
How to repair Boat Rub Rails
Rub rails are essential for protecting your boat from collisions and abrasions. However, over time, they can get damaged and may need repairs . Here’s a step-by-step guide on how to repair rub rails, ensuring your boat stays protected and looks great.
Materials You’ll Need
- Replacement rub rail insert (if needed)
- Drill with screwdriver bit
- Rubber mallet
- (optional) Heat gun
- Screws and washers (marine-grade)
- Marine adhesive or sealant
- Utility knife
- Measuring tape
Step-by-Step Repair Process
Assess the damage.
Examine the rub rail to identify the extent of the damage . If the insert is damaged, you might need a replacement . If the base is damaged, it will require more extensive repair.
Remove the Damaged Section
Use a utility knife to carefully cut out the damaged section of the rub rail. If it’s the insert, this will be relatively straightforward. For the base, unscrew the affected area using a drill.
In this article you can follow the detailed instructions to perform this task.
Prepare the Replacement
Measure the length of the damaged section and cut the replacement insert or base to size . If you’re using a new insert, you might need to soften it with a heat gun to make it more pliable.
Install the New Insert
Position the new insert in place . Use a rubber mallet to gently tap it into the base , ensuring it fits snugly. If replacing the base, align it properly and screw it into place using marine-grade screws and washers.
Seal the Joints
Apply marine adhesive or sealant to the joints and screw heads. This step is crucial to prevent water ingress, which can cause further damage.
Test the Repair
Once the adhesive has cured, test the repaired section to ensure it’s secure. Press and flex the rub rail slightly to check for any movement or gaps.

Tips for effective repairs
Use Quality Materials : Always opt for marine-grade materials to ensure durability and resistance to harsh marine environments. Rub rails provide a wide range of top quality rub rails replacements for your boat.
Work in Small Sections : If the damage is extensive, repair small sections at a time to maintain control and precision.
Regular Inspections : Periodically inspect your rub rails for signs of wear and tear. Early detection allows for minor repairs before they escalate into major issues.
You can contact us anytime if you need support in replacing your Rub rails with our products; in our catalogs section you can also find product-mounting instructions for various types of installations.

Repair the rub rails
USEFUL LINKS
- BOAT RUB RAILS
- STAINLESS STEEL BOAT RUB RAILS
- VINYL PVC BOAT RUB RAILS
- RUB RAIL INSTALLATION
- PRODUCT RANGE
- WHERE TO BUY
- CERTIFICATION
- TRADE ASSOCIATIONS & PARTNERSHIP
TESSILMARE HEAD QUARTER Via Vittorio Veneto, 15 23896 Sirtori LC Tel. +39 039 921571 Fax +39 039 9210483
TESSILMARE – MATE USA 3251A SW 13th Drive Deerfield Beach, FL, 33442 Tel. +1 (954) 463-5757 Fax +1 (954) 463-5635


- Forum Listing
- Marketplace
- Advanced Search
- About The Boat
- Gear & Maintenance
- SailNet is a forum community dedicated to Sailing enthusiasts. Come join the discussion about sailing, modifications, classifieds, troubleshooting, repairs, reviews, maintenance, and more!
Rub rail repair?

- Add to quote
There are a few places on my boat where the rub rail appears to be separating from the hull in a few places. The previous owner used to grind the front corner of the boat against a post to force the boat to turn into the slip, and that's the area that seems to be separating a bit. It's a big, thick piece of black rubber that goes all the way around the boat. Does anyone have links to repair/replacement tutorials? I'm not even sure how the rail might be attached, much less how to replace/seal it, and I'd like to see some other boats so I can get an idea of what I'm up against without pulling back on the rail and damaging it further. [Edit] Thanks arf... I need to update my sig. It's a 1978 Morgan OI 30.

Best you let folks know what kind of boat you've got (and the year) to help them help you.
It's a Morgan OI 30. Thanks for catching that arf.
Taco Marine has just about every conceivable size and shape of rub rail and insert.
I'm hoping CaptForce might have a source. I think maybe the 41 and the 30 have a similar rub rail config.

A picture would help as rubrails can be attached in more than one manner. That said, many have a rubber insert that is held in a plastic or aluminum chanel. Ours was rubber in plastic and had some out of the groove in several places. I was able to work it back into place on a hot day with a screwdriver.

Catalina uses a rubber insert in a metal channel. On my previous boat, a Catalina 30, I would sometimes brush up against a piling that the wind pushed me against. This would cause the rubber to come out of the channel and stretch. I would then have to hang over the edge and work it back into the channel, sometimes using a screwdriver to help coax the groove back in place. I would often have an extra loop to put in since the rubber was stretched. I would work it from side to side to get it back in the channel. If that didn't work, I would removeit to the stern end where it was secured with a screw, reinstalling it as I went and cutting off the excess. I don't know of other options and it was a pita! I'm glad to have sold the boat and now sail a Bayfield 36 with 2 teak rubrails with brass cove moldings. Much better! Tod
most have a two piece[channel-insert system thats pop riveted to the hull/deck,the harder plastic channels can be heated with a heat gun to make the corner turns,the insert is much softer and slips into the channel very easily,i fill the old river holes with a dab of 5200 and drill the new holes,dabing 5200 on the replacement screws beneath the channel just before i tighten them,its a easy one day job
- Model # 10725315 | Manuf. # V21-9647WHA20D )
I'll have to take that leap and peel it back a bit and check. I was nervous about making it worse.

I believe that this type of rub rail is glued on over two flange edges. I don't see an insert or fasteners. It appears that there is an end cap. If you remove the end cap you will be able to see the cross section of the rub rail.
My Etap 26 has a similar rub rail, which I need to refasten at the stern. It is held by aluminum clips pop riveted to the hull. The problem is that the clips were originally formed with a pair of tabs extending outwards at about 45 degrees. The molding was placed over it, and you hit it with a mallet, bending the tabs back and expanding them into grooves in the molding. Unfortunately some of the tabs broke completely off, and I haven't found a source for them yet. Gary H. Lucas
We are currently repairing a damaged rub rail on our Pearson 34. We removed the cracked vinyl and rplaced it (it was pop riveted on but we cut notched to slide over the riets and used silicon cement to firnmly attach it to the hull). But we can't get the rubber insert (which was not really damaged but may have stretched from hanging loose) back into the grooves in the vinyl. We can get the top or the bottom but not both. We were working on a hot day and applying a heat gun and using a screwdriver and or putty knife with no luck. Of course its possible the new piece is slightly different from the old one but it looks exactly the same. Any advice? We are about ready to trim the groove at the top side of the rubber, slide the bottom in and use silicon cement to affix the top part. Thanks!
- ?
- 176.4K members
Top Contributors this Month

ACTIVE STORM TRACKER Hurricane and Tropical Storm Information Learn more
Service Locator
- Angler Endorsement
- Boat Towing Coverage
- Mechanical Breakdown
- Insurance Requirements in Mexico
- Agreed Hull Value
- Actual Cash Value
- Liability Only
- Insurance Payment Options
- Claims Information
- Towing Service Agreement
- Membership Plans
- Boat Show Tickets
- BoatUS Boats For Sale
- Membership Payment Options
- Consumer Affairs
- Boat Documentation Requirements
- Installation Instructions
- Shipping & Handling Information
- Contact Boat Lettering
- End User Agreement
- Frequently Asked Questions
- Vessel Documentation
- BoatUS Foundation
- Government Affairs
- Powercruisers
- Buying & Selling Advice
- Maintenance
- Tow Vehicles
- Make & Create
- Makeovers & Refitting
- Accessories
- Electronics
- Skills, Tips, Tools
- Spring Preparation
- Winterization
- Boaters’ Rights
- Environment & Clean Water
- Boat Safety
- Navigational Hazards
- Personal Safety
- Batteries & Onboard Power
- Motors, Engines, Propulsion
- Books & Movies
- Cockpit Confessions
- Communication & Etiquette
- Contests & Sweepstakes
- Colleges & Tech Schools
- Food, Drink, Entertainment
- New To Boating
- Travel & Destinations
- Watersports
- Anchors & Anchoring
- Boat Handling
The Rub On Rails
Advertisement
There's a reason your boat has rub rails and it's because the world isn't perfect.

If you've taken that all too common walk around your boat and trailer, noticing what another year has done to the prop or the bottom paint or the hull, then you've no doubt noticed the beating taken by your boat's rub rail. This quiet unassuming fixture takes the first hit when the boat touches a piling or, if no fenders are used, another boat. After a while, the rub rail's appearance suggests the time has come for a change.
Plan on an afternoon to bring about that change.
"Installing a rub rail is relatively easy to do," says technical advisor Hank Ingenito of D.I.Y. Marine, "but preparation is key to doing it well. This isn't a project you can keep walking away from to get another tool and complete in a few hours." Everyone who has done this job by themselves says the next time they'll have a friend lend a hand...or both. It makes the job go easier (and faster).
First, though, a little about removing a rub rail. Boat manufacturers work long hours to make their designs different from competing models. This means, unless you can order the same rub rail from the factory that built your boat (and in many cases, this is possible to do), you should accept the fact the new one may not look like the old one. That's not a worry. Experts stress, however, that the replacement has to have at least the same height as the old rail. If it doesn't, parts of the hull will be exposed that weren't before the job began. And considering the banging taken by a boat as well as the amount of water the exposed surface comes in contact with, this is a situation best avoided.
"Depending on the look you want," says Ingenito, "rub rails are interchangeable." They are typically available in four different materials: aluminum, rigid vinyl, semi rigid vinyl and stainless steel. Remember you are going to need to buy rub rail using this formula: twice the length of your boat plus the beam plus at least two feet.
Removal of the old rub rail should begin at either the bow or the stern where the beginning and end pieces are found. With a slotted screwdriver, pry off the insert and pull it out of the track. Next, remove all the fasteners (screws or rivets). If rivets have been used, it will be necessary to drill them out with a bit of equal or slightly smaller size. (Some rails won't have an insert.) Once the rail has been removed, scrape the surface to remove excess sealant.
It is important to fill the holes that held the screws/fasteners/rivets with sealant such as 3M5200. Do not use the same holes to attach the new rub rail because the integrity can't be trusted. Before drilling new holes, let the sealant cure. Drying time will be dependent on the temperature and the product. New holes will need to be drilled every 6"-8". Some of the rub rail replacements will have holes pre-drilled so it will be necessary to line up the new rail on the hull so as not to drill into an earlier hole. This is also the point where you need to look at how the old rub rail was attached.
If the rub rail ends were clipped together on the bow, avoid making the same mistake. Instead, line up the rub rail so that the center of the bow is completely covered, securing it with screws through the holes on either side. "I've seen some rub rails put on with the ends right on the bow and that is something you want to stay away from." says Ingenito. "It's just not a good idea because the bow is a point of stress on any boat and it's going to be weakened by screws."
Those installing rub rails for a living suggest placing the middle of a section so that it wraps around the bow. Predrilled screw holes in the new rub rail should be located three inches on either side of the bow (if using holes every six inches).
The Rub: On Screws and Lubes and Metals
To ensure a snug fit around the boat, use a drill bit that is slightly smaller than the screws you intend to use. Ingenito recommends using Phillips head screws when installing a new rub rail. "They are by far, easier to put in than the blade type screw," he says, "and with a Phillips you have three or four places to ensure a secure fit with the screwdriver. This isn't an area where you want any stripped screws that can't be removed or, for that matter, tightened." In addition, apply some of the sealant to the screw threads before inserting into the hole. One more piece of advice for the rub rail installer: a cordless screwdriver is worth the investment on a job like this. Need a reason? Let's say your boat is 22 feet long. That's 44 feet of rub rail with an eight foot beam (approximate). This means you have 52-feet of rub rail using six-inch centers which results in using 104 screws. One other suggestion: use two screw guns because one person can be drilling the new holes while the other is inserting the new screws. With only one tool, you are going to be changing from screw driver to drill bit and back all afternoon.
Bending a rigid vinyl rail around the corners on the transom is going to require the careful use of a heat gun. If this isn't available, a portable hair dryer can be used but it will take longer to heat the material. If you are installing a stainless steel or aluminum rail, use a rubber mallet together with hand pressure until the rail conforms to the desired shape.
Many rub rail designs require the use of a rubber, vinyl or even metal insert into the frame that has already been secured to the boat. The insert will bear the impact of the boat coming in contact with a piling or pier or dock because it sits highest on the rub rail track. The trick here is going to be getting the insert into the track. This is done by squeezing (a heat gun is helpful here), it into position. It is also helpful to use liquid soap on both the insert and the track to move it into place. Having the soap in a spray bottle works best. Some people simply use a soapy rag and wipe the track and insert. You will have to pick the method that works best. Whatever method is chosen, be aware you may have to use a heat gun on the track surface to increase the temperature if working outside in cold weather.
Related Articles
The truth about ceramic coatings for boats.
Our editor investigates the marketing claims of consumer-grade ceramic coatings.
Fine-Tune Your Side Scan Fishfinder
Take your side-scanning fishfinder off auto mode, and you’ll be spotting your prey from afar in no time
DIY Boat Foam Decking
Closed-cell foam flooring helps make boating more comfortable. Here’s how to install it on your vessel
Click to explore related articles
BoatUS Editors
Contributor, BoatUS Magazine
Award-winning BoatUS Magazine is the official publication of Boat Owners Association of The United States. The magazine provides boating skills, DIY maintenance, safety, news and more from top experts.
BoatUS Magazine Is A Benefit Of BoatUS Membership
Membership Benefits Include:
Subscription to the print version of BoatUS Magazine
4% back on purchases from West Marine stores or online at WestMarine.com
Discounts on fuel, transient slips, repairs and more at over 1,200 businesses
Deals on cruises, charters, car rentals, hotel stays and more…
All for only $25/year!
We use cookies to enhance your visit to our website and to improve your experience. By continuing to use our website, you’re agreeing to our cookie policy.
Pro Tips for Weatherstrips
Guide to replacing your boat’s rub rail insert.

When it comes to replacing your boat’s rub rail insert, it’s natural to have questions about where to start, what you need, and the steps involved. In this post, we’ll provide you with all the information you need to ensure you choose the right replacement and install it successfully.

Rub rails are subjected to extensive wear and tear in order to protect the hull from damage. Among the various components of a rub rail, the rub rail insert plays a crucial role in providing an extra layer of safeguard and enhances the aesthetics of your boat. These inserts often bear the brunt of collisions with pilings and docks, making them susceptible to damage. As a result, it’s essential to replace rub rail inserts as part of your routine boat maintenance.
While most inserts available on the market are made of vinyl or metal, at Steele, we manufacture inserts from a durable, dense EPDM rubber. This material offers robust cushion to absorb minor impact as well as exceptional resistance to ozone, UV, and extreme weather conditions. Unlike vinyl, EPDM rubber does not fade, shrink, or crack, and does not require any pre-heating to install!
Where to Start
Unlike a classic car or truck, the make and model of your boat isn’t the determining factor for what part will fit your rub rail. This is because most marine seals are universal, meaning they can be used for wide range of applications. However, this is actually a good thing! It means you have options to choose from.
Start with what is currently on your boat. What you’ll need is a cross section view of the shape of the seal, which acts as a unique identifier, as well as the dimensions to determine the right size. To do this with your current insert, cut a small 1-2in piece or pull out the end of the insert and take a cross-sectional photo (see example below). Having a cross-sectional piece or photo allows you to see the layer structure of your insert. In the even that you no longer have an insert on your boat to refer to, don’t worry! You can take measurements of the opening on your rub rail where the insert would install.

Selecting the Right Part
Now that you know the shape and measurements of your seal, it’s time to select a replacement. Our Marine catalog includes part photos as well as part drawings with the measurements so you can easily compare.

To ensure you order the correct footage for your rub rail, take a measurement of the length and width (beam) of your boat. Multiply the length of your boat by 2 and add the beam width for the total.

Request your free Marine catalog here ! Or, if you prefer paperless, you can view the digital PDF copy right here . Additionally, our complete Marine line is always available online, which is where you will find pricing.
We conveniently offer both replacement and repair kits. Replacement kits, designed for a full rub rail insert replacement, will include at least 50ft of the insert, a scraper/tuck tool, and an instruction sheet. The difference in our repair kits, designed for repairing a section of Steele Rubber Products’ rub rail insert, is that it includes only 20ft of the insert and includes the additional product Loctite 495 Super Bonder to bond the repaired section to the current insert.
So, it’s important to double check not only that you have the correct profile, but also that you are looking at the correct kit for your needs.

We also offer FREE sample packs! This allows you to test fit different profiles and sizes to figure out which one works best for your boat. Contact our customer service team today to get your rub rail insert sample pack!
Installing Your Rub Rail Insert
Once you’ve selected and ordered the correct replacement insert, it’s time to install. As we mentioned before, our rub rail inserts do not require any pre-heating for installation! This makes the job go a lot quicker and smoother.
Steps for full rub rail replacement
Tools needed:
- Rub Rail Insert
- Screwdriver
- Heavy duty scissors (mitering scissors work great)
- Rubber mallet (optional)
- Start by removing the old rub rail insert entirely. Be sure to keep any necessary hardware associated with holding the insert in place such as end caps or screws.
- Next, do a thorough clean of the rub rail track. You want to remove any dirt, debris, or mold that may have been trapped. If caulk was used to keep the old insert in place, you’ll also want to remove that as caulk will not be needed for your new insert.
- If your rub rail wraps the entire boat, begin installing the new insert where there was an end cap. If your track does not wrap the entire boat, start installing the insert at one end of the rub rail track.
- This step is when your tuck tool comes in handy! Place the lower groove of the insert onto the bottom lip of the track, then use the tuck tool to press the top of the insert into place. This should ensure a snug fit, which is exactly what you want! Using this method, install the rest of your rub rail in sections until completed.
- Once you get all of your insert installed, trim the excess rubber flush with the end of the track, or, to the screw hole where the end cap was. Be sure not to cover your screw hole!
- Finally, you’ll install any necessary or remaining hardware, and you’re done!
- Install tip: Do not use any tools with sharp objects to push in the insert! Things like a screw driver or knife can damage the seal.
- Maintenance tip: If you have a Steele Rubber Products rub rail insert, the only products we recommend using for maintenance cleaning is just soap and water! No additional cleaners, treatments, or coatings are needed because they can actually break down the compounds in the rubber and cause deterioration.
Steps for rub rail insert repair
- Identify the damaged section of the insert. Remove and set aside any necessary hardware like end caps and screws. This is a good time to replace these components if needed.
- Carefully remove the section that you’ll be replacing from the track. Use a tuck tool or something similar for this to prevent damaging the track or the insert still in good condition.
- With the rub rail insert partially removed, carefully cut the section to be replaced from the rest of the insert. We recommend cutting out no less than 12″ in length to make the install of the repair splice easier. Once you have the damaged section cut out, press the remaining good condition insert back into the track with the tuck tool.
- Take this time to clean out any debris or mold that may be in the track.
- Measure the gap in the track between the cut ends and cut a length from the repair kit that is 1/16″ longer. While our rub rail inserts will not shrink, adding the 1/16″ is recommended to provide a tight, secure bond at the splice.
- Do a test fit first! The Loctite 495 Super Bonder is an instant adhesive that creates a permanent bond. It will bond rubber together in <5 seconds, so make sure the section fits before moving on to the next step!
- Apply a small amount of the Loctite 495 to one end of the replacement insert and carefully press that end into place against one end of the existing insert. Then, press the rest of the section into place before leaving 1-2″ of the opposite end out.
- Lastly, apply the Loctite 495 to the exposed end and press into place against the remaining end of the existing insert. Install any necessary hardware back in place and you’re done!
- Install tip #1: Do not use any tools with sharp objects to push in the insert! Things like a screw driver or knife can damage the seal.
- Install tip #2: When using Loctite 495, a little goes a long way. We like to apply this with the end of a paperclip to keep the coat thin. Like we said on step 6, this is an instant adhesive, so always do a test fit before gluing.
Steele not only offers top-quality products, but top-quality knowledge to help you complete your projects, too. If you have questions regarding weatherstripping for your classic vehicle, street rod, RV, or boat, don’t hesitate to contact us! Call us at 800-447-0849, send us an email , or chat with us on our website .
*For additional help check out our How To series on YouTube !
Look for us on all your favorite social media platforms:
Facebook , Instagram and Pinterest
One response to “Guide to Replacing Your Boat’s Rub Rail Insert”
[…] For more information on how to replace and maintain your rub rail insert, click here! […]
Leave a comment Cancel reply
- Already have a WordPress.com account? Log in now.
- Subscribe Subscribed
- Copy shortlink
- Report this content
- View post in Reader
- Manage subscriptions
- Collapse this bar
- Forums New posts Unanswered threads Register Top Posts Email
- What's new New posts New Posts (legacy) Latest activity New media
- Media New media New comments
- Boat Info Downloads Weekly Quiz Topic FAQ 10000boatnames.com
- Classifieds Sell Your Boat Used Gear for Sale
- Parts General Marine Parts Hunter Beneteau Catalina MacGregor Oday
- Help Terms of Use Monday Mail Subscribe Monday Mail Unsubscribe
Repair rub rail on 1968 Columbia 36
- Thread starter kfrancisco
- Start date Jul 6, 2018
- Forums for All Owners
- Ask All Sailors

We hit a large wake from a freighter and it loosened the rub rail on our boat, starboard side. Now noticing some bubbles on the port side. Want to make repair but concerned that the way the old Columbia's were designed, we might run into trouble pulling it off due to the double channel aluminum that joins the hull to deck. Does anyone have any thoughts or experience with this?
Attachments

sailnoproblem
Not sure about the Columbia, but from my experience the rub rail has nothing to do with the deck to hull joint. Most of the time it will cover the joint. A picture would be a great help.
Thanks! I will add a couple photos later today.

LeslieTroyer
Thank you. I'm going down to the boat later today to take photos.

kfrancisco said: We hit a large wake from a freighter and it loosened the rub rail on our boat, starboard side. Now noticing some bubbles on the port side. Want to make repair but concerned that the way the old Columbia's were designed, we might run into trouble pulling it off due to the double channel aluminum that joins the hull to deck. Does anyone have any thoughts or experience with this? Click to expand
It was...actually a series of them...

SBO Weather and Forecasting Forum Jim & John
Looking at your rub rail images, it appears there is some sort of caulking applied to the top side of the aluminum fitting. Perhaps to try to stop a leak or perceived leak. Taco Marine, Florida is the primary maker of boat rub rail with a variety of configurations. You’ll need to remove a bit of the rail starting at the end and see what is there. Then look at the Taco Marine’s list to find something that matches. The aluminum strip is attached to the deck/hull with screws. Some screws may be stripped. That could be a source of leaks. While doing the work. A great time to inspect the deck to hull joint.
I agree with jssailem, only problem I see is the age of your boat. I used to do a lot of business with Taco, and they have a large selection of rub rails. Not sure they were around when you're boat was built. Give them a call and ask for Mercedes.
Thank you all for some great suggestions!
- This site uses cookies to help personalise content, tailor your experience and to keep you logged in if you register. By continuing to use this site, you are consenting to our use of cookies. Accept Learn more…
- CREATE AN ACCOUNT
- Boat Cover Finder
- Bimini Top Finder
- Boat Propeller Finder
- Engine Parts Finder
- Anchor & Dock
- Watersports
- Clothing and Footwear
- Engine Parts
- Cabin and Galley
- Covers and Biminis
- Electronics
- Paint and Maintenance
- Pumps and Plumbing
- Anchor Chains & Ropes
- Boat Fenders
- Boat Mooring
- Boat Protection
- Dock Storage & Protection
- Ladders, Steps, & Platforms
- Top Sellers

- Fishing Rods
- Fishing Reels
- Fishing Rod & Reel Combos
- Fishing Tools & Tackle Boxes
- Fishing Line
- Fly Fishing
- Fishing Bait & Fishing Lures
- Fishing Rod Holders & Storage Racks
- Fish Finders, Sounders & Sonar
- Trolling Motors
- Fishing Nets
- Fishing Downriggers & Acessories
- Fishing Outriggers & Acessories
- Fishing Kayaks
- Fish Cleaning Tables

- Inflatable Rafts
- Paddle Boarding
- Paddles & Oars
- Wakeboard, Wakesurf & Ski
- Wakeboard Towers
- Tow Ropes & Handles
- Life Jackets & PFDs
- Snow Sports
- Roof Racks, Carriers, Dollies

Men's Clothing
- Accessories
Men's Footwear
- Atheltic Shoes
- Water Shoes
Women's Clothing
- Dresses & Skirts
Women's Footwear
- Fuel Systems
- Sacrificial Anodes & Zincs
- Generator Parts
- Inflatable Boats
- Propeller Parts & Accessories
- Boat Manuals
- PWC Parts & Accessories

- Fishing Boat Seats
- Offshore Boat Seats
- Ski Boat Seats
- Pontoon Boat Seats & Furniture
- Boat Seat Pedestals & Hardware
- Boat Seats by Manufacturer
- Boat Tables & Hardware
- Boat Seat Covers
- Boat Seat Vinyl
- Floating Boat Cushions

- Barbeque Grills
- Boat Drink Holders
- Cabin Accessories & Hardware
- Boat Ventilation
- Interior & Cabin Lighting
- Marine Teak Products
- Carbon Monoxide & Smoke Detectors
- Binoculars & Telescopes

Boat Bimini Tops
- Bimini Top Accessories
- Pontoon Bimini Tops
- Other Biminis
- RV & Trailer Covers
- Boat Shrink Wrap & Accessories
- Boat Shelters
Boat Covers
- Boat Cover Accessories
- Boat Lift Canopy Covers
- Other Covers
- Boat Wiring & Cable
- Marine Batteries & Accessories
- Marine DC Power Plugs & Sockets
- Marine Electrical Meters
- Boat Lights
- Marine Electrical Panels & Circuit Breakers
- Power Packs & Jump Starters
- Marine Solar Power Accessories
- Marine Electrical Terminals
- Marine Fuse Blocks & Terminal Blocks
- Marine Switches
- Shore Power & AC Distribution

- Marine Audio & Video
- GPS Chartplotters & Accessories
- Electronic Navigation Charts & Software
- Digital Instruments
- Display Mounts
- VHF Radios & Communication
- Marine Radar
- Auto Pilot Systems
- Action Cameras

- Fiberglass & Epoxy Boat Repair
- Boat Paint & Varnish
- Marine Adhesives, Sealant, & Caulking
- Marine Engine Maintenance
- Boat Cleaners & Waxes
- Boat Cleaning Supplies

- Fresh Water Boat Systems
- Bilge Pumps
- Marine Plumbing Parts
- Wash Down Pumps
- Livewell Aerator Pumps & Live Bait Wells
- Toilet & Waste Pumps
- Marine Pump Replacement Parts

- Tires, Rims, & Hub Kits
- Boat Trailer Winches
- Boat Motor Supports & Transom Savers
- Boat Trailer Guides & Rollers
- Boat Trailer Fenders
- Boat Trailer Lights
- Boat Trailer Hardware
- Boat Trailer Jacks
- Boat Trailer Brakes & Axles
- Boat Trailer Tie Downs
- Couplers, Mounts, Hitches, & Locks

- Boat Deck Harware
- Marine Nuts, Bolts, & Screws
- Boat Handles, Pulls, & Rings
- Prop Nut Kits & Hardware
- Boat Cabin Hardware
- Marine Fasteners
- Boat Windshield Parts
- Boat Tubing & Rails
- Boat Mirrors
- Marine Tools & Tool Kits
- Boat Lettering

- Women's Clothing Deals
- Men's Clothing Deals
- Fishing Deals
- Anchor & Dock Deals
- Electrical Deals
- Electronics Deals
- Paint & Maintenance Deals
- Pumps & Plumbing Deals
- Boat Seats Deals
- Trailering Deals
- Camping & RV Deals
- Dealer Login

- Forums Login

- Search forums
- The iboats forum moderators are excited to announce that at this time it appears the iboats forums posting pictures function is working once again. Though we cannot promise for how long, we're hoping for indefinitely.
- Boat Repair and Restoration
- Boat Restoration, Building, and Hull Repair
Rub Rail?Replace or Repair?
- Thread starter enginesilo
- Start date Apr 18, 2013
Petty Officer 1st Class
- Apr 18, 2013
I'm considering buying a 2001 Rinker and there is one section of the rub rail that looks flattened out and loose. Guessing a past owner hit a dock or another boat enough to break it loose. I can also see that there is a little bit of silicone in that section where they tried to repair it. Is this a big deal if it looks like there is no damage to the boat, but the rub rail is loose? Is this something that can be siliconed and make sure its not leaking, or something that I crucially should be replacing? Its about half way up on the front side of the boat so it doesn't get direct water splashing, but definitely could if it was rough. I think the rub rail is what holds the top shell onto the boat hull itself, is that right? So I want to be sure this isn't a major issue. Boat doesn't seem like it took on any odd water or anything, but I'll have to grab the hose and check I guess. Any insight appreciated.

Rear Admiral
Re: Rub Rail?Replace or Repair? Usually rub rails are just like the bumpers on your car...they are made for a certain amount of bumping and rubbing...in most cases it is not a big deal and is usually just a cosmetic offense... You might be able to find a section of similar rub rail and splice in a repair piece, however, most rub rail inserts are sold in rolls of 50 feet or so... Something to consider is if the aluminum part of the rub rail is in good shape, you can replace just the rubber insert with a new one...If the aluminum part is damaged, you may have to check around for a local boat scrap yard and see if you can find a replacement section, or if it is really bad, you may have to spend some serious bucks and replace the entire thing, which can get pricey...here is one link to get an idea of some pricing... Boat Rub Rails - iboats Also, be sure to do a really close inspection of the area around the damage to be sure the underlying fiberglass hasn't been too badly damaged... If you post up a couple of good pictures of the damage, some of the other members on the forum may be able to give you some other ideas... Good Luck! GT1M
GT1000000 said: Usually rub rails are just like the bumpers on your car...they are made for a certain amount of bumping and rubbing...in most cases it is not a big deal and is usually just a cosmetic offense... You might be able to find a section of similar rub rail and splice in a repair piece, however, most rub rail inserts are sold in rolls of 50 feet or so... Something to consider is if the aluminum part of the rub rail is in good shape, you can replace just the rubber insert with a new one...If the aluminum part is damaged, you may have to check around for a local boat scrap yard and see if you can find a replacement section, or if it is really bad, you may have to spend some serious bucks and replace the entire thing, which can get pricey...here is one link to get an idea of some pricing... Boat Rub Rails - iboats Also, be sure to do a really close inspection of the area around the damage to be sure the underlying fiberglass hasn't been too badly damaged... If you post up a couple of good pictures of the damage, some of the other members on the forum may be able to give you some other ideas... Good Luck! GT1M Click to expand...

Re: Rub Rail?Replace or Repair? From the pics you posted, it looks like the rub rail did exactly what it is supposed to do...prevent further damage to the boat from impact... BTW, you are 100% correct about the rub rail being the point of joining/attachment between the top {aka, Cap} and bottom {aka, Hull}... My next concern would be the water you mentioned and the fact the boat has been stored... Any standing water in a boat can lead to problems... If the water did in fact come from a recent wash down, and has a place to drain out...that is not too bad... If the boat has been stored without a cover and the bilge plug left in, that could be a sign of possible trouble... If the boat was stored without a cover, had the bow raised as high as possible, had the bilge drain plug removed and no water was allowed to stand in it, everything might be OK... You should try and do a very thorough inspection, not necessarily a core sampling { as the current owner probably wouldn't allow such a thing}, but get down in the back as low as possible in the bilge area and look for evidence of water that has been sitting... That could be an indication that some problems exist... Unfortunately, there is no easy way, short of actually doing core samples from the wood structure of the boat, or actually seeing visible signs of rot, to know if it rot...which is something that can significantly impact the value and life expectancy of the boat... If the value of the boat warrants, you may want to have a professional Marine survey done, although that too, is no guarantee that problems don't exist... I hope not to have rained on your parade, but these are things you should concern yourself with, especially if you are putting down a sizeable investment... Another thing I would ask for before commitment to buy is a sea trial...
GT1000000 said: From the pics you posted, it looks like the rub rail did exactly what it is supposed to do...prevent further damage to the boat from impact... BTW, you are 100% correct about the rub rail being the point of joining/attachment between the top {aka, Cap} and bottom {aka, Hull}... My next concern would be the water you mentioned and the fact the boat has been stored... Any standing water in a boat can lead to problems... If the water did in fact come from a recent wash down, and has a place to drain out...that is not too bad... If the boat has been stored without a cover and the bilge plug left in, that could be a sign of possible trouble... If the boat was stored without a cover, had the bow raised as high as possible, had the bilge drain plug removed and no water was allowed to stand in it, everything might be OK... You should try and do a very thorough inspection, not necessarily a core sampling { as the current owner probably wouldn't allow such a thing}, but get down in the back as low as possible in the bilge area and look for evidence of water that has been sitting... That could be an indication that some problems exist... Unfortunately, there is no easy way, short of actually doing core samples from the wood structure of the boat, or actually seeing visible signs of rot, to know if it rot...which is something that can significantly impact the value and life expectancy of the boat... If the value of the boat warrants, you may want to have a professional Marine survey done, although that too, is no guarantee that problems don't exist... I hope not to have rained on your parade, but these are things you should concern yourself with, especially if you are putting down a sizeable investment... Another thing I would ask for before commitment to buy is a sea trial... Click to expand...
- Apr 19, 2013
- Jun 4, 2014
I'm restoring a 1967 Holiday, the rub rail is shot, need to replace it..After many hours on the internet I've come to the conclusion that profile is no longer available. Now I have to improvise. Any ideas? Where the deck and hull join there is a 3/4 inch flange that's pop-riveted together. the old rail is vinyl I think, probably flexible, it was screwed in from the bottom of the rail, broke off in one foot chunks! Any one know where I can get it or have any advice on hoe to Magyver a replacement?

HFR said: I'm restoring a 1967 Holiday, the rub rail is shot , need to replace it..After many hours on the internet I've come to the conclusion that profile is no longer available. Now I have to improvise. Any ideas? Where the deck and hull join there is a 3/4 inch flange that's pop-riveted together. the old rail is vinyl I think, probably flexible, it was screwed in from the bottom of the rail, broke off in one foot chunks! Any one know where I can get it or have any advice on hoe to Magyver a replacement? Click to expand...
DIY: Rub Rail Replacement

Source: Florida Sport Fishing
Vinyl Rub Rail Repair Benefits More Than Aesthetics
Your boat comprises many different elements and needs. And with the condition of your vessel comes reputation when observed by passing boaters in the channel, especially those of a Coast Guard Auxiliary unit. In this effort, rub rails are essential for ensuring the integrity of your hull and sound gunnels. For do-it-yourselfers, Taco Marine of Miami has created the Rub Rail Replacement Guide for all of your rub rail replacement needs.
Photo: Doughertyphotos.com
Harsh marine conditions and the usual wear and tear associated with being on the water can damage and undermine all sorts of gear and equipment required for safe boating. Rub rails are no exception, especially when trusting that your hull and gunnels will stand strong to support your marine activities.
With this all-encompassing guide, your rub rail concerns are easily addressed in an extensive, handy format and really leaves nothing to chance.
With over 50 years experience in the marine industry as well as in-house engineering and technological expertise, Taco Marine sits at the top of rub rail manufacturing. So much so that the firm developed its own downloadable guide to help boaters of all types replace an integral element for boat preservation.
Using the highest grade of vinyl com-pounds, which also incorporate U.V. inhibitors, fungicides and impact modifiers, surviving the weather and elements is paramount toward Taco Marine’s manufacture of rub rails. Parts that are exposed to accelerated weather undergo extensive testing in terms of a Xenon arc weatherometer and other testing protocols.
Taco Marine’s replacement guide is comprehensive, comprising more than 40 pages. Included in the downloadable PDF file is a five-step instructional process for ordering, a list outlining the tools and supplies needed, reference index and profile insert samples of rub rails for your particular vessel. Each page is easy to read through.
Cross-referencing the original factory rub rail for over 80 of the leading boat builders since 1993—from Action Craft to Yellowfin—this five step ordering process asks you to look up the make of boat in the index; match the rub rail profile insert to your existing rail; choose the desired color, then call a Taco Marine distributor to determine availability prior to placing an order.
Adding the length and beam of your boat, and multiplying by two gives you the minimal length of rub rail to be ordered. Recommended is adding an additional ten feet to this overall amount for trial and error purposes. It’s that easy.
Getting ready for the actual replacement process will take more than a few tools and material to get the job done. Taco Marine urges attention-to-detail regarding installation as well as the overall material required for a perfect install. Some of the suggested items for the installation process: Rub rail, measuring tape, safety glasses, two cordless drills outfitted with a drill and screw bit respectively, putty knife, caulking gun with silicon sealant, metal file or sandpaper to remove burs, heat gun, garden shears or hacksaw depending on the rub rail chosen, miter box, rubber mallet, fasteners of prop-er size and type, and work gloves.
There are different types of rub rails for certain prevailing conditions and durability concerns. Flexible vinyl rails are the easiest to bend and provide cushioning for normal contact with pilings and docks. Rigid vinyl and aluminum rub rails with flexible vinyl inserts last long and are easy to install. Rigid rub rail with aluminum overlap gives the most protection while ensuring many years of durability.
Those looking for a simple method of ordering or installation have several vinyl rub rail kits to choose from. Each kit comes with a coiled rail for one piece installation without a seam, insert, applicable end caps, screws and an installation guide. Each kit comes in a variety of lengths, width, colors and style in an easy to carry retail box, which happens to comply with UPS packaging requirements.
With each design, a five-year limited warranty applies to Taco Marine’s rub rails. Within this timeframe, Taco Marine will allow repair or replacement without charge should any product be proven to be defective in material or workmanship.
Making sure nothing is overlooked, the Taco Marine website (tacomarine.com) has step-by-step instructions and how-to videos documenting the installation of the various types of rub rails you choose for your vessel. Whatever the rail chosen, the site contains an Application Support page dedicated to that particular rail, the installation method with imagery devoted to each step in the process, what materials and tools are needed to complete the project and a pro’s tips section detailing certain knowledgeable secrets for making the project as simple as the website is to navigate.
Considering Taco Marine’s aim is to make sure of purchase satisfaction, various methods with which to contact them are available should the need arise as you engage in your replacement project. A phone number, email address and contact technical support form are all there to provide avenues of communication in the event of anything going awry.
There’s even a FAQ section pertaining specifically to rub rail replacement projects. On this page are common questions regarding everything from what rub rail goes on a certain boat to reading rub rail part numbers. Also answered are questions concerning boat manufacturers who may not be listed in the PDF guide, what to do if your boat was built prior to 1993 or if your boat doesn’t have a rub rail at present but you would like to install one. Each answer provides enumerated steps and links to give you as much instruction and information as needed.
With this all-encompassing guide, your rub rail concerns are easily addressed in an extensive, handy format and really leaves nothing to chance. Thankfully, the process of replacing a rub rail has become stream-lined by the manufacturer itself, minimizing the pitfalls of such an undertaking. But with project completion, a sense of pride comes with knowing your own hands helped maintain the safety and integrity of your vessel. So, when crossing large expanses of open water you’ll have the confidence that comes with a rub rail that is designed not only with uncompromising elements and testing but with the knowledge that the manufacturer stands behind its product.
With this all-encompassing guide, your rub rail concerns are easily addressed in an extensive, handy format and really leaves nothing to chance. Thankfully, the process of replacing a rub rail has become stream-lined by the manufacturer itself, minimizing the pitfalls of such an undertaking. But with project completion, a sense of pride comes with knowing your own hands helped maintain the safety and integrity of your vessel. So, when crossing large expanses of open water you’ll have the confidence that comes with a rub rail that is designed not only with uncompromising elements and testing but with the knowledge that the manufacturer stands behind…
Click here to read more

Dynovatech Offers Special Discount
You may also like.

Boating and Biofuels

Florida Keys Fishing Reports

Field Test: Benelli’s First Over/Under
More stories.

Jigging for Fluke With The Stanley Gola ‘S and S Bucktail’
Please verify you are a human
Access to this page has been denied because we believe you are using automation tools to browse the website.
This may happen as a result of the following:
- Javascript is disabled or blocked by an extension (ad blockers for example)
- Your browser does not support cookies
Please make sure that Javascript and cookies are enabled on your browser and that you are not blocking them from loading.
Reference ID: a67a427b-7566-11ef-9f77-97af25ce9167
Powered by PerimeterX , Inc.
Ro-Ro Shipping
Multimodal shipping.
- Vessel tracking
- Information
Kaliningrad
- Bremerhaven
- St Petersburg
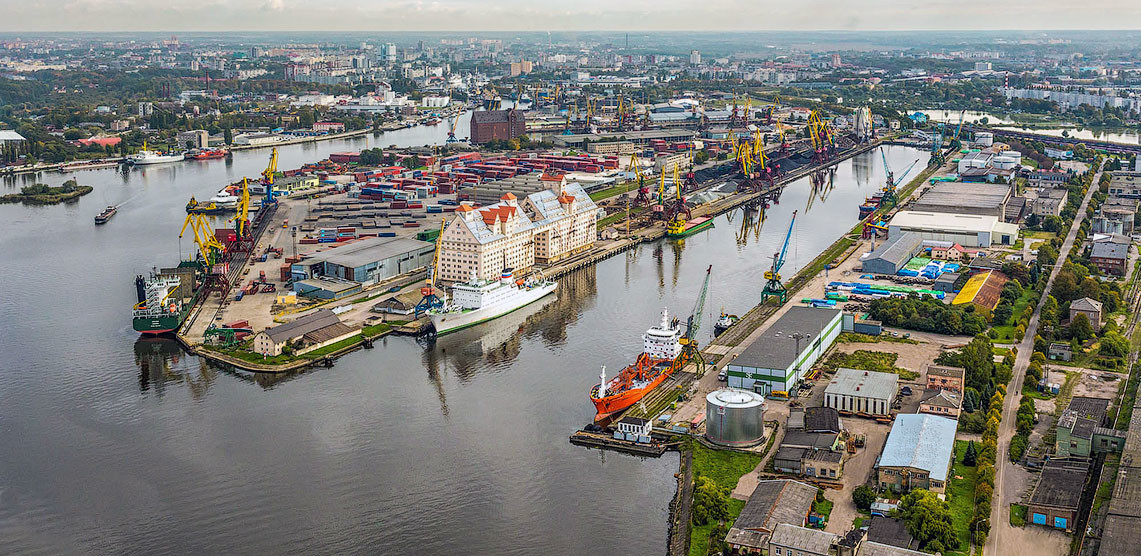
Mann Lines Multimodal Limited calls at the container terminal of Kaliningrad Sea Commercial Port , the principal port of Kaliningrad Region.
Kaliningrad Sea Commercial Port has by far the best facilities for shippers of containerised and general cargo to and from Kaliningrad, including substantial warehousing and cold storage facilities.
Mann Lines works closely with Kaliningrad Sea Commercial Port to develop feeder, short-sea and transit cargoes to and from Kaliningrad. Through local agent Mann Lines CJSC in Kaliningrad, Mann Lines Multimodal Limited is able to exercise an exceptional degree of control over shipments to the benefit of customers.
Quick links
- Warehousing and Distribution
- Port Operations
- Ships Agency
- Connections
- Project and Special Cargo
- Israel-Gaza War
- War in Ukraine
- US Election
- US & Canada
- UK Politics
- N. Ireland Politics
- Scotland Politics
- Wales Politics
- Latin America
- Middle East
- In Pictures
- BBC InDepth
- Executive Lounge
- Technology of Business
- Women at the Helm
- Future of Business
- Science & Health
- Artificial Intelligence
- AI v the Mind
- Film & TV
- Art & Design
- Entertainment News
- Arts in Motion
- Destinations
- Australia and Pacific
- Caribbean & Bermuda
- Central America
- North America
- South America
- World’s Table
- Culture & Experiences
- The SpeciaList
- Natural Wonders
- Weather & Science
- Climate Solutions
- Sustainable Business
- Green Living
Kaliningrad: Russia warns Lithuania of consequences over rail transit sanctions

Russia has warned Lithuania of "serious" consequences after it banned the rail transfer of some goods to the Russian territory of Kaliningrad.
Russia "will certainly respond to such hostile actions," senior security official Nikolai Patrushev said.
Lithuania says it is only following the EU sanctions imposed over Moscow's invasion of Ukraine.
Kaliningrad - a strategic region where Russia's Baltic Fleet is headquartered - has no border with mainland Russia.
The western territory was annexed from Germany after World War Two in 1945 and is bordered by EU and Nato members Lithuania and Poland.
The region - where an estimated one million people live - relies heavily on imports of raw materials and spare parts from Russia and the EU.
Regional governor Anton Alikhanov said the ban would cover around 50% of the items that Kaliningrad imports.

During a visit on Tuesday to Kaliningrad, Mr Patrushev said the blockade by Lithuania was instigated by the West "in violation of... international law".
The secretary of Russia's Security Council warned that "appropriate measures" would be taken "in the near future".
"Their consequences will have a serious negative impact on the population of Lithuania," he added, without giving any further details.
Earlier on Tuesday, the EU ambassador was summoned to the Russian foreign ministry over the blockade.
- Kaliningrad profile
Last week, the Lithuanian authorities announced they would ban goods subject to EU sanctions from passing through their territory to Kaliningrad.
Lithuanian Foreign Minister Gabrielius Landsbergis said: "It's not Lithuania doing anything: it's European sanctions that started working from 17 June... It was done with consultation from the European Commission and under European Commission guidelines."
The EU has echoed Lithuania's statement, saying that the country is just implementing sanctions imposed by the EU as a result of Russia's invasion of Ukraine.
The sanctions list includes coal, metals, construction materials and advanced technology.
As a member of the Nato military alliance, Lithuania is protected by collective defence treaties.
US state department spokesman Ned Price said the US was standing by Lithuania, adding that the country's commitment to Nato's Article 5 - which views an attack on one member state as an attack on all - was "iron clad".

Russian officials are furious with Lithuania - and the EU - over the ban on the transit of some goods to Kaliningrad. They're likening it to a blockade.
But when the foreign ministry in Moscow says "Russia reserves the right to take actions to protect its national interests", what exactly does it mean? What actions and when?
The Kremlin says it's trying to work that out right now.
On Monday, President Vladimir Putin's spokesman, Dmitry Peskov, noted that "the situation is really very serious and requires a very deep analysis before preparing any measures or any decisions. This thorough analysis will be carried out over the next few days."
Today, one of Mr Putin's closest allies, Nikolai Patrushev, flew to the Kaliningrad region to discuss "national security in north-west Russia". Mr Patrushev is secretary of Russia's powerful Security Council. Officials claim the visit was planned long in advance. What a coincidence.
When it comes to "national security", Kaliningrad is a key location. Russia's Baltic fleet has its headquarters there. And Moscow has previously deployed nuclear-capable Iskander ballistic missiles to Kaliningrad region.
In other developments on Tuesday:
- The eastern city of Severodonetskhas been subjected to heavy shelling by Russian forces, the regional governor says. In a similar way to the Azovstal steel plant in Mariupol, Ukrainian troops in the city now hold on to just one factory where hundreds of civilians are also sheltering
- Russia says it has repelled an attempt by Ukraine's forces to retake Snake Island in the Black Sea, which was captured by Moscow at the start of the invasion
- German Chancellor Olaf Scholz said Germany would continue to send weapons to Ukraine "for as long as Ukraine needs our support". Foreign Secretary Liz Truss said the UK was also "determined to provide more weapons" and "impose more sanctions"
How Sweden and Finland went from neutral to Nato
Russia claims first use of hypersonic missile, eu shuts its airspace to russian planes, russia moves missiles to kaliningrad, kaliningrad: the forgotten land.
IMAGES
VIDEO
COMMENTS
Repairing wooden rubrails and toerails is also very simple, requiring nothing more than a couple of hand tools—as I learned when I repaired some sections of rail on my long-neglected 1975 Cape Dory 28. Gathering the materials. Often, the hardest part of the job is finding suitable lumber.
We recommend adding the boat's length to its beam and then doubling the sum to ensure you order enough rubrail to complete the job. Taco Marine is a popular OEM supplier of rubrails for many boat manufacturers and offers an extensive line of replacement rubrails and inserts in kit form. Here are the basic steps in the replacement of an insert ...
I helped a friend several years ago remove and replace his rub rails. He was getting leaks thru the screws at the deck/hull joint. we removed all the rails, then filled the screw holes and voids with six10 2 part eopxy from West marine. once cured we predrilled holes and reattached rails. Leaks gone!
Tips for effective repairs. Use Quality Materials: Always opt for marine-grade materials to ensure durability and resistance to harsh marine environments.Rub rails provide a wide range of top quality rub rails replacements for your boat. Work in Small Sections: If the damage is extensive, repair small sections at a time to maintain control and precision.
N. needsanap. 22 posts · Joined 2011. #14 · Aug 20, 2012. We are currently repairing a damaged rub rail on our Pearson 34. We removed the cracked vinyl and rplaced it (it was pop riveted on but we cut notched to slide over the riets and used silicon cement to firnmly attach it to the hull).
I'm having a problem finding replacement rub rails. I can't seem to find the same rub rails that are on my boat. I'd like to replace just a portion of the rub rail, but if I have to, I would consider replacing the entire rub rail. Either way, I'd like to use the same rub rail that was originally on the boat.
I show how to fix a bulging rub rail in only a few minutes at no cost.https://highschoolfishingcentral.com/ was created as a go-to resource for fishing enthu...
Uh oh! The vinyl rub rail on the side of your boat got scuffed or scratched when it rubbed against the piling in the slip. BoatUS Magazine contributing edito...
So shop now and save or browse our great selection of boat fenders to help protect your boat. Can't find what you're looking for? Let us help. 206-632-4462. A boat rub rail, also known as marine rub rail, is a protective strip installed along the sheerline (the point where the hull meets the deck) of your boat.
Interlux 202 Solvent. Clean rags. Time. 1 to 2 hours depending on the damage. Cost. Around $30 for the solvent. Rubrails take a beating. After all, they exist to protect your boat when it rubs up against pilings, docks, and other boats. But after a few years of such dedicated duty, vinyl rubrails can look rather chewed up.
Mar 1, 2016. 267. Oday 28 Tracy's Landing. Oct 20, 2016. #1. I have a 1984 Oday 28. the prior owner replaced the rub rail with a teak rub rail that needs maintenance. I've been considering putting an original rubber type rub rail for lower maintenance and better bumping protection. Would appreciate advice on how to take on such a job.
says Ingenito. "It's just not a good idea because the bow is a point of stress on any boat and it's going to be weakened by screws." Those installing rub rails for a living suggest placing the middle of a section so that it wraps around the bow. Predrilled screw holes in the new rub rail should be located three inches on either side of the bow ...
Rub rails are subjected to extensive wear and tear in order to protect the hull from damage. Among the various components of a rub rail, the rub rail insert plays a crucial role in providing an extra layer of safeguard and enhances the aesthetics of your boat. These inserts often bear the brunt of collisions with pilings and docks, making them ...
If your rub rail is relatively soft and has been sliced, partially cut or gouged, repair will most likely require only a section of the rail be replaced. This often requires little more than a sharp utility knife, a tape measure and a tube of marine-grade sealant. Proceed by cutting out the damaged section of rail with clean 90° cuts at each ...
Jul 6, 2018. #1. We hit a large wake from a freighter and it loosened the rub rail on our boat, starboard side. Now noticing some bubbles on the port side. Want to make repair but concerned that the way the old Columbia's were designed, we might run into trouble pulling it off due to the double channel aluminum that joins the hull to deck.
The vinyl rub rail on the side of your boat got scratched up when it rubbed against the piling in the slip. ... It's actually pretty darn easy to repair a vinyl rubrail like this. Hi! i'm Lenny Rudow from BoatUS Magazine and today let's learn just how simple it is to make that look like new again First off, you need an assortment of sandpaper. ...
Messages. 355. Apr 18, 2013. #1. I'm considering buying a 2001 Rinker and there is one section of the rub rail that looks flattened out and loose. Guessing a past owner hit a dock or another boat enough to break it loose. I can also see that there is a little bit of silicone in that section where they tried to repair it.
In this effort, rub rails are essential for ensuring the integrity of your hull and sound gunnels. For do-it-yourselfers, Taco Marine of Miami has created the Rub Rail Replacement Guide for all of your rub rail replacement needs. A boaters reputation comes with a vessels condition. Harsh marine conditions and the usual wear and tear associated ...
Shop rub rail at West Marine. Rub rails protect the exposed sides of boats from contact with pilings, docks, other boats, and similar surfaces. Types of Rub Rail . Rub rails are installed around the perimeter of the hull, where it is likely to rub against other surfaces. Available rub rails fall into the following classifications:
Links to the only supplies you need!Heat Gun, 1800W MAXXHEAT Heavy Duty Hot Air Gun Kit Variable Temperature Control with 2-Temp Settings 122℉~1202℉ Overload...
Kaliningrad is on the Baltic Sea and uses a rail link to Russia via Lithuania for passengers and freight. When Lithuania banned the transit of steel and other ferrous metals under EU sanctions ...
Kaliningrad Sea Commercial Port has by far the best facilities for shippers of containerised and general cargo to and from Kaliningrad, including substantial warehousing and cold storage facilities. Mann Lines works closely with Kaliningrad Sea Commercial Port to develop feeder, short-sea and transit cargoes to and from Kaliningrad.
Russia has warned Lithuania of "serious" consequences after it banned the rail transfer of some goods to the Russian territory of Kaliningrad. Russia "will certainly respond to such hostile ...