

The $tingy Sailor
Diy trailerable sailboat restoration and improvement without throwing your budget overboard.

Flatten Your Mainsail Foot With an Outhaul
You’re familiar with basic mainsail running rigging, right? The halyard hoists it up the mast and the main sheet adjusts the angle of the sail to the hull. Both lines are important but they don’t adjust the aerodynamic shape of the mainsail, which can make a big difference if you want to get the best performance out of your mainsail.
There are three potential control lines for your mainsail to adjust its shape. Each line controls the tension on one of the three sides of the mainsail. To control luff tension, you need a Cunningham or boom downhaul like I describe in Control Mainsail Draft with a Boom Downhaul . To control leech tension, you need a boom vang like I describe in Control Your Mainsail Shape Better With a Boom Vang . In this post, I describe a trimmable outhaul to control the foot tension.
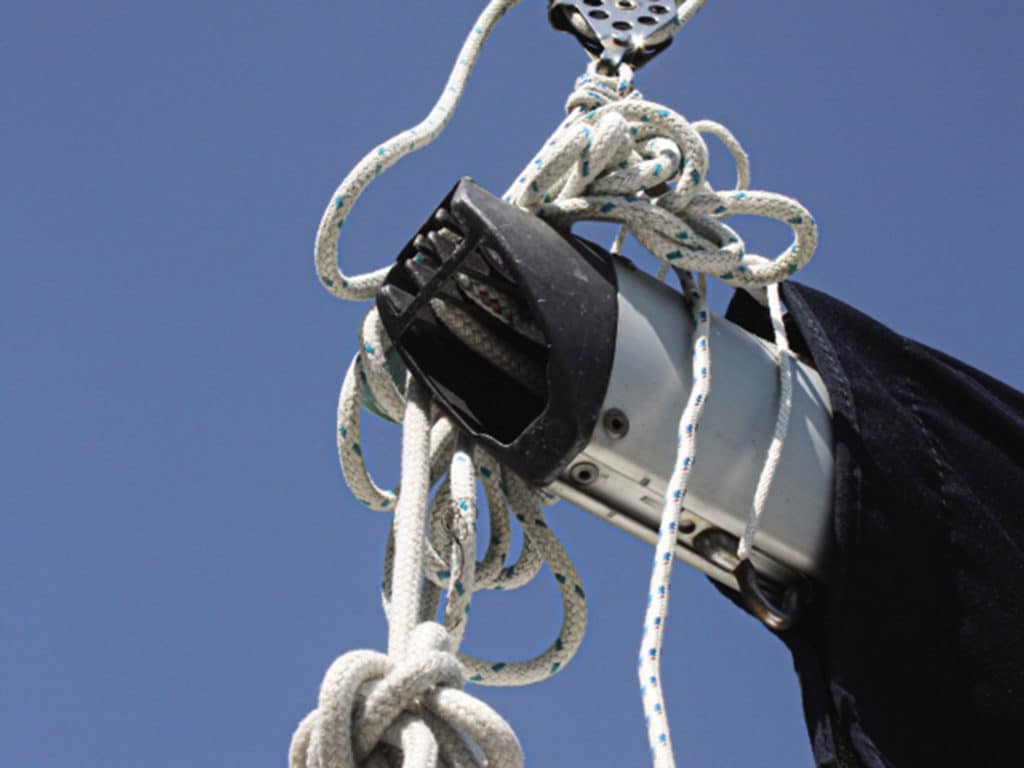
Most first generation C-22s and similar sailboats came from the factory with a simple loop of line between the mainsail clew and an eye strap at the end of the boom similar to the picture below. It holds the sail in place but that’s about all. You can’t easily trim it while sailing. If it’s loose enough to make connecting the clew easy, then it isn’t tight enough for moderate to heavy winds. If you take the time to cinch it up tight, you’ll have to untie it to take the sail off if you trailer sail. By then, the knot could be hard to loosen.

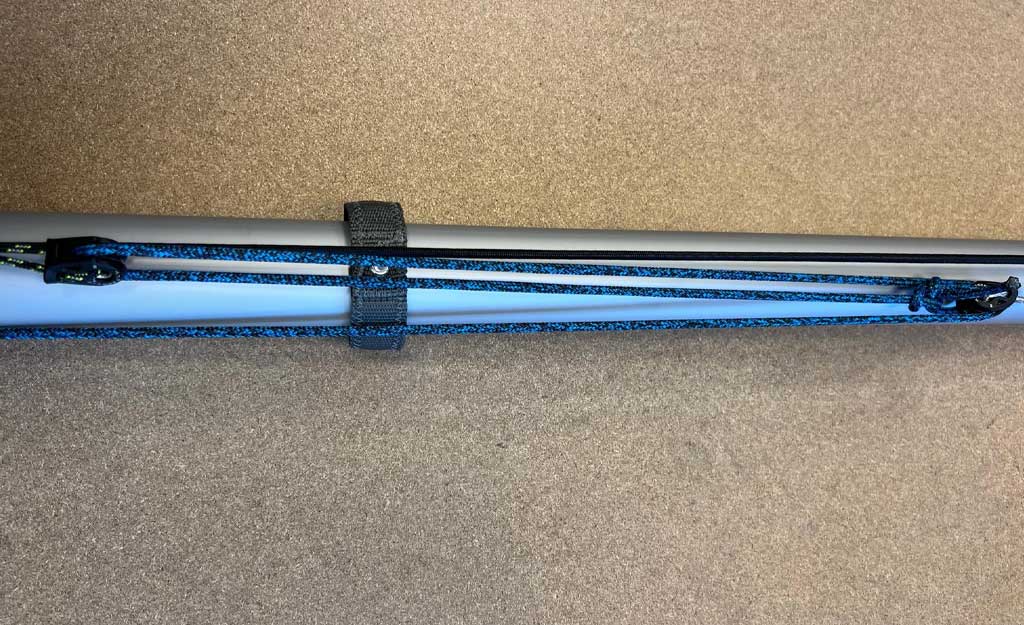
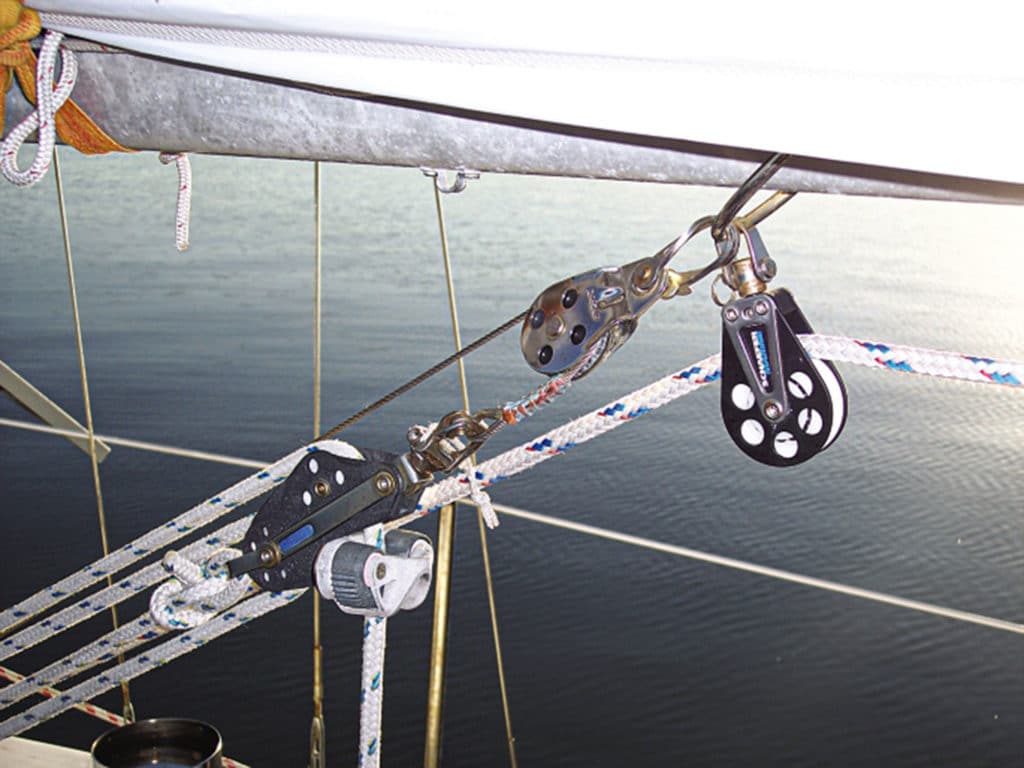
The solution is to replace that crude loop of line with a trimmable outhaul that con sists of:
- (2) Harken 085 double blocks or equivalent, one with a becket
- Fixed eye snap shackle or halyard shackle
- (2) Harken 072 3/16″ shackles or equivalent
- Ronstan small V-Cleat Fairlead or equivalent
- 5′ x 1/4″ New England Ropes Sta Set or equivalent
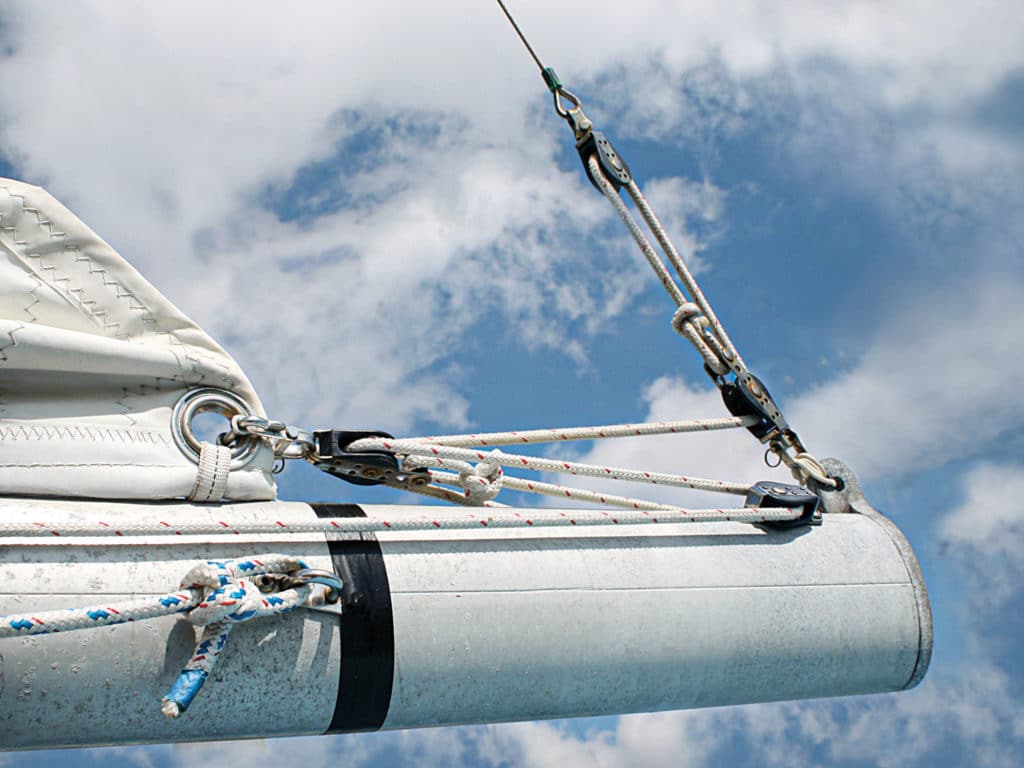
The pictures in this post show a five part (five line segments) outhaul only because those were the blocks that I had on hand when I rigged the outhaul. You could use fewer parts. I recommend at least two. The line is white with blue flecks in keeping with the color scheme that I describe in Choose Your Running Rigging Colors Logically . Notice in the picture below that I spliced an eye in the end of the line where it attaches to the becket. You could also use a bowline knot there but I prefer the neatness of spliced eyes, particularly here at the end of the boom where four lines are attached (main sheet not shown).

Size does matter
The challenge in this setup is to get the overall length of the outhaul as short as possible. On a C-22, there’s only about 10″ from the mainsail clew to the eye strap at the end of the boom. If the combination of blocks and other hardware is too long when you tighten the outhaul, the blocks will meet in the middle before putting enough tension on the foot of the mainsail. To solve the challenge, use the shortest shackles you can find. You might also need to shorten the becket on the one double block. Another option is to attach the working end of the line around one of the sheaves of the block itself, but that will result in less mechanical advantage.
To make the outhaul as easy to attach as possible, add a snap shackle to the working end of the outhaul for hooking to the mainsail clew. Install the fairlead cleat on the same side of the boom as where the line exits the outhaul blocks (port side in the picture below). The fairlead keeps the line captured at the boom if it gets out of hand. A foot of slack on the end makes the setup easy to trim while under sail and to loosen when removing the sail to head home.
The two lines that you see hanging down from the aft end of the boom in the pictures above are the working ends of the topping lift and jiffy reefing lines that I’ve installed on Summer Dance . They’re held out of the way in the pictures for simplicity. I describe them in Let Your Boom Off Its Leash with a Topping Lift and Single Line Jiffy Reefing Made Easy , respectively. To see how all four systems (including the main sheet) fit on the boom, see the pictures below.

Keep It Simple, Skipper (KISS)
If the outhaul shown above seems too complicated or expensive for you, a simpler version is even easier to set up.
For a three part (three line segments) outhaul, you’ll need:
- Harken 083 single block with a becket or equivalent
- 4′ x 1/4″ New England Ropes Sta Set or equivalent.
Install the block on the boom eye strap, the fairlead cleat on the side of the boom, and reave the line as shown in the picture below.

In this system, the line runs through the clew grommet itself. The line isn’t as easy to trim as with multiple blocks, but it’s still easy enough.
For the complete collection of rigging projects like this one, purchase my ebook Do-It-Yourself Small Sailboat Rigging .

Would you like to be notified when I publish more posts like this? Enter your email address below to subscribe to this blog and receive notifications of new posts by email. You will also receive occasional newsletters with exclusive info and deals only for subscribers and the password to the Downloads page. It’s free and you can unsubscribe at any time!
Share this:
13 thoughts on “ flatten your mainsail foot with an outhaul ”.
Have been reading your posts with great interest since purchasing a ’74 in February. Planning to do the topping lift and outhaul as soon as I repair the forestay reinforcement. I’m curious about your costs. For this project, the cost of the 085 and 086 blocks alone is in the $90+ range from the two suppliers I checked. Can you recommend a less-expensive source for hardware? Thanks, Dave
Yep, they’re pricey little buggers! The main reason that I used that size of blocks was because I got the pair of them on eBay for around $25, so it was a no-brainer. If that had not been the case, I would have used something like the Harken micro blocks 227 and 228 at around half the cost. Those are also the size that Catalina Direct uses in their kit. Another benefit would be that their combined length is even a little shorter, which might make the difference with a long-footed mainsail.
When I need to buy parts at retail instead of eBay, I like defender.com. They don’t offer free shipping but their prices are among the lowest for most things and they have a great selection, which means I can usually get several things on the same order to spread the cost out and still be less than most other retailers.
Good luck with your improvement projects. Hope to see you here some more! $tingy
Thanks, $tingy. I figured you had to have done something like that. Just started the topping lift project today: bought a piece of 7/64″ Amsteel and put an Brummel eye in one end and another Brummel eye with a thimble in the other. Will have to wait till the next time I drop the mast to install it. I think the necessary hardware is already on the boom. Was thinking about attaching it to the main halyard for a quick check of the concept, either with or without the mainsail. I know the lead won’t be quite the same as attaching it alongside the backstay on the masthead truck, but it should be close.
Glad to hear you’re going for it! I think you’ll like how handy it is to just reach up and hoist the boom up whenever you need to.
Must be kinda tricky splicing line that small. I’ve only done as small as 1/4″ so far and that was tough enough. Did you make a core to core splice?
Had to look up core-to-core splice, but no, that’s not the technique I used. The Amsteel line is single-layer, not cored. I used these instructions ( http://www.l-36.com/brummel2.php and http://www.colligomarine.com/docs/misc/splicing_instructions_for_web_rev_1_2.pdf ) modified to account for the fact that the smaller line is 8-strand, not 12. {I can’t find any sites that call the 7/64th rope as 8-strand, but that’s what I have. It wasn’t hard to work with at all.
Interesting splice and it looks faster to make. I might try that on the lazy jacks I’m making. They don’t need the full strength of a conventional eye splice and I don’t want to have to make 8 of them!
The most no-nonsense, comprehensive forum I have found for our boats. Thanks. 1987 Cat. 22 SK #14218
Thanks for your comment, John. We could all gain from less nonsense and more common sense.
Hey $tingy!
My name is Nic Reid. I’m over in Bend, OR. I just bought a Tanzer 22, and I’m SOOOOOOOO excited to get going with some projects. I stumbled across your blog last night when I was looking for info on how to do projects on the cheap, and I can’t believe how awesome it is! You’ve done a stellar job, my friend. I’m working through the Mast Step post at present.
I noted that you said there is a downloadable checklist with mast step coaching and a boom crutch document as well. Call me thick, but I’m not finding those. Any help would be appreciated.
I’m excited to follow your posts. Are you still actively sailing in N. Idaho?
Congratulations on your new-to-you Tanzer! You’re in for lots of fun.
There’s a trailer sailor launch checklist and a dimensioned drawing of a mast crutch on the password protected Downloads page. The password for the page is in the confirmation email that you should have received when you subscribed. If it’s not in your Inbox, look for it in your Spam or Junk folder. If you can’t find it anywhere, use my Contact page to send me an email and I’ll send you the password.
I sail weekly on awesome Lake Pend Oreille in north Idaho. I’ve been coming here for years and still haven’t explored it all. Bend is pretty cool place too!
So, testing my understanding of pulleys used in combo like your initial project above… if I modified your second 2:1 example using a single block at the sail and a single block at the boom end, it eould just give a bit more leverage on the outhaul line, but less than the double block arrangement, right? Is it possible to pull the foot too taunt and harm the sail?
Thanks for sharing all your projects…great inspiration to make some modifications and maybe even get my V21 to sail ‘better’.
Two single blocks wouldn’t give you any more mechanical advantage, it would still be a 3-part tackle. But it would reduce friction considerably. You could try it that way and see if you like it and if it’s not strong enough, replace one of the blocks with a double block to increase the ratio.
It would take a LOT of leverage to damage the foot your mainsail with an outhaul, especially if you have rope in the foot. The only time that you would want it as tight as possible is in the highest wind conditions, which most skippers don’t want to brave anyway.
Thanks Stingy. I implemented option 2 due to space constraints on my gulf coast 18. My only change was to use a horn cleat. Love the system!
Leave a comment Cancel reply
This site uses Akismet to reduce spam. Learn how your comment data is processed .
- Already have a WordPress.com account? Log in now.
- Subscribe Subscribed
- Copy shortlink
- Report this content
- View post in Reader
- Manage subscriptions
- Collapse this bar

- Forum Listing
- Marketplace
- Advanced Search
- About The Boat
- Gear & Maintenance
- SailNet is a forum community dedicated to Sailing enthusiasts. Come join the discussion about sailing, modifications, classifieds, troubleshooting, repairs, reviews, maintenance, and more!
Outhaul Rigging?
- Add to quote
Hi all, Does anyone have handy pictures of their outhaul systems? I have a general idea of how to rig mine, but don't quite think I've got it right. Any help is appreciated. Thanks!
big gear? holly cow, that's stout fiddle blocks for a 26 ft boat. I have micro blocks with 4 to 1 and 1/4 (or smaller) line running to a cleat a few feet down the boom from the mast (right over the front of the cockpit). everything is external. I would go all the way to the mast and back into the cockpit if it were a raceboat and expected frequent adjustments. since i cruise this boat, I set at the start of the day's sail and usually leave it.
jrutledge33 said: holly cow, that's stout fiddle blocks for a 26 ft boat. I have micro blocks with 4 to 1 and 1/4 (or smaller) line running to a cleat a few feet down the boom from the mast (right over the front of the cockpit). everything is external. I would go all the way to the mast and back into the cockpit if it were a raceboat and expected frequent adjustments. since i cruise this boat, I set at the start of the day's sail and usually leave it. Click to expand...
craigtoo said: ....I really hate hardware inside a boom. You can't easily (and therefore won't) maintain any hardware in a boom. (at least I won't!).. It will cause problems before you know it. Click to expand...
craigtoo said: Please note I've been traveling for 23 hours straight and am in a small town in Eastern Europe. God knows what the hell I'm doing on Sailnet.... I think I have a problem.. Click to expand...
Thanks for all the good ideas guys. Sure I can figure something out from that!
Hi Andy, Welcome to Sailnet! I didn't run my Outhaul external. Here's what I did. I cut the old outhaul out as best I could. I let the pulleys stay in the boom to rattle around and die...along with whatever wire I couldn't get out through either end. I fished a new line with 4 ft. of wire spliced to its end through the boom. (From bow to stern) I took the wire end out the end of the boom towards the stern. I routed the wire UP through the sheave/pulley at the end of my boom. I added a small metal single block (pulley) to the sail... and routed the wire end UP through the small block on the sail and terminated the wire at the end of the boom with a shackle. To keep it simple, you could also just terminate the wire end at the sail and skip the block on the sail. Should be no problem for your boat. Got it? Good Luck!!!
Pic. Here's a pic. The outhaul wire is run up through the pulley at the end of the boom.. (you can't see that bit) then through a small block on the car (triangular lookin' thingy) at the clew of the sail, then terminated at the end of the boom. You could just run it up through the boom and terminate on the clew. Especially if you've got a winch to tension the outhaul already!
Attachments
- ?
- 176.4K members
Top Contributors this Month
High School and College Sailors - 15% Off Apparel & Accessories - LEARN MORE

- Call Us +1-503-285-5536
- Sign in & Register
- Recently Viewed
- One Design Parts
- ILCA / Laser Parts
Laser / ILCA Outhaul Rigging
The the outhaul s one of three primary sail control systems on the Laser / ILCA sailboat (along with the cunningham and boom vang). West Coast Sailing offers everything you need to complete the outhaul rigging on your boat, including complete rigging kits, pre cut lines, blocks, and more.
- Qty in Cart
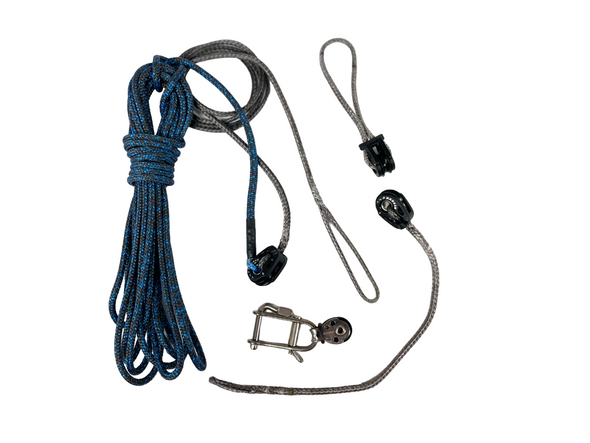
Laser / ILCA Outhaul TecPRO 6:1 (Complete)
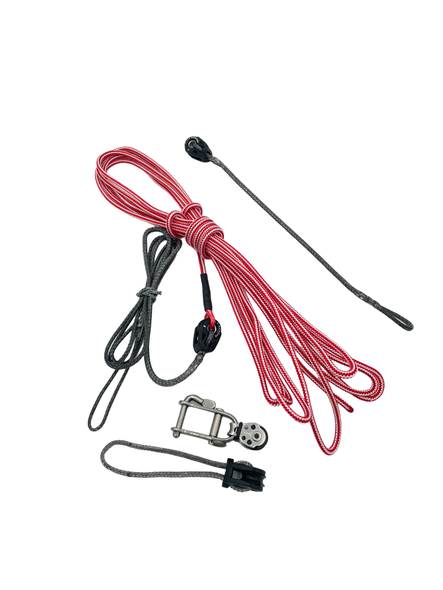
Laser / ILCA Outhaul PRO 6:1 (Complete)

ILCA Cunningham / Outhaul Upgrade Kit Harken

Laser / ILCA Outhaul Mast Loop w/ Block
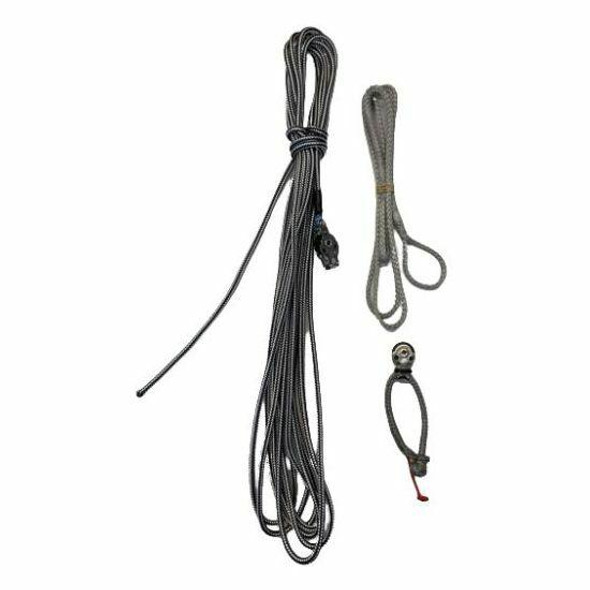
Laser / ILCA Outhaul (Complete)
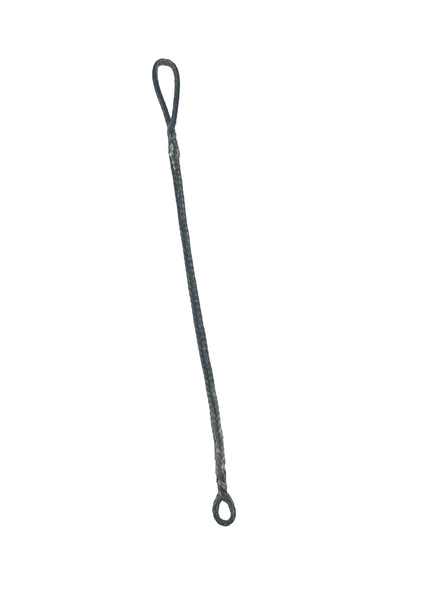
Laser / ILCA Outhaul Strop (4.7/ILCA 4)
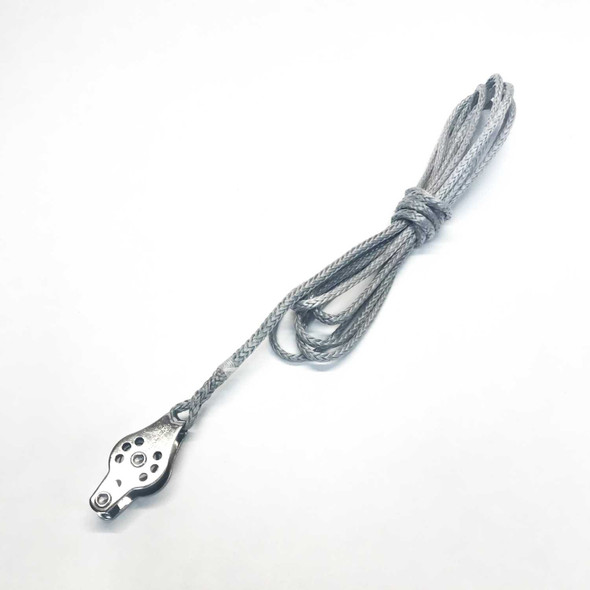
Laser / ILCA Outhaul Primary

Laser / ILCA Outhaul Mast Loop w/ Block (Double Block)

Allen 20mm Hook Block
- Total: items /
- Add all to cart
Adding your products to cart
Subscribe to our newsletter.
Sign up for our newsletter to receive exclusive discounts, new product announcements, and upcoming sales.
No products in the cart.
Sailing Ellidah is supported by our readers. Buying through our links may earn us an affiliate commission at no extra cost to you.
The Running Rigging On A Sailboat Explained
The running rigging on a sailboat consists of all the lines used to hoist, lower, and control the sails and sailing equipment. These lines usually have different colors and patterns to easily identify their function and location on the vessel.
Looking at the spaghetti of lines with different colors and patterns might get your head spinning. But don’t worry, it is actually pretty simple. Each line on a sailboat has a function, and you’ll often find labels describing them in the cockpit and on the mast.
In this guide, I’ll walk you through the functions of every component of the running rigging. We’ll also look at the hardware we use to operate it and get up to speed on some of the terminology.
The difference between standing rigging and running rigging
Sometimes things can get confusing as some of our nautical terms are used for multiple items depending on the context. Let me clarify just briefly:
The rig or rigging on a sailboat is a common term for two parts, the standing , and the running rigging.
- The standing rigging consists of wires supporting the mast on a sailboat and reinforcing the spars from the force of the sails when sailing. Check out my guide on standing rigging here!
- The running rigging consists of the halyards, sheets, and lines we use to hoist, lower, operate and control the sails on a sailboat which we will explore in this guide.
The components of the running rigging
Knowing the running rigging is an essential part of sailing, whether you are sailing a cruising boat or crewing on a large yacht. Different types of sailing vessels have different amounts of running rigging.
For example, a sloop rig has fewer lines than a ketch, which has multiple masts and requires a separate halyard, outhaul, and sheet for its mizzen sail. Similarly, a cutter rig needs another halyard and extra sheets for its additional headsail.
You can dive deeper and read more about Sloop rigs, Ketch Rigs, Cutter rigs, and many others here .
Take a look at this sailboat rigging diagram:
Lines are a type of rope with a smooth surface that works well on winches found on sailboats. They come in various styles and sizes and have different stretch capabilities.
Dyneema and other synthetic fibers have ultra-high tensile strength and low stretch. These high-performance lines last a long time, and I highly recommend them as a cruiser using them for my halyards.
A halyard is a line used to raise and lower the sail. It runs from the head of the sail to the masthead through a block and continues down to the deck. Running the halyard back to the cockpit is common, but many prefer to leave it on the mast.
Fun fact: Old traditional sailboats sometimes used a stainless steel wire attached to the head of the sail instead of a line!
Jib, Genoa, and Staysail Halyards
The halyard for the headsail is run through a block in front of the masthead. If your boat has a staysail, it needs a separate halyard. These lines are primarily untouched on vessels with a furling system except when you pack the sail away or back up. Commonly referred to as the jib halyard.
Spinnaker Halyard
A spinnaker halyard is basically the same as the main halyard but used to hoist and lower the spinnaker, gennaker, or parasailor.
The spinnaker halyard is also excellent for climbing up the front of the mast, hoisting the dinghy on deck, lifting the outboard, and many other things.
A sheet is a line you use to control and trim a sail to the angle of the wind . The mainsheet controls the angle of the mainsail and is attached between the boom and the mainsheet traveler . The two headsail sheets are connected to the sail’s clew (lower aft corner) and run back to each side of the cockpit.
These are control lines used to adjust the angle and tension of the sail. It is also the line used to unfurl a headsail on a furling system. Depending on what sail you are referring to, this can be the Genoa sheet , the Jib sheet , the Gennaker sheet , etc.
The outhaul is a line attached to the clew of the mainsail and used to adjust the foot tension. It works runs from the mainsail clew to the end of the boom and back to the mast. In many cases, back to the cockpit. On a boat with in-mast furling , this is the line you use to pull the sail out of the mast.
Topping lift
The topping lift is a line attached to the boom’s end and runs through the masthead and down to the deck or cockpit. It lifts and holds the boom and functions well as a spare main halyard. Some types of sailboat rigging don’t use a topping lift for their boom but a boom vang instead. Others have both!
Topping lifts can also be used to lift other spars.
A downhaul is a line used to lower with and typically used to haul the mainsail down when reefing and lowering the spinnaker and whisker poles. The downhaul can also control the tack of an asymmetrical spinnaker, gennaker, or parasailor.
Tweaker and Barber Haul
A tweaker is a line, often elastic, attached to the sheet of a headsail and used to fine-tune the tension on the sheet.
Barber haul
A barber haul is a line attached to a headsail’s sheet to adjust the sheeting angle to the wind. It is often used to pull the clew further toward the center or outboard than the cars allow.
Boom Preventer
A boom preventer is a line attached to the boom’s end when sailing off the wind. Its function is to hold the spar in place and prevent it from swinging wildly.
If the boat were to get an accidental gybe, it could cause serious damage to the rigging or even harm people on board. It is important for the rigger to be cautious when setting up the boom preventer.
Running Backstay
Running backstays is similar to a normal backstay but uses a line instead of a hydraulic tensioner. Some rigs have additional check stays or runners as well.
Bonus tip: Reefing
The term reefing is used when reducing the effective sailing area exposed to the wind of a given sail. Headsails are usually reefed by partially furling them in, and they often have marks for what we refer to as 1st, 2nd, and 3rd reefs.
The mainsail is reefed similarly with an in-mast furling or in-boom furling system.
On a traditional mast, we use a system called slab reefing. The system has reefing lines running through the boom to reinforced points on the luff and leech, allowing you to pull the sail down to the boom and effectively reduce the sail area.
Having at least two reefing points in the mainsail is normal, but most cruising sailboats have 3. The 3rd is used for the heaviest conditions, giving you only a tiny bit of sail area exposed to the wind.
You want to reef your sails before the wind increases to a point where your boat gets overpowered.
It is essential to practice your reefing technique . You will find yourself in situations with rapidly increasing winds where you need to reduce your sails quickly.
Rule of thumb: If you think setting a reef might be a good idea, do it.
Shaking a reef is the term used when we sail with a reefed sail and want to increase the sail area back to full.
Hardware used for sail handling and the running rigging
Furling system.
Most sailboats have their headsail on a furling system. A furling system is a tube that runs along the forestay from the bottom furler drum to the masthead swivel.
This system allows you to roll the headsail around the forestay, making furling the sail in and out accessible. It is also convenient when reefing the sail when the wind picks up, as you can easily do this from the safety of the cockpit. These furling systems come in manual versions and electric versions.
In-mast furling
In-mast furling is a system that rolls the mainsail in and out of the mast. To unfurl the mainsail, we use the outhaul .
In-boom furling
In-boom furling is a system that rolls the mainsail in and out of the boom. This system has been costly and has mostly been seen on big yachts earlier. They are becoming more affordable and common on smaller boats, though. To unfurl this setup, we use the main halyard.
A Stack pack is also called a Lazy Bag or Lazy Pack. It is a bag with a zip attached to the boom where the mainsail is stored when unused. It protects the mainsail from UV rays from the sun and weather elements. It is a very nice and tidy way to store the mainsail and reefing lines if you don’t have in-mast or in-boom furling.
Lazy Jacks is a system of lines running from the stack pack to the mast. The Lazy Jacks guide the mainsail up and down from the Stack Pack and prevent it from falling down on the deck. It is also possible to rig Lazy Jacks without a Stack Pack.
A block is a pulley with a sheave wheel. Blocks are used to change the direction of a pull on a line or rope and give a mechanical advantage. They have many uses, especially onboard sailboats.
A winch is a metal drum that gives you a mechanical advantage to control and tighten lines. These can be operated by turning a rope around it and pulling manually or by a winch handle to get more force. Most modern winches are self-tailing, which means they lock the line on so you can winch the line without holding on to it. Some boats even have electrical winches operated by a button.
Mainsheet Traveler
The mainsheet traveler is a horizontal track that the mainsheet is attached to through a series of blocks. The traveler enables you to adjust and lock the boom at an angle and also plays a critical part in trimming the mainsail.
Most cruising sailboats have their traveler attached to the top of the coachroof in front of the spray hood. A racing boat typically has the traveler in the cockpit near the helm to give the helmsman better control over the mainsheet.
The cars are basically a pulley or block attached to a track on the port and starboard deck that your headsail sheets run through. Cars are used to control the angle of the sheet between the clew and the deck. The cars are handy when you trim the sail to set the right balance of tension between the foot and leech, depending on your point of sail.
The jammer is used to lock a line in place. Most sailboats use these for locking the halyards, mainsheet, outhaul, reef lines, traveler lines, boom vang lines, etc. You can pull or winch a line through a closed jammer, but it won’t run away if you let go of it unless you open the lock.
As I explained earlier, it is normal to have most or all of the lines led back to the cockpit, and they are usually run through a series of jammers.
The jammers are often labeled with the name of the line it locks, which makes it easier to remember which line goes where.
Spinnaker Pole
A spinnaker pole is a spar used to wing out a headsail when sailing off the wind, particularly the spinnaker. The spinnaker pole should have the same length as the distance between the mast and the forestay measured along the deck. We use a fore and aft guy and the pole’s topping lift to rig a pole correctly.
The rigging varies depending on the layout of the boat, but it usually looks like this:
- One line runs from the bow to the end of the pole.
- An aft line runs from near the stern to the end of the pole.
- A topping lift is used to raise and lower the pole.
Whisker Pole
A whisker pole is similar to the spinnaker pole and is rigged similarly. It is typically built lighter and attached to a track on the mast. These can be found in fixed lengths or adjustable lengths. Ideally, the length should be the same as the foot of the headsail you intend to pole out.
Boom Vang/Rod Kicker
The Boom Vang has a few different names. Rod-kicker, kicking strap, or kicker. It is used to tension the boom downwards. When you are sailing downwind and have the boom far out, the mainsheet won’t pull the boom down as much as inboard, and you can then use the vang to adjust the twist and shape of the mainsail.
Mooring line
A mooring line is a traditional rope lead through a fairlead to the vessel’s cleat and a mooring buoy, key, or pontoon.
Final words
Congratulations! By now, you should have a much better understanding of how the running rig on a sailboat functions. We’ve covered the different lines, their purpose, and the hardware used to operate them. I hope you’ve enjoyed this guide and learned something new.
Now it’s time to take what you’ve learned and put it into practice by getting out on the water, setting sail, and getting hands-on experience with the lines.
Or you can continue to my following guide and learn more about the different types of sails .
Sharing is caring!
Skipper, Electrician and ROV Pilot
Robin is the founder and owner of Sailing Ellidah and has been living on his sailboat since 2019. He is currently on a journey to sail around the world and is passionate about writing his story and helpful content to inspire others who share his interest in sailing.
Leave a Reply Cancel reply
Your email address will not be published. Required fields are marked *
Fast Dispatch, Fast Delivery and a 5 Star Rated Service

- MENS SAILING CLOTHING
- DYNEEMA TRAPEZE LINES AND ROPES
- SINGLE SHEAVE BLOCKS
- Gelcoat Fillers
- Dry Lubricants
- Adhesive Glues
- Hooks & Clips
- Catamaran Launching Trollies
- Jockey Wheels
- Hitch Locks
- Lighting Board
- Breakaway Cables
- Clew Straps
- Upper Masts
- Lower Masts
- Rope Thimbles
- Wind Indicators & Burgees
- Parrel Beads
- Whipping Twine
- Sailmakers Palm
- Digital Compasses
- DEVOTI ILCA
- LASER SAIL BOATS & DINGHYS
- BAHIA SAIL BOATS & DINGHYS
- Numbers & Letters
- Dinghy Covers
- Under Covers
- Catamaran Covers
- Single Handed
- Double Handed
- 18 Foot Skiff
- Exocet Moth
- Musto Skiff
- Dart 15/ Sprint 15
- Hurricane 5.9
- Laser Bahia
- Laser Cascais
- Laser Funboat
- Laser Stratos
Your Cart is Empty
- £0.00 Subtotal
Tax included and shipping calculated at checkout
Order before midday Monday to Friday and we will ship your order the same day.
- 01268 222912
- Accessories
- Laser Products
- Sails & Covers
- Rope Lengths
- Parts By Boat
- Boat Care & Cleaning
- Splicing Tools
- Boat Covers
- Dinghy Rope Lengths
- Laser Rope Lengths
- RS Rope Lenghts
- Catamaran Rope Lengths
- Laser Performance
- Topper Sailboats
- Other Boats

Pay in 30 days or split over 3 months
- Mens Sailing Clothing
- Womens Sailing Clothing
- Junior Sailing Clothing
- Repair Kits
- Skiff Suits
- Life Jackets
- Trapeze Harnesses
- Buoyancy Aids
- Hiking Pads & Pants
- Hiking / Toe Straps

Zhik Superwarm
- 100m Rope Reel
- 50m Rope Reel
- Polyester Ropes
- Control Lines
- Double Braids
- Braid On Braid
- Anchor Lines & Ropes
- Spools & Reels
- Windsurfing
Mini Spools
- Single Block
- Double Block
- Triple Block
- Soft Attach
- Split Rings & Pins
- Inspection Hatches & Covers
- Bungs & Sockets
- Rudder & Tiller Parts
- Bushes & Fairleads
- Marine Screws
- Penny Washers
- VHF Aerials & Antennas
- Marine Tapes
- Traveller Systems And Parts
- Traveller Blocks
- Pico Hull & Deck Fittings
- Hull & Deck Fittings
- Laser Boats
- Laser Sails
- Laser Sail Packages
- Laser Spars
- Laser Rig Packages
- Laser Foils
- Laser Hull & Deck Fittings
- Laser Ropes
- Laser Dinghy Covers
- Devoti ILCA Boats
- ILCA Sail Packages
- ILCA Rig Package
- Devoti D-Zero Boats
- Devoti D-Zero Parts
- Devoti KDK Boats
- ILCA Charter Boats

New Devoti ILCA
Search our chandlery

How to Build a Laser XD 6-1 Outhaul System
November 11, 2022 3 min read
How to Build a Laser 6-1 Outhaul System
The Laser 6-1 Outhaul System is now the standard that comes with all new boats. If you are finding your outhaul is very difficult to adjust it may be time to upgrade your system.
In this article, we walk you through what you'll need and how to make a Laser 6-1 Outhaul System step by step.
Items You Will Need
You can also buy the full Laser Outhaul Kit on our website.
Some ropes will need to be cut to your correct length once the system is made. This system is tied together with knots however, we would always recommend when working with Dyneema lines to splice them as this is stronger than knots.
- x4 Harken 2698
- x1 Laser Clew Hook
- 2m of 3mm Rig 12 Dyneema
- 3m of 3mm Kingfisher Evo Race Rope
- 6m (or 7m for 4.7 Rigs) of 4mm Kingfisher Evo Race Rope (Secondary Control Line
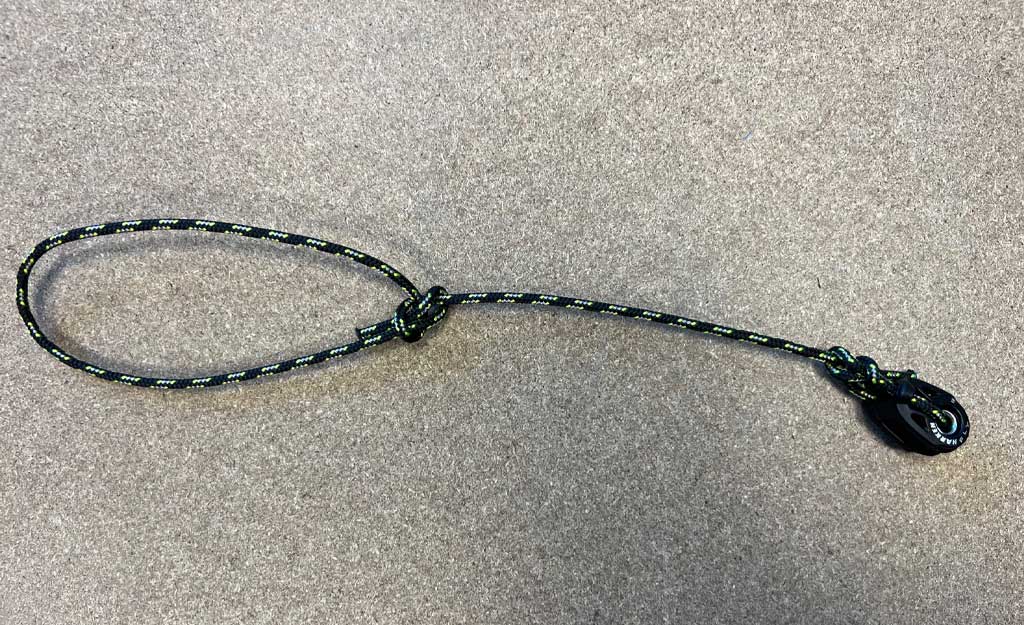
The first part of the Outhaul System is going to be the clew block and hook. There are lots of different ways that people rig this. We will do it per the instructions you receive with a new boat. Take one of the 18mm blocks, the clew hook and one length of the 3mm race rope.
Tie a stopper knot in one end of the line and thread it through the centre of the block and up through the top of the block. Now grab your clew hook and thread the line through and back down into the top of the block. Lastly back through the middle of the block and tie another figure of 8.
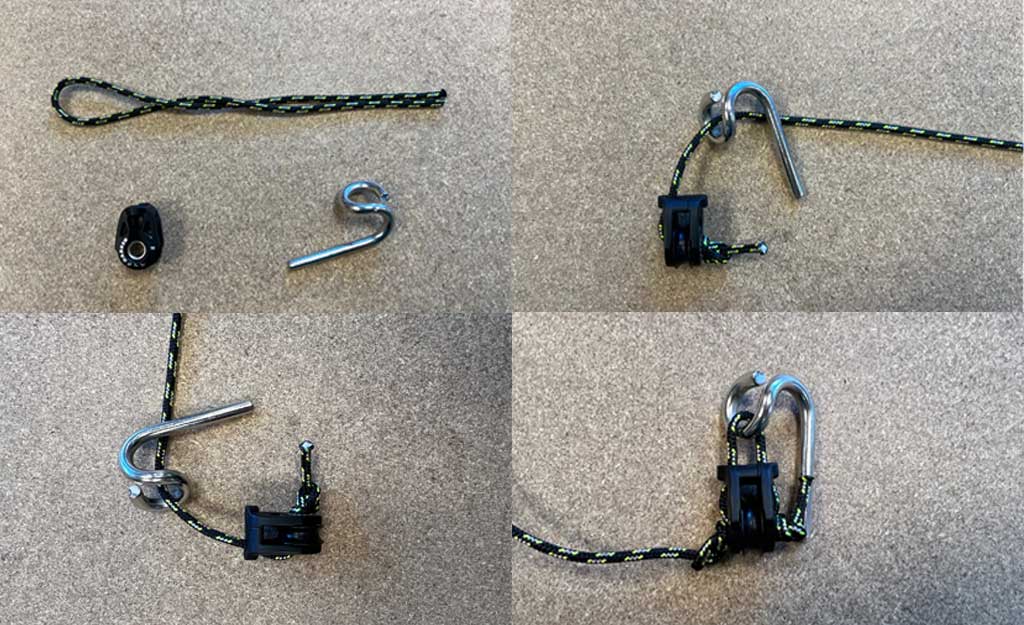
Primary Dyneema
Take your length of 3mm Dyneema and tie a bowline around the eye on the boom end.
Now thread your line through the clew block from step one and the Dyneema back through the boom eye. The rope will then run along the boom towards the front of the boat.
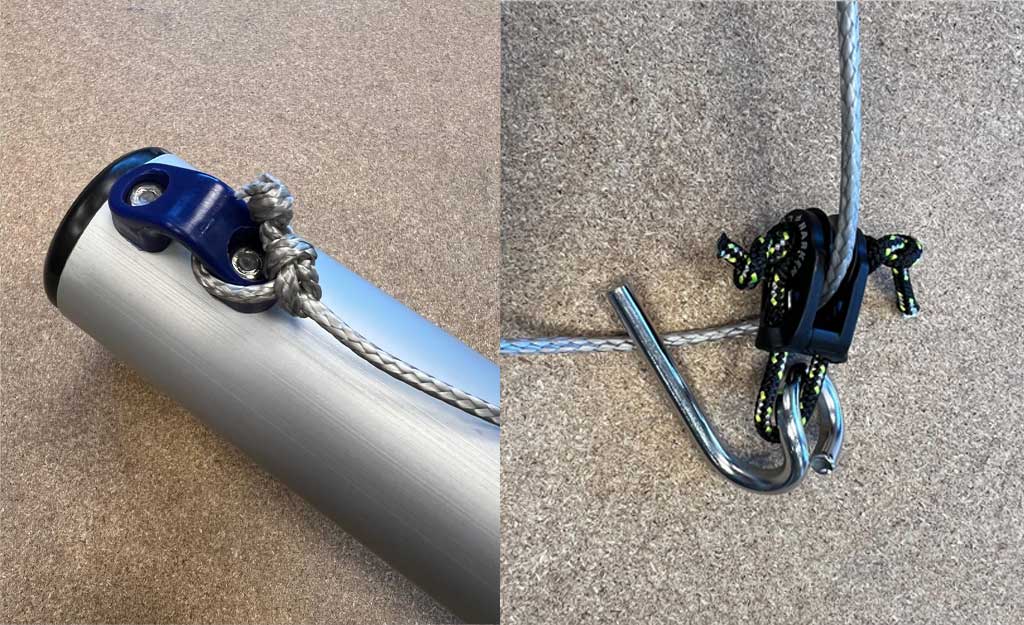
Control line
Take your 4mm Race rope and an 18mm block. Thread the 4mm line about 3 inches through the centre of the block.
Now with the Primary Dyneema thread it into the top of the same 18mm and tape both lines together using the photo below as a reference.
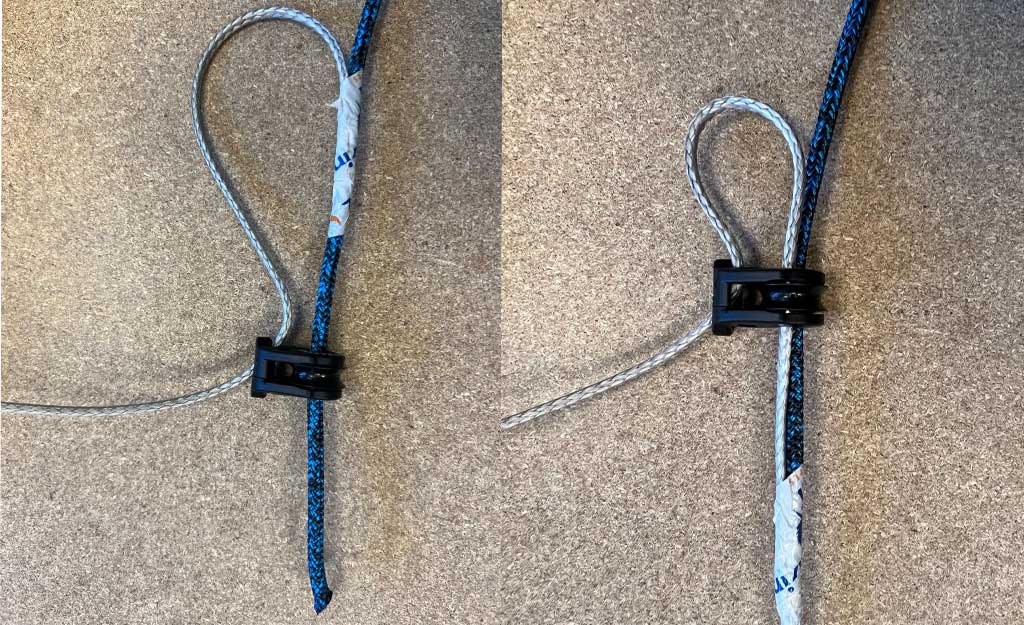
Pull both through and tie a bowline in each.
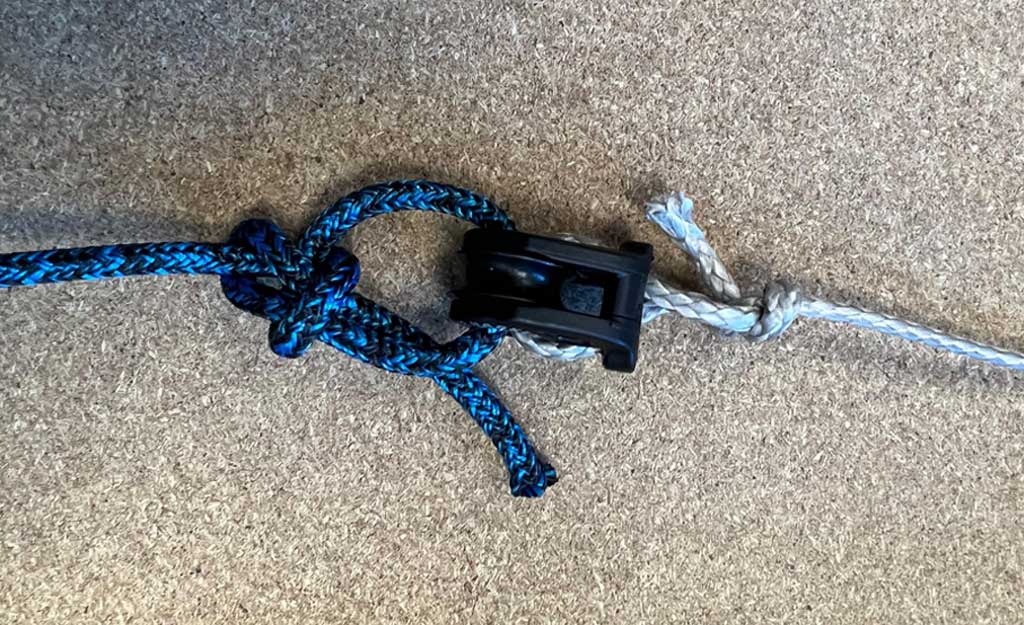
Take your next 18mm block and a length of 3mm race rope and tie it into the cleat on the boom. This should face backwards down the boom towards the back of the boat.
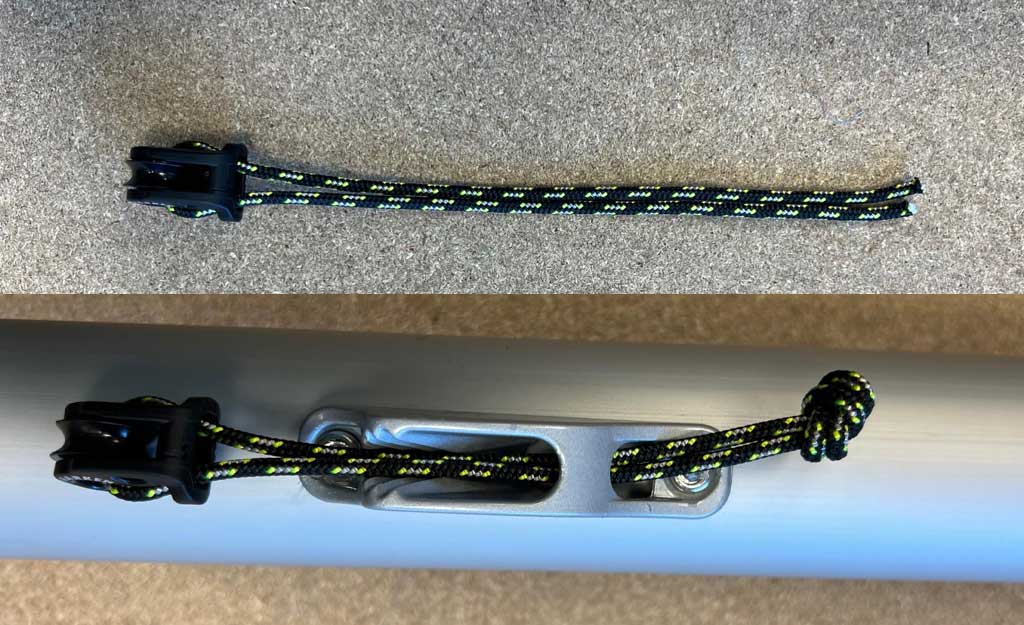
Control line
Now thread the control line from the bowline you have tied through the mid-block tied to the boom and back through the block the bowline is tied onto going around the sheave. This will create your 6 to 1 purchase.
Take your last 18mm block and 3mm race top and tie a bowline around the block and the loose end will be tied around the lower mast where the boom and mast meet. This block acts as the turning point where the control line rope goes along the boom and down towards the deck plate.
The control line rope will then go through the deck block at the bottom of the mast and backwards through the cleats on the deck.
Elastic/ Shockcord
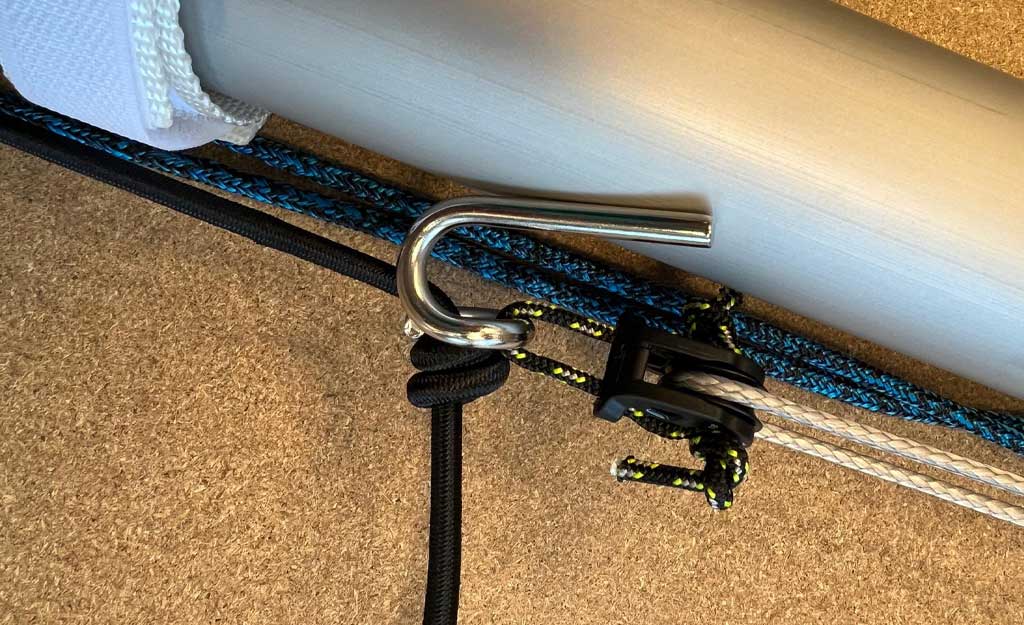
Thread the shockcord through the cleat on the top of the boom then tie a stopper knot. Now the other end can be tied to the sail or the clew hook as shown below.
If you have any questions on the Laser 6 to 1 outhaul system please get in touch with our team who are always happy to help.
Recent Articles
- Looking After You ILCA Spars
- ILCA Outhaul Calibration Markers
- ILCA Daggerboard Calibration Sticker
- 90˚ Marked Laser/ILCA Main Sheet - Sailing Chandlery
- Pre season Check List
- Where Should My ILCA Tell Tales Go
- What Are The Basic Tools Needed To Start Rope Splicing?
- You Don't Always Need Dyneema
- Boat Care and Cleaning Products
- Ropes for Club Boats and Club Dinghies - The Bosuns Guide

Let customers speak for us
Used 2 of these to replace the little plastic ones on a supernova tiller. Much better and now pull in the right direction
This is the perfect tool to assist in tightening my Dart Trampoline. It grips the rope far better than you can with your hands.
After having my Previous Superwarm X Suit for over 5 years whilst working as a watersports instructor this is a great improvement over the previous suit. Warmer and softer linning throughout the inside of the suit and I will continue to use the suit all year round like my old suit.
Someone at the club “borrowed “ one of my Solo’s bungs. I bought two so now I have a spare.
Great to have something that goes over everything if a quick solution is required
had ordered one on amazon before, received the wrong size received the correct size now :)
A simple moulded part of good quality, supplied quickly and well packed.
Turned out that I had ordered the wrong make, my camcleats being Allen not Harken, however by drilling the two fixings holes out by 1mm and filing two small notches they fitted perfectly.
Super helpful company. Attentive, and quick to deliver.
Second time I have use for this purpose. Really easy to attach to alloy mast and so easy and positive to operate.
We have put the boat on this trolley but not yet used it for launch and recovery. First impressions are very good, It fits together well and is super easy to assemble - it's made to put together and take apart fast if you want to put it in a vehicle etc. It is very lightweight which should be a boon launching and recovering the boat - at the same time it looks strong and well made. Being aluminium we won't have a rust problem either. I was impressed how it fits perfectly wherever it supports the boat. So assuming it performs well in use we are pleased we got this. Very helpful guy on the phone and it came quickly so all good, thanks,
Good service, and fast delivery. Very happy with my large amount of assorted short lengths of rope of many different thicknesses for practising my knots.
Good quality rope that can be spliced. Delivered promptly by the Sailing Chandlery.
Excellent sail, ideal for training and comes with a sailbag, Our only drawback was the long delivery time (2-3 weeks) and having to pay €90 in customs charges all due to Brexit! If Sailing Chandlery had a outlet here in the Republic or in Northern Ireland, business could get much better.
Worked a treat
The Puco hatches I bought hatch really well for hatchy things. Speedy service and great value. Hatch-on!
SIGN UP TO OUR NEWSLETTER
Save up to 40% on your next order.
- BOAT OF THE YEAR
- Newsletters
- Sailboat Reviews
- Boating Safety
- Sails and Rigging
- Maintenance
- Sailing Totem
- Sailor & Galley
- Living Aboard
- Destinations
- Gear & Electronics
- Charter Resources
- Ultimate Boating Giveaway

Running Rigging for Cruising Sailors
- By Bruce Bingham
- Updated: October 15, 2020
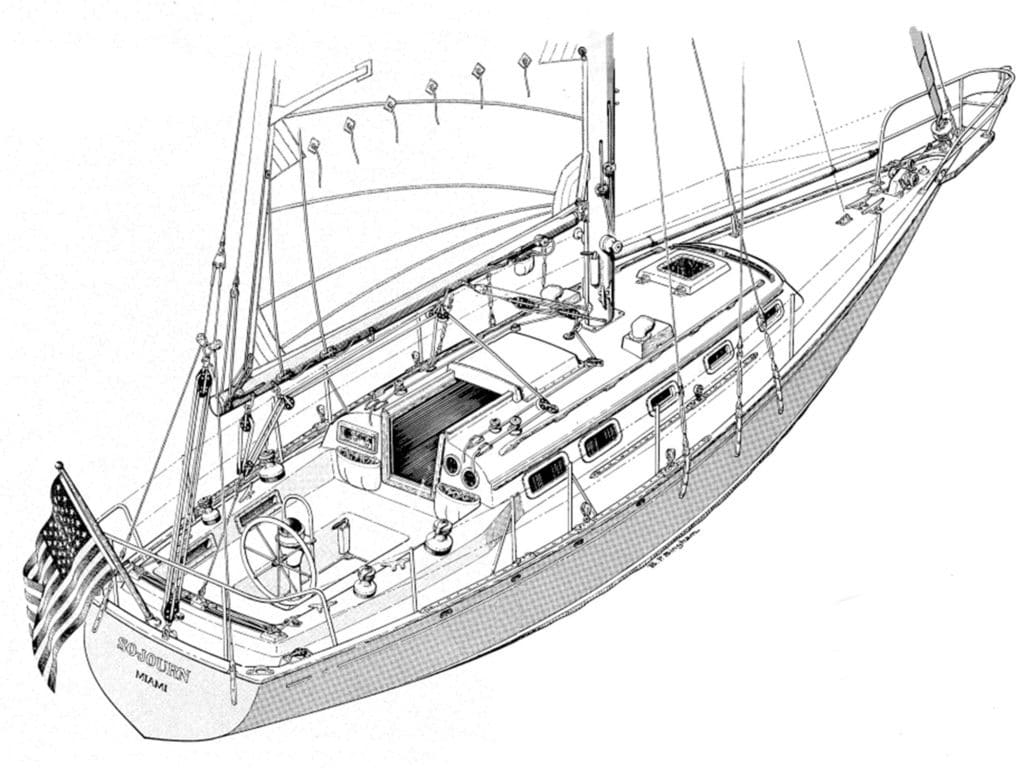
During my 75 years of sailing, I’ve become aware of the chasm between cruisers and racers. But I’ve never understood it because I have always been both. Even when I cruise, I’m racing—against changing weather, the need to get home in time for dinner, whatever. What that really means is that I’m determined to get the most speed out of my boat at all times. And to do so means having excellent running-rigging systems.
There are three issues in play when deciding on whether to install or upgrade your running rigging. First, do you want to increase your ease and convenience when adjusting sail trim? Second, are you willing to add lengths of line (as well as lengths of time) to make sail-trim adjustments? And last, how much investment are you willing to make to reach your sail-handling (i.e., running-rigging) goals?
I can scratch only the surface of this complicated topic and not present a comprehensive guide to all systems and conditions. Hopefully I’ll encourage you to think of how you might be able to improve your systems to make your sailing better and more satisfying.
Let’s begin by looking at sail-trim adjustments, which encompasses many items: sail curve (or draft, also called cord), luff tension, foot tension, sail twist from head to foot, and attack angle (the angle of wind as it approaches the sail’s leading edge, or luff).
On racing boats, all of the power required to make these adjustments is enhanced with more-powerful winches, larger crews, expensive low-friction blocks, and extremely strong and flexible lines. All of the running-rigging systems on racing boats are also appropriate for cruising boats, but cost often plays a deciding factor when making hardware and arrangement choices.
Increasing the power of running-rigging systems will always cost more, but it will also result in ease of handling and efficiency of controlling mainsail and headsail trim. Let’s move on, focusing first on the main.
Main Outhaul
Mainsail draft (depth of the sail’s curve) is controlled primarily by the outhaul but also may be supplemented by halyard tension and mast bend. So, let’s concentrate on the outhaul if for no other reason than its ease of use, as long as it is easily adjustable and also conveniently reachable. Unfortunately, most outhauls that I see on cruising boats are not adjustable and are usually a bundle of knots, difficult to reach when under sail, and almost impossible to untie without a marlinspike or fid. So let’s fix this first.
The mainsail outhaul on my Cape Dory 28 Nikki ’s boom end is a 2-to-1 tackle with its hauling end attached to another 2-to-1 tackle, also called a cascade or Burton. In light air, when sailing to weather, the draft of the main can be flattened by taking in on the 2-to-1 part of the tackle. In strong breezes, flattening the mainsail’s draft is easily done by hauling in on the Burton only, a total power ratio of 4-to-1. Both of the outhaul tackles have their own clam cleats mounted on the side of the boom.
I don’t recommend mast bending to most cruisers because its proper application depends largely on the boat owner’s knowledge of the nature and dimensions of the curve built into the sail by the sailmaker. In a nutshell, though, when sailing to weather, mast bend will flatten the luff of the sail. When sailing off the wind or in light air, a straight mast will increase the curve or draft of the sail for better drive.
If your halyards are only general-purpose Dacron line (like those used for dock lines and sheets), as you tighten them, they will stretch and have little to no effect on sail shape with increased wind. Keep in mind that as windspeed increases, the draft of your sails will also increase, causing a greater heeling moment. The increased draft will also cause the sail luff to become fuller and reduce the ability to point upwind.
I really like limited-stretch and no-stretch halyards. They help reduce the sail draft near the luff from increasing when the wind builds. Limited-stretch halyards won’t stretch markedly when tightened in order to flatten the sail luffs. No-stretch or limited-stretch halyards might sound racy and will cost more, but the payoff is better performance, especially in strong winds. Good halyards are an easy fix that pay big dividends.
Cunninghams and Downhauls
Cunninghams and downhauls are essentially the same thing: Their function is to provide tension adjustment to the lower portion of the luff of a sail. A Cunningham, however, is more associated with the mainsail; downhauls are generally used with a headsail or staysail.
The purpose of Cunninghams and downhauls is to provide a rapid and convenient method of changing and distributing the tightness of a sail luff from tack to head, primarily on sails whose luff is in a mast slot, aluminum furling extrusion or attached to a stay with piston hanks; all of which cause friction that resists the luff from equalizing its load along its length. Since the halyard pulls upward from the top and the Cunningham pulls downward from slightly above the tack, the load in both directions equalizes the tension of the sail’s luff.
When you hoist a mainsail, there will often be about twice the tension on the luff above the spreaders than between the spreaders and the gooseneck. The load on the Cunningham is used to increase the lower luff tension. So, instead of cranking the halyard so tight that the winch is nearly torn off the mast or cabin top, raise the sail only until you begin to feel the luff load up, then tighten up the Cunningham until it feels about the same as the halyard. That’s the way your mainsail was designed and made, with about equal tension along the full length of the luff.
The cordage used as a downhaul or tack attachment for staysails and headsails, including those with roller-furling systems, should be set up as tackles that are adjustable under sail. The cord should be long enough to set up a 4-to-1 tackle, and cleated or tied so that rapid luff tension can be adjusted without a hassle, whether slacking off in light air or tightening in a heavier breeze.
Gaining Mechanical Advantage
When I bought my schooner, At Last , back in the mid-’70s, she had lots of line and blocks but not a single winch. I think that most of her previous sailing had been done by a crew of six or a smaller crew made up of 300-pound gorillas. At that time, I weighed only 135 pounds, and my partner, Katy, was about 15 pounds lighter. Neither of us were what you would call “husky.”
Sailing At Last in light air was not difficult, but when it blew over 8 knots, every evolution became quite physical. We learned the first rule of manpower pretty quickly: The more line we pulled to achieve any sail adjustment (main or foresail sheet trimming, gaff hoisting, etc.), the more power was developed and less personal exertion was required.
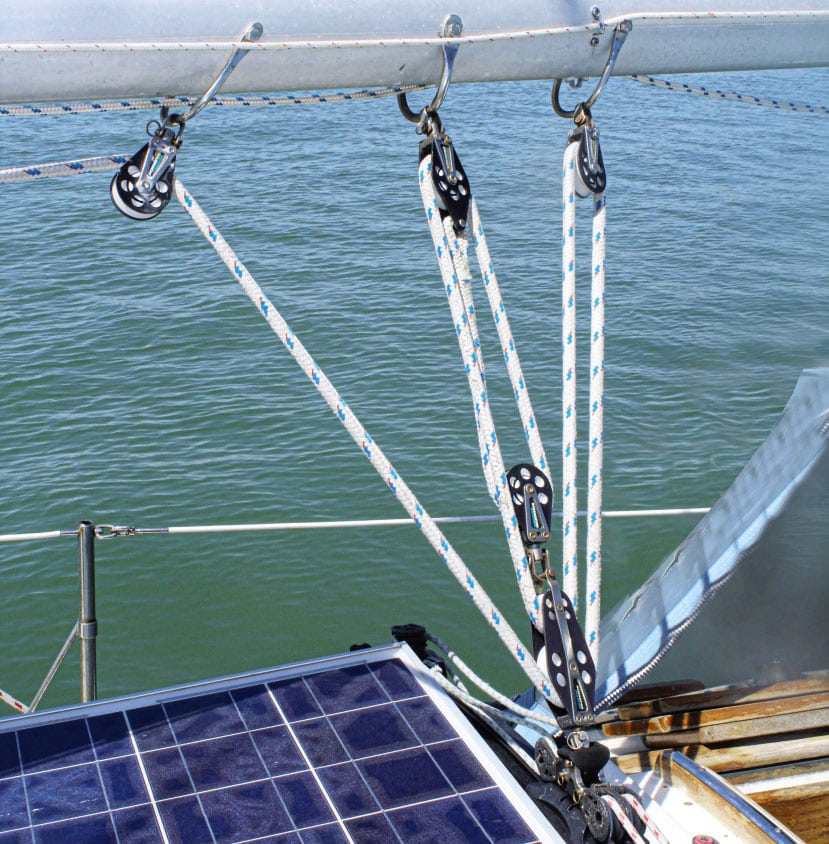
Yes, eventually we did install sheet winches for each of the headsail sheets, but not for the main or foresail halyards or sheets, outhauls, vangs or topping lifts. For those, we added blocks and line to each system. It was like multiplying our crew. Every sail-trim maneuver became markedly easier—but slower. So, if we at least doubled the line length by adding sheaves, we also multiplied the power by the same ratio (not deducting for friction) and reduced the hauling load by the same ratio.
The rule of tackles is straightforward: The number of moving parts equals the mechanical advantage (power ratio). Google “block and tackle mechanical advantages,” and you will find excellent graphic diagrams with their power ratios.
Leading Systems to the Cockpit
More and more boat owners want every sail-control line led to the cockpit. This invariably requires at least three additional blocks or sheaves to be added to most running-rigging systems, thus increasing friction as well as adding lots of line (I call it “spaghetti”) in or near the cockpit. In the case of reefing, leading all lines to the cockpit actually makes most reefing much more difficult and inefficient.
In 2009, my 28-foot Nikki won the Florida West Coast Boat of the Year award in a long series of races over several months’ time. Most wins occurred in extremely high winds because we had practiced reefing in under 45 seconds. That had become possible largely because of deftly efficient tackles, all kept within a single person’s reach. Only the main sheet went to the cockpit and was usually handled by the helmsman.
Mainsheets and Travelers
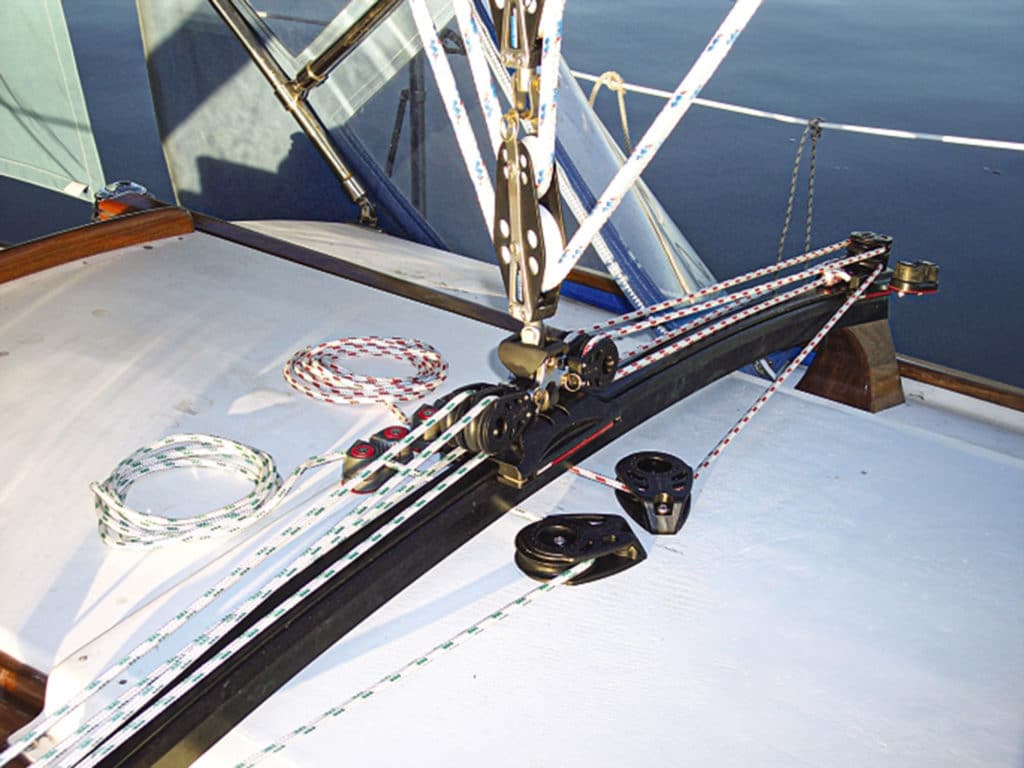
Thirty years ago, virtually all mainsheets were attached to the aft end of the boom and to a multisheave block on a short and mostly inefficient traveler at the stern of the boat. Because of the position of the traveler, its angle of effectiveness was fairly narrow, so when far off the wind (beam and broad reaches and running), the amount of downforce on the boom became little to negligible, rendering the traveler useless.
A double-legged mainsheet never accomplished its intended goal of acting like a traveler. Such a mainsheet always vectors the load to the longitudinal center of the boat on all points of sail regardless how far apart the lower blocks are spread. It was the racers who came up with the idea of moving the mainsheet to the approximate middle of the boom and down to a longer track and adjustable car (the traveler), usually just forward of the main companionway hatch on the cabin top. With this arrangement, the mainsheet becomes the major controller of both boom angle as well as mainsail twist by its increased downforce on the boom and sail.
The traveler car should be controlled by a port and starboard tackle of at least 3-to-1 advantage for boats up to 24 feet, 4-to-1 for boats up to 30 feet, and 5- to 6-to-1 for boats up to 34 feet and beyond. I also recommend the use of cam or clam cleats for all traveler control lines.
Racing sailors also came up with the idea of a boom vang attached to the forward portion of the boom at the upper end, and to a bale at the base of the mast at the lower end. This is what you usually see on most sailboats today. That simple arrangement was a giant leap forward in the area of mainsail-twist control. But almost indiscernible additional improvement seemed to occur. Nowadays, most boom vangs aren’t all that efficient and ought to be brought into this century.
The first improvement should be to pull downward on the boom vang line in order to pull down the boom. However, I rarely see a vang rigged this way, which means it loses about half of its power advantage. Most vangs I see are pulled upward or aft to exert a download on the boom, thus losing more power.
A really practical boom vang should have at least a snap shackle on the lower block so it can be quickly detached from the mast base and moved to a car on the genoa track or a hole in a perforated aluminum toe rail. This will allow the boom vang to exert much more of a vertical download. The more vertical the vang, the more downforce on the boom. Another benefit to the detachable boom vang is that the lower block can be brought forward of the mast and attached to a stout deck-pad eye or perforated toe rail so the boom vang can also act as a preventer when sailing downwind.
Doubling the power of the boom vang can be accomplished simply and easily with a small investment by adding a 2-by-1 cascade (also, again, called a Burton), which is a single 7-by-7-foot or 7-by-37-foot stainless cable run though a wire block on the boom with one end shackled to the vang bale at the mast base. The other end of the wire is fashioned with an eye to which the upper end of the vang tackle is attached. So if your vang tackle is 5-to-1 and the cascade is 2-to-1, your vang will become 10-to-1. Then by moving the lower end of the vang from the mast to the toe-rail eye, a dedicated deck-pad eye or a genoa-track car, you have doubled it again, all for about $40.
The vang that I have described is most efficient when sailing long distances without jibing or tacking, but if you’re simply afternoon daysailing around the bay, the vang would be more conveniently left attached to the bale at the mast base.
I have never seen a rigid boom vang that was routinely adjusted while under sail; they’re really only a boom support system while under power or tied up to a dock.
Main Boom Topping Lift
I put the topping lift in the same underused category with the main outhaul; too often it’s a bundle of knots at the end of the boom that have not been adjusted or adjustable in decades.
A proper topping lift is meant to raise and store the boom off the Bimini when not in use. When under sail, however, its purpose is to adjust the weight of the boom so it changes the sail twist in various wind conditions and points of sail. It works in the opposite direction of a boom vang; it pulls the boom upward while the vang pulls downward. Upward increases sail twist, and downward reduces it.
A topping lift should also be used to take the weight of the boom off the mains’l leech when putting in a reef, then tightened again while shaking out the reef. The topping lift should be adjustable on any point of sail, which translates into “reachable.” Also, lifting your outboard from your dinghy becomes a simple matter by using your boom vang tackle attached to the end of the boom, and “topping” the boom with the topping lift so the outboard can clear the aft pulpit and lifelines.
Backstay Adjusters
These are used to apply tension to the backstay, which is transferred to the headstay for the purpose of flattening the luff of the headsail…or slacking the backstay, thus also easing the headstay to add more draft to the jib or genoa, as would be desirable when off the wind. When closehauled and/or sailing in a stiff breeze, a flattened headsail is preferred to lessen the boat’s heeling moment and to allow the boat to point up a little closer to the wind. With a backstay adjuster, this can be done in a few seconds with an adequate tackle arrangement.
Adjusting a headstay is usually impossible while under sail with the headsail sheeted in tightly. There are special turnbuckles and hydraulic backstay adjusters that can be used while under sail, but they are not as rapid as the appropriate backstay tackle systems. When tightening the backstay, the mast is also slightly bent to help flatten the draft and remove the “cup” from the luff of the mainsail at the same time as the headsail. So double benefits are derived from one simple adjustment.
Making your boat perform better does not have to be, nor should it be, a lot of work. In reality, effective running-rigging systems will make sailing a lot less strenuous, as well as more enjoyable and rewarding. Your boat will look better and perform better, and teach you a lot about getting the most out of the wind while adding joy to your afternoons under the clouds.
Don’t avoid the possibilities. Embrace them.
Boat designer, builder, writer, illustrator and longtime CW contributor Bruce Bingham lives aboard his Cape Dory 28, Nikki , on Florida’s Gulf coast.
- More: deck hardware , How To , lines , print oct 2020 , rigging
- More How To

Grease the Wheels of Your Boat: A Guide to Proper Lubrication

A Bowsprit Reborn: A DIY Renovation Story

Rigging Redo: Our Switch to Synthetic

Top Tools for Sailboat Cruising: Must-Have Gear for 2024

Galápagos: A Paradise Worth the Paperwork

Around Alone

- Digital Edition
- Customer Service
- Privacy Policy
- Terms of Use
- Email Newsletters
- Cruising World
- Sailing World
- Salt Water Sportsman
- Sport Fishing
- Wakeboarding
Mark Reynolds
You should have enough purchase on your outhaul system that by the time it gets to the final line you pull on there shouldn't be enough load on line to make a big difference on what line you use. You don’t want any stretch in the system and you want it to run as smooth as possible. I have a 1/4" spectra blend line but after a wire system that has a total purchase of 12 to 1. I use a cascading purchase system that multiplies the purchase instead of putting it all into one place. This is more efficient because of the multiplying effect there are fewer pulleys. There is a 2-1 inside the boom that then goes to a 3-1 right before exiting the front of the boom. Then it goes to another 2 -1 with the line I pull on. This allows me to trim the outhaul when sheeted in tight in any wind condition.
The Discussion
This website uses cookies and collects usage statistics. Privacy Policy
Us, too. We pour that passion into each of our newsletters to help you enjoy sailing even more.
Sailing Skiron
Sailing Skiron out of Sausalito in the SF Bay and along the coast of California
Mainsail Trim: Outhaul
Most recognize the outhaul as the principal way to pull the mainsail out of an in-mast furling mechanism. Those who flake their sails probably have a better understanding of how to properly use this sail control device. During my training, we did nothing more than pull the sail all the way out when we were ready to get going. Once I acquired Skiron, I sent some photographs to the former owners of the vessel and they pointed out a few things to me regarding how I had too much camber in the sail. This is another way of saying that the draft was too deep for the point-of-sail. That’s when I started learning about the outhaul and other mainsail controls.

As I have learned, the outhaul is not simply the line that one tensions to pull the sail out of the mast. Of course, it serves that purpose. And, on in mast furling systems, pulling the sail in part of the way with the furling line allows us to reef the main to depower (and decrease weather helm, too).
Importantly, the outhaul controls the depth of the draft in the lower third of the mainsail.
The outhaul should be tensioned to flatten the sail to depower in heavy winds or when needing to point high. This change may be made just prior to a decision to reef the sail.
The outhaul should be detensioned to increase the draft in light winds and probably also in heavy seas.
As is the case with most mainsail controls, the outhaul is rarely changed without a change in some other control. For example, the adjustable backstay and halyard also require simultaneous adjustments, not because the outhaul is adjusted but because of the wind conditions and desired effects necessary to optimize sail performance.

Share this:
Leave a comment cancel reply.

- Already have a WordPress.com account? Log in now.
- Subscribe Subscribed
- Copy shortlink
- Report this content
- View post in Reader
- Manage subscriptions
- Collapse this bar
How to Use a Mainsheet Traveler
Better Sail Trim Means Faster Boat Speed
- Snowboarding
- Scuba Diving & Snorkeling
Although the mainsheet tackle attaches to a fixed point on some smaller sailboats , most cruising and racing sailboats have a mainsheet traveler that allows for better positioning of the boom. This provides the best sail trim and boat speed. Learn how to use a traveler for your next sail by centering the boom upwind and more.
What Is a Mainsheet Traveler
The mainsheet traveler is a device that allows for changing the position where the mainsheet tackle connects to the boat. The traveler is typically mounted either in the cockpit or on the cabin top for mid-boom sheeting. Different forms of mainsheet tackle may be used, but the principle is the same: the tackle connects between the boom above and the boat below.
Usually, the tackle connects with a car that can be moved to port or starboard by control lines that lead to the cockpit. In the traditional type of traveler, each line leads back to a cam cleat. To move the traveler car to port, release the starboard control line and pull in the port line. Reverse this to move it to starboard.
Centering the Boom Upwind
A primary use of the traveler is to keep the boom centered when sailing close-hauled. Because the mainsheet tackle covers a span between the boom and the boat attachment, the boom will move to leeward no matter how tight the mainsheet is sheeted in. Moving the traveler car slightly upwind when sailing close-hauled can bring the boom back over the centerline to gain the most power from the mainsail. Be careful not to bring the boom to windward of the centerline, however. This causes a loss of power.
Trimming With the Traveler
In many situations, the mainsail is trimmed further off the wind by letting the sheet out, allowing the boom and sail to swing farther to leeward. The force of the wind on the sail also causes the boom to rise, however, making the mainsail less flat. In certain situations on points of sail between close-hauled and a beam reach, it may be better to trim the main by moving the traveler down rather than letting out the mainsheet. With the traveler farther off center, the sail can be flattened by tightening the mainsheet and pulling down the boom, without pulling the boom back toward the centerline.
Experiment With Your Own Boat
Letting out the traveler reduces boat heel and weather helm, the tendency of most sailboats to turn toward the wind with a gust. This action of using the traveler position to pull the boom down is similar to using a boom vang to keep the boom from rising and putting more belly in the sail. While the vang is often a critical adjustment for downwind sailing when the boom is far out, and thus rises easily with wind gusts, the traveler works better upwind.
As with all matters of varying boat gear and sail trim, it’s best to experiment with your own boat to see what configuration produces the most speed. Read about how to use the traveler and other sail adjustments for strong winds .
- When to Adjust Sailboat Sails for Stronger Winds
- Learn How to Sail a Small Sailboat – 1. The Parts of the Boat
- Simple Reefing System for Sailors
- How to Tack a Sailboat
- How to Gybe a Sailboat
- How to Trim the Jib Using Telltales
- How to Raise the Mainsail
- How to Rig a Preventer Line
- How to Heave To a Sailboat
- The Sunfish: A Perfect Lake or Urban Sailboat
- How to Use a Sailboat's Outhaul
- How to Use Roller Furling
- How to Attach Jib Sheets With a Soft Shackle
- How to Use a Topping Lift
- Best Sailing and Boating Apps
- Using AIS on Your Sailboat

By Product Categories
Small Boat Blocks
Big Boat Blocks
Complementary Hardware
Travelers & Genoa Leads
Mainsail Handling
Headsail Handling
Mooring Solutions
Spare Parts
Accessories
Harken Canvas
Sportfishing
Fly Soft-Attach Blocks
Carbo Air Blocks
Small Boat Classic
Flip-Flop Small Boat
GP Catamaran Ceramic Mainsheet Systems
Protexit™ Exit Blocks
Through-Deck
Wire High-Strength
Dinghy Vang
Small Boat Deck Organizers
Midrange Classic
Midrange Deck Organizers
Zircon Blocks
Element Blocks
Black Magic Air Blocks
Cruising ESP Blocks
Megayacht Blocks
Stainless Steel Blocks
Black Magic Air Runners
FlatWinder Powered Blocks
Mastbase Blocks
Over-the-Top
Crossover Blocks
Big Boat Deck Organizers
Cam Cleats & Kits
Cam Cleat Accessories
Cam Cleat Bases
Stand-Up Bases
Deck Organizers
Spinnaker Pole Cars
Soft Attachments
Fixed Padeyes
Removable Padeyes
Bolt-Down Fairleads
Grand Prix Jib Leads
Halyard Tensioners
Tiller Extensions
Peter's Desk Drawer
Dinghy Jib Leads
Crossbow Pivoting Self-Tacking Jib Traveler
13 mm Micro
22 mm Small Boat
27 mm Midrange
32 mm Big Boat
Windward Sheeting
42 mm Mini-Maxi
T-Track Genoa Lead
Access Rail System
13 mm AA Battcar System
22 mm A Battcar System
27 mm B Battcar System
32 mm C Battcar System
18 mm Switch Battcar System
26 mm Switch Battcar System
26 mm Trysail Switch
32 mm Switch Battcar System
32 mm Trysail Switch
40 mm Switch Battcar System
40 mm Trysail Switch System
Furling Mainsail Outhaul Systems
Single Line Reefing
Harken Vang-Master
Carbo Racing Foil
Small Boat Furling
Small Boat Underdeck
Reflex Furling
MKIV Jib Reefing & Furling
MKIV Underdeck Jib Reefing & Furling
Furling Accessories
Powered Furling
MKIV Ocean Furling
SnubbAir (Not a Winch)
Grand Prix Winches
Air Winches
Circuit Breakers
Analog Switches
Digital System Switch
Aluminum, Chrome & Bronze Winch Handles
Carbo OneTouch Locking Winch Handle
Service Kits
CLR Mooring Winches
Electric Captive Reel Winches
Hydraulic Captive Reel Winches
UniPower Radial
Single-Acting Integral Backstay Adjuster
Single-Acting Cylinders
Locking Cylinders
Double-Pull Cylinders
Grand Prix Cylinders
Hydraulic Cylinder Rod End Blocks
Hydraulic Cylinder End Fittings
Control Valves
Control Manifolds
Control Panels
Compact Control Panel
Rotary Pumps
Hydraulic Pump Handles
Power Systems
Repair Kits
Ball Bearings
Block Spare Parts
Traveler Cars
Furling Spare Parts
Winch Spare Parts
Winch Service Kits
Blockheads Gear
Promo & Gifts
Marine Grip
Blue Performance
Jeep/Truck tops
Garage storage
One-design Covers
Boat accessories
Canvas bags
By Type of Sailing
Dinghy / One-Design
Offshore Racing
Coastal / Day Cruising
Bluewater Cruising
Megayachts / Custom
Service Guide
Tech/Service
deck layouts
Data Sheets (SDS)
How to choose
System diagrams
Calculators
Reeving diagrams
Traveler Purchase Selection Guide
How to Choose
Testimonials
Hoister Videos
Request a Quote
Request Samples
Fabric details
Cover Styles
Canvas Videos
Contract Services
Materials and Components
Our Equipment
Contract Cut-and-Sew Project Spotlight
- Harken at the front
- Safety & Rescue
Support / Selection tools

Backstay Adjuster Systems
Backstay adjusters allow racers and cruisers to adjust and control mast rake and headstay tension. Adjusting the backstay shapes the main to optimize upwind and downwind performance. On racer/cruisers, tightening the backstay increases headstay tension for upwind sailing, while loosening the backstay offwind reduces weather helm. When selecting blocks or systems for backstays, make certain blocks match or exceed the wire or line breaking strength. Typical Boat Length: Small Boat: 22' - 28' (6.7 - 8.5 m) Midrange: 29' - 34' (8.8 - 10.4 m) Big Boat: 35' - 42' (10.7 - 12.8 m)

Boom Vang Systems
The vang allows vertical adjustment of the boom, and is an extremely important tool to shape the main for speed. Tension the vang to tighten the leech, flatten the sail and bend the mast. Cruisers use the vang to keep the boom from rising when sailing downwind and abraiding the main.
Typical boat length: Small Boat: 22' - 28' (6.7 - 8.5 m) Midrange: 29' - 34' (8.8 - 10.4 m) Big Boat: 35' - 42' (10.7 - 12.8 m)

Cunningham Systems
The cunningham controls the fore and aft position of draft in the mainsail or genoa and works together with the traveler, mainsheet, outhaul and vang to optimize sail shape and increase boatspeed. Cunningham controls lead to the crew to encourage adjustment as wind speed changes.
Typical Boat Length: Small Boat: 22' - 28' (6.7 - 8.5 m) Midrange: 29' - 34' (8.8 - 10.4 m) Big Boat: 35' - 42' (10.7 - 12.8 m)

Genoa Lead Car Systems
Genoa lead cars allow sailors to change the sheeting angle of the genoa so the sail has a more efficient shape. Not only for racers, people with furling genoas need adjustable leads when genoas are partially furled. Cars are available in both T-track and ball bearing configurations.

Mainsail Reefing Systems
Mainsail reefing systems must operate effciently to reduce sail under adverse conditions and provide proper sail shape when reefed. These systems are a must for both racers and cruisers.

Mainsheet 2-Speed Systems
These dual purpose systems offer sailors the option of either speed or power. They are used for mainsheets on small to medium-sized offshore boats where power is required for effective heavy-air trimming upwind, but speed is crucial for off-wind trimming and mark roundings.

Mainsheet Systems
Mainsheets are simple hardware systems, but are among the most important as they are in almost constant use.

Mastbase and Cabintop Blocks
Mastbase and cabintop blocks allow crew to raise, lower and trim sails from the cockpit. A variety of specialized blocks have evolved for routing lines aft.

Outhaul Systems
The outhaul controls and shapes the mainsail. Ease the outhaul to increase draft and power up the sail. Tighten the outhaul to flatten the sail and reduce drag and heel in heavy air.

Self-Tacking Jib and Staysail Systems
Self-tacking jibs and staysails are popular on boats of all sizes because tacking is nearly automatic, with no need to haul in or release a sheet. They work well with furling systems and with jib booms. Calculate loadings for traveler cars and blocks using the following Genoa System Loading Calculator.

Spinnaker Pole Handling and Halyards
Both racers and cruisers benefit from adjustable spinnaker pole cars. Racers use adjustable cars to square the spinnaker pole’s inboard end to the horizon and help with dip pole jibing. Cruisers use the car to level the whisker pole when sailing downwind wing-and-wing and to store the pole against the mast when not in use.

Traveler Systems
Traveler controls must be powerful enough to move the car easily under load and lead to a position where crew can conveniently operate them. Smaller boats usually position controls so the helmsman can make adjustments. Larger boats position controls for the mainsheet trimmer.
Standard Boat Length: * Small Boat: 22' - 28' (6.7 - 8.5 m) Midrange: 29' - 34' (8.8 - 10.4 m) Big Boat: 35' - 42' (10.7 - 12.8 m)
*Refer to Ordering Travelers Chart for in-depth specifications by boat type.

Spinnaker Systems
A well-designed system makes all the difference when setting, flying and jibing the spinnaker. Trimming involves three adjustments: raising or lowering the pole, moving the outboard end of the pole forward or aft, and pulling in or easing the sheet.
Product Categories
- United States
- New Zealand
- United Kingdom

- Forums New posts Unanswered threads Register Top Posts Email
- What's new New posts New Posts (legacy) Latest activity New media
- Media New media New comments
- Boat Info Downloads Weekly Quiz Topic FAQ 10000boatnames.com
- Classifieds Sell Your Boat Used Gear for Sale
- Parts General Marine Parts Hunter Beneteau Catalina MacGregor Oday
- Help Terms of Use Monday Mail Subscribe Monday Mail Unsubscribe

In Boom Outhaul
- Thread starter drewlamparello
- Start date Mar 14, 2021
- Catalina Owner Forums
- Catalina 275
drewlamparello
Does anyone have a diagram of this rig in the boom. Jibed the boat yesterday and the line parted. Opened the back of the boom and clearly it separated from the exposed end that was in the Sun... Once again the splices on the lines can't handle UV.
Claude L.-Auger
Hi Drew. My boom is a Kenyon so I don't know if you have the same system, but it seems pretty common. As per the attached picture, the steel line going through the end of the boom to the outhaul is attached to a block and tackle rig (left side of picture). On my boom, the Internal Outhaul Tackle a 4-1 purchase. Block and Tackle assembly includes 25' of 5/16" line and 13' of 1/8" wire spliced to the Blocks. Becket block attaches to bolt at forward end of boom, line exits through centerline gooseneck sheave, wire exits through centerline sheave in outhaul assembly. The bolt securing the forward boom bail runs through the shackle of the other block (right side of picture), securing the rig to the inside of the boom. The outhaul line goes to the forward end of the boom and exits in the center. In my case, I have it running through a block at the bottom of the mast then to the cockpit through deck organizers. Hope this helps. (FYI Étarque is French for Outhaul)
Attachments

drewlamparello said: Thanks for the info. I believe its more simple like this one without the added purchase. I could be wrong as I really can't see there. Any one with a seldon mast/ boom know? View attachment 191518 Click to expand
Are you sure that the outhaul line is broken? Two years ago in high wind and max outhaul tension my outhaul line popped. I thought is had broken. I remove the boom end, fished out the line and found it intact. It had released from the open hook outhaul car. I reattached it, installed a replacement retention washer of appropriate thickness (which was not easy to source) and all has been fine since. You will need to make sure that the nylon washer fitted under the outhaul car hook is thick enough to retain the outhaul line. Another option that I've considered is to attach the outhaul line to a small shackle and secure the shackle under the outhaul hook.
Tried to help by looking at the downloads for a Catalina 275. see link https:// catalina .sailboatowners.com/dl/downloads.php? task=model&mid=275&model=275 what I get is Downloads for the Pearson 42 Sorry! There are currently no downloads available for this model.
PMK said: Are you sure that the outhaul line is broken? Two years ago in high wind and max outhaul tension my outhaul line popped. I thought is had broken. I remove the boom end, fished out the line and found it intact. It had released from the open hook outhaul car. I reattached it, installed a replacement retention washer of appropriate thickness (which was not easy to source) and all has been fine since. You will need to make sure that the nylon washer fitted under the outhaul car hook is thick enough to retain the outhaul line. Another option that I've considered is to attach the outhaul line to a small shackle and secure the shackle under the outhaul hook. Click to expand
drewlamparello said: Does anyone have a diagram of this rig in the boom. Jibed the boat yesterday and the line parted. Opened the back of the boom and clearly it separated from the exposed end that was in the Sun... Once again the splices on the lines can't handle UV. Click to expand
I have the same setup as Claude has in a Kenyon boom. Both he and I have a steel wire connecting to the sail clew. That eliminates any concern from UV deterioration. You need not copy your original design. One possible reason that you cannot extract your block assembly (if used) is due to bail fastening bolts passing entirely through your boom. Simply pull them out and the block assembly should slide out. BTW I believe the sketch above to have an error in the line path near the lower end.
SteveLKN said: Here is the drawing from the 275 owners manual View attachment 191823 Click to expand
RoyS said: I have the same setup as Claude has in a Kenyon boom. Both he and I have a steel wire connecting to the sail clew. That eliminates any concern from UV deterioration. You need not copy your original design. One possible reason that you cannot extract your block assembly (if used) is due to bail fastening bolts passing entirely through your boom. Simply pull them out and the block assembly should slide out. BTW I believe the sketch above to have an error in the line path near the lower end. Click to expand
With reefing lines and outhaul line slack, can you pull out the outhaul line and the reefing car from the aft end of the boom? If not, access to the outhaul line may be from the forward end of the boom. I've been having problems keeping my outhaul line on aft hook of the outhaul car. It pops off easily. So I'm considering eliminating the car. I'll attach the outhaul line directly to a shackle on the clew. The clew is secured to the boom with a velcro strap. Has anyone tried this arrangement and found it to work well, or has anyone switched to an outhaul car that securely attaches to the outhaul line?
- This site uses cookies to help personalise content, tailor your experience and to keep you logged in if you register. By continuing to use this site, you are consenting to our use of cookies. Accept Learn more…

IMAGES
VIDEO
COMMENTS
Flatten Your Mainsail Foot With an Outhaul You're familiar with basic mainsail running rigging, right? The halyard hoists it up the mast and the main sheet adjusts the angle of the sail to the hull. Both lines are important but they don't adjust the aerodynamic shape of the mainsail, which can make a big difference if you want to get the best performance out of your mainsail.
sailingdog. If you're leading the running rigging aft, you can often get away without any outhaul block and tackle system, since you'll have a winch at the cockpit to tension the outhaul line. That's how mine is setup now. Maintaining the blocks in the boom can be a royal PITA. BTW, Faster's diagram is showing two fiddle blocks, one with a ...
The outhaul on a sailboat is one of the controls, part of the boat's running rigging. The outhaul is a line that connects to the clew of the mainsail (the ring in the lower aft corner) and pulls the sail back toward the end of the boom. On most boats, this line or wire cable passes around a block (pulley) down into the boom, as shown in this photo.
1. the outhaul runs forward thru the two fairleads on the top of the boom, to the aft-most large cleat with no need to use the winch. 2. the Each reef line starts on one of the port-side eyes, up thru the leech, back down through one of the turning blocks, then forward to one of the two cleats. Us the winch when setting the reef.
The outhaul controls and shapes the mainsail. Ease the outhaul to increase draft and power up the sail. Tighten the outhaul to flatten the sail and reduce drag and heel in heavy air.
An outhaul is a control line found on a sailboat. It is an element of the running rigging, used to attach the mainsail clew to the boom and tensions the foot of the sail.
Sailing Instructional Video. Discuss this video and anything sailing on my forum www.anything-sailing.com . A video on main sail outhaul adjustment and prin...
The the outhaul s one of three primary sail control systems on the Laser / ILCA sailboat (along with the cunningham and boom vang). West Coast Sailing offers everything you need to complete the outhaul rigging on your boat, including complete rigging kits, pre cut lines, blocks, and more.
The outhaul line in a J/109 sailboat has a block and tackle concealed inside the boom to provide mechanical advantage when adjusting tension on the foot of the mainsail. When the line needs to be ...
The running rigging on a sailboat is the lines and ropes controlling the sails and equipment. Get in the cockpit, and let's cruise through this guide together!
How to Build a Laser 6-1 Outhaul System. The Laser 6-1 outhaul system is now the standard that comes with all new boats. If you are finding your outhaul is very difficult to adjust it may be time to upgrade your system.
When it comes to running rigging, cruising sailors can learn a lot from racers, and in the process maximize their fun while getting the most out of their sails, hardware and lines. This rendering of a roughly 40-foot cruising boat shows a deck layout optimized for performance sailing, with plenty of lines that are well-led for trimming and ...
One of my winter projects is to set up a pulley system inside the boom to adjust outhaul tension. One approach that looks good to me is shown in "Outhaul Plan A". Another is "Outhaul Plan B" I do not have the hang of figuring out mechanical advantage ratios. Could someone tell me what the...
You should have enough purchase on your outhaul system that by the time it gets to the final line you pull on there shouldn't be enough load on line to make a big difference on what line you use. You don't want any stretch in the system and you want it to run as smooth as possible. I have a 1/4" spectra blend line but after a wire system that has a total purchase of 12 to 1. I use a ...
How to properly attach outhaul rigging to the mainsail/boom on early 70's (not sure if it is 71 or 72) Macgregor 22. Just in case alterations have been made from the default, here is the description:u000bOn starboard side of the boom there is a small block toward aft and jam cleat about 4 feet in front of it; on port side of the boom there is ...
First, thanks in advance... I've been reading so many great threads in here. New to me 2008 Laser and I cannot get the outhaul rigged right. A few items: (1) Is the bungee to pull the outhaul back in? (2) There is a small pulley on the end of the thin outhaul line that attaches to the thicker...
The outhaul should be tensioned to flatten the sail to depower in heavy winds or when needing to point high. This change may be made just prior to a decision to reef the sail. The outhaul should be detensioned to increase the draft in light winds and probably also in heavy seas. As is the case with most mainsail controls, the outhaul is rarely ...
Support / Selection tools / System diagrams. Cunningham Systems. The cunningham controls the fore and aft position of draft in the mainsail or genoa and works together with the traveler, mainsheet, outhaul and vang to optimize sail shape and increase boatspeed. Cunningham controls lead to the crew to encourage adjustment as wind speed changes.
Hunter 310 1998. Tried getting other 310 owners to chime in on the specific forum but not much luck. Tried to replace outhaul and was blindsided by a block hidden in the boom. I thought it was just a straight in then out 1:1 purchase. It seems there is an eye inside the boom where the rope is...
Learn to use a mainsheet traveler to get the best sail trim and boat speed by centering the boom upwind, trimming, and experimenting with your boat.
2. Hunter Hunter 37.5 Ledgend 37 Jordan Creek. Oct 28, 2020. #1. I have purchased a 1993 37.5 Legend. The running rigging and sails were missing. I think I have every thing figured out but the outhaul. There is a triangle slide in the track of the boom that the is pulled back to a pulley inside the end of the boom but where does the line come ...
Cunningham Systems. The cunningham controls the fore and aft position of draft in the mainsail or genoa and works together with the traveler, mainsheet, outhaul and vang to optimize sail shape and increase boatspeed. Cunningham controls lead to the crew to encourage adjustment as wind speed changes. Typical Boat Length: Small Boat: 22' - 28' (6 ...
On my boom, the Internal Outhaul Tackle a 4-1 purchase. Block and Tackle assembly includes 25' of 5/16" line and 13' of 1/8" wire spliced to the Blocks. Becket block attaches to bolt at forward end of boom, line exits through centerline gooseneck sheave, wire exits through centerline sheave in outhaul assembly.