The Cape Dory Board
This bulletin board, hosted by the CDSOA, Inc., is the on-line meeting place for all Cape Dory owners and groups. We welcome everyone's questions, answers and comments about Cape Dory sailboat
Skip to content
- CDSOA Home Page
- Board index Cape Dory Discussions Cape Dory Project Descriptions & Project Photos

Cockpit Coaming Rebuild
Moderator: Jim Walsh
Post by John Stone » Sun 9/25/22 9:29 pm
Re: Cockpit Coaming Rebuild
Post by JD-MDR » Mon 9/26/22 2:06 am
Post by John Stone » Mon 9/26/22 2:21 am
Post by Jim Walsh » Mon 9/26/22 2:32 am
Post by John Stone » Mon 9/26/22 4:12 am
Jim Walsh wrote: I presume my cockpit coamings were bedded at the factory but it must have failed at some point in the past. Since I would never entertain the thought of removing them, as you have, I put a small bead of teak colored Life Caulk where they join against the side decks. It lasts for about three seasons but it’s simple to remove and renew. It’s interesting to see a proper removal and rebedding process documented. It helps to reaffirm my decision not to undertake the task Good luck.

Post by wikakaru » Mon 9/26/22 2:17 pm
Post by John Stone » Mon 9/26/22 2:45 pm
wikakaru wrote: I was expecting from your description to see the coamings split into multiple pieces. In the photo they look good. Is the damage on the other side? Good luck with the project! Smooth sailing, Jim
Post by wikakaru » Tue 9/27/22 11:04 am
John Stone wrote: Some sections of wood peeled from the plank held to the fiberglass by the 3M 4000. I'll post some more pics when I have cleaned it up. I'm not really concerned if I decide to make new ones--not difficult or particularly expensive. Two 10' long by 10" wide by 1" think unmilled A. Mahogany is about $150. But once I strip the varnish and bedding compound I will be able to examine them much more closely. If I can fair in the damaged areas with thickened epoxy or even grave in some pieces and since it will be unseen faced against the fiberglass I may do that. MTF.
Post by John Stone » Tue 9/27/22 12:34 pm
Post by John Stone » Wed 2/22/23 6:16 pm
Post by John Stone » Wed 2/22/23 6:44 pm
Post by John Stone » Sun 3/5/23 11:10 pm
Post by John Stone » Thu 3/9/23 8:55 pm
Post by John Stone » Sat 3/11/23 3:45 pm
Post by Jim Walsh » Sat 3/11/23 11:41 pm
Return to “Cape Dory Project Descriptions & Project Photos”
- Cape Dory Discussions
- ↳ Cape Dory Sailboats
- ↳ Cape Dory Powerboats
- ↳ Buy/Sell CD Boats & Gear
- ↳ Cape Dory Eye Candy
- ↳ Cape Dory Project Descriptions & Project Photos
- Cruising Solutions
- ↳ Cruiser's Corner
- ↳ Underway Gourmet
- ↳ Club Cruises & Races
- ↳ Float-ins
- ↳ Land-based & Other Activities
- ↳ Rendezvous
- ↳ General Events
- Message Board Tech
- ↳ About this Board
- ↳ Sandbox
- Board index
- All times are UTC
Powered by phpBB ® Forum Software © phpBB Limited
Privacy | Terms
BoatNews.com
Duracell project: Reinforced coamings for sailboat cockpits
To accommodate the fittings and protect Duracell's new cockpit, Matt manufactures new coamings. Ergonomically and structurally important parts.
A carefully thought-out geometry
The result of Matt's reflections several months earlier on the transformation of Duracell's cockpit for cruising use, the geometry of the coamings has been fixed to meet different needs. A slope at the stern will accommodate the autopilot display and possibly a bow thruster, visible from the helm station. A recess in the coaming will house the larger, aft-most winch, while the forward-most secondary winch and blocker battery will be located on top of the coaming. Part of the interior space will be used to store the crew's minor equipment: telephones, cranks, sun cream...
A structural challenge
Winches and blockers are subjected to considerable stress under sail , transmitted by halyards and sheets. The new coamings need to be sufficiently rigid. Matt therefore uses a sandwich with a core of coosa board, a reinforced foam he has already used in this restoration .
The main winch, partially recessed in the coaming, is bolted directly to the deck through an angled wedge to align with the blockers. The second winch and blockers are reinforced with unidirectional carbon at the base.
Tools and assembly
To complete the project, Matt pays particular attention to the order in which the parts are assembled, in order to keep them aligned. He also makes tooling, such as a circular cutting jig to the size of the winch base.
With its coamings, Duracell gets closer to the definitive back line.
- Forums New posts Unanswered threads Register Top Posts Email
- What's new New posts New Posts (legacy) Latest activity New media
- Media New media New comments
- Boat Info Downloads Weekly Quiz Topic FAQ 10000boatnames.com
- Classifieds Sell Your Boat Used Gear for Sale
- Parts General Marine Parts Hunter Beneteau Catalina MacGregor Oday
- Help Terms of Use Monday Mail Subscribe Monday Mail Unsubscribe
New coaming boxes for my boat
- Thread starter HukilauMike
- Start date May 9, 2018
- Forums for All Owners
- Ask All Sailors

HukilauMike
I've drilled holes in my boat before to install new hardware and the like, but before this past weekend, I'd never cut big holes into the hull. Well, I've popped that cherry, so to speak. One thing that has always bothered my about my boat (an Oday 23) is the tangle of lines I get in the cockpit while sailing. The jib sheets, roller furling line and centerboard pendant line can make a mess in the cockpit while underway. I've taken care of the roller furling line by installing a swivel cam block out of the cockpit to tame that mess. And I've trimmed the pendant line so that it is completely out of the way while extended. But the jib sheets have always been a problem. I've always thought that a couple of storage boxes tucked into the coamings would nicely take care of the problem. One year, I went so far as to measure out which of the many aftermarket options would fit. But I never pulled the trigger; there was always something higher priority to fix, install or ignore. But over the past year, I've been watching Mads on the Sail Life Youtube channel, and I've been inspired. So this winter, I ordered two coaming boxes, and I planned how to install those bad boys this spring. My biggest question: what tool do I use to cut into the coamings? I figured my choices were a small circular saw, or an angle grinder with a cutting wheel. After researching both options, I decided on the angle grinder/cutting wheel. So a couple of weekends ago, I tried out my new tool, and it cut into the coaming very easily. But it couldn't seem to go deep enough to cut all the way through, mostly because of the blade guard. And when I maneuvered it around so that I could push the wheel deeper into the glass, the cutting wheel shredded itself. Ugh. Time to rethink things. The coaming box manufacturer recommended using a "saber saw". I don't have a saber saw, but I do have a jig saw. I just wasn't sure if it had enough juice for the job. Rather than go out and buy a bigger jig saw immediately, I figured I would give my old unit a try. I bought some new blades, suitable for cutting metal, and headed back to the marina. In order to get the blade in, I had to drill large holes at each corner of where the box would go, and fortunately, the jig saw made relatively quick work of the rest. Plenty of power. Below is a picture of the hole, and a picture of the installed coaming box. This first box went so quickly, I was encouraged that the second one would be even easier. Not so much. I made the mistake of assuming that the area behind the coaming on the starbord side was as empty as it was on the port side. It was not. My first clue was when I drilled the corner holes for jig saw access; it seemed like the glass was thicker than on the port side. This was repeated when I put the jig saw to the coaming. But I really knew things would be different when the cut-out piece of coaming didn't fall into its hole when the cuts were complete: something was clearly in the way. I removed the piece of coaming, only to see an edge of an interior pan in the way. Oday, which never seemed to make neat appearances a high priority, for some reason "finished off" the aft end of the area behind this coaming with a piece of gelcoated glass. This is only visible from the cabin if you stick your head into the space behind the sink; this "bulkhead" is also behind the water tank and is just not accessible. It is also clearly non-structural as it wasn't tabbed to the hull or the coaming, and is only about 1/8" thick. Using the jig saw, but mostly the angle grinder (this time with a grinding wheel, so it turned out to be useful for this job after all), I was able to take away enough material from it to fit in the other coaming box. All in all, it took about an hour and a half to install both boxes. Their stark white color is quite the contrast to the faded gel coat on my 1979 boat, but I can't wait to try them out! And I cut holes in the boat!
Attachments

Nice job! Where is your get the combings from?
Jonosdad said: Nice job! Where is your get the combings from? Click to expand
- This site uses cookies to help personalise content, tailor your experience and to keep you logged in if you register. By continuing to use this site, you are consenting to our use of cookies. Accept Learn more…

- My Boats & Boat Articles
- Boatbuilding Plans
- Free Stitch and Glue Boat Plans

Steps in Building a SCAMP sailboat
Links to all my scamp building pages.
The Cockpit Coaming which act as Backrests and Cockpit Fence
There is probably a very salty name for this but I don't know it. I'll go for coaming. This is a fence and splash guard, that runs on the inside of the side decks and acts as back rest for the seats. It would also add stiffness to the structure.

I spent some time sanding and smoothing out under the decks. I also added some fillets and a final coat of epoxy. Not much to show. Not my favourite job, but eventually the epoxy was smooth enough for me. Since this will not show, I'm only going to finish enough so that it's waterproof, well glued in and does not snag anything that might get put in there.
I'm getting good use of the Dremel Sander. The triangular foot can get in corners and in narrow areas. The papers are quite expensive and I try to use it sparingly. If I could find large sheets of velcro paper I could cut out the triangles. I'll ask Mr. Amazon if there is any out there.

I also glued in some plywood reinforcements under the spots where I plan to screw on some mooring cleats. This was epoxied in, sanded, and filleted.
I also spent time smoothing out the drainage holes cut in the bulkhead that allow water to move and not pool against the bulkheads.
Fitting the pieces.

I did a final fitting before putting glue on to check that the coaming would go in with no surprises. After a little tweaking it went in.
The piece is stiff and it's tricky to muscle it in place. It slots in between the cuddy side and the carlings that support the deck. It follows the curve of the deck. I'd made the gap just a little too narrow and had to chisel off a layer of ply from the fence. Not difficult when you have sharp just sharpened chisels. --- self satisfied grin goes here.

Eventually I was satisfied it would glue up cleanly so I put some glue down and clamped the coaming in position. We have had very cold weather and the shop is not warm so I had extra working time with the epoxy. It's not complicated but because the plywood needs to bend it was a bit tricky to get it in place and clamp it.
After cleaning up any squeezed out glue and making sure everything was lined up I was able to check everything again and left the epoxy to set. The shop was warming up and I put an extra log on the fire.

Where the fence meets the side of the cuddy, there is a V shaped space that gets a piece of plywood to close in the fence. I cut and fitted this gusset but did not glue it in quite yet. I wanted to have the piece to make sure the angle of the starboard side was the same as the just done port fence.
I spent some time checking the fit of the starboard fence. No surprise there. I went on to glue the second side. There was a slight gap between the coaming and the deck because I had sanded the supporting carling and had rounded the profile very slightly. A little extra epoxy glue fixed that. A quick clean and making sure that the angle of the fence was the same as the other side, I left everything to set.
I'm not sure why this step had worried me but I was relieved that it had gone well. The manual instructions were just a little vague and the photos were not as helpful as I would have liked.
The next step is to fit and glue in the little triangular gusset pieces and put a strip of wood on the outside edge of the coaming.
Both the deck and the coaming have no pencil marks and could be left natural colour. I'm not planning to have a lot of wood showing. I'll decide later. For some reason, varnished wood is a lot more maintenance than painted wood. It's much prettier though.

Both sides glued in and ready for the coaming cap. A strip of wood that gets attached to the edge to strengthen the coaming and get rid of the sharp edge.

With the coaming in place I was able to make a pattern and cut the cuddy side doubler. It reinforces the opening and covers the cuddy side and coaming connection. I noticed that the 2 sides were not absolutely the same. I think this is a result of the bulkhead plywood being slightly warped.
It reinforces the opening of the cuddy.

I glued the doublers and once set, I was able to even out and sand the 2 glued edges. I wanted to do this before closing in the side in case it made it more difficult to access.

I dug up my steaming apparatus. It's a large coffee can with a hole hear the top. There is an insulated curtain rod/pipe that runs to a aluminium dryer vent pipe. I heat the water on a portable induction hotplate. I had a better lid but it rusted so I used a metal plate with bricks on top. It worked well enough. I insulated the pipe with whatever sweater, shirt, scarf and cardboard I had around. The wood is only 5 feet long so it's not a long set up.

I left the wood in the steamer for over an hour. I worked fast to clamp each piece onto the coaming. I left it on for a couple of days and it seemed to work very well.
I'm using ash. There is a great abundance of it right now because all our beautiful ash trees are being decimated by the Chinese Emerald Ash Borer. This wood has been kiln dried in a local mill. It's lovely to work with. I made my gunwales with it as well.

I made a cardboard pattern to fit the gusset and to my everlasting amazement, both sides were exactly the same. I marked the patterns on the plywood, cut it on the band saw and spent some time fitting it into the space.

I cut some bevels on the sides and once I was happy the pieces were fitting well, I glued them in. That proved to be a comedy of errors. I had a huge amount of trouble clamping the pieces in. Eventually I won but it was a good fight. When the epoxy set I was able to round the edge and put small fillets to allow the glass to fit on better. The glass went on without any trouble. It set overnight.

After cleaning up the excess glass cloth and scraping the edges to flatten them I started fitting the coaming cap. There is a small piece to fit along the gusset and the long piece which I had steamed, bent, and clamped. When I took the piece off, quite a lot of it had stuck to the epoxy. I guess the wood was hot enough to slightly soften the set epoxy and under pressure stuck to it. It came off with no damage but the epoxy definitely softened.
It took me a long time to fit the small piece because it's hard to measure and copy the compound angles. Eventually it was good enough. After sanding and roughing up the edges of the coaming and wooden cap, I glued and clamped it in position, cleaned up the squeezed out epoxy and checked that it was in position.
The wood had enough curve because of the steaming, that I did not have any trouble clamping it in place. There was just enough epoxy that squeezed out to show that it was well glued. It will set overnight and I'll finish putting in the small piece.
I'm debating weather I will put some screws in the wood. I'm not completely happy using just glue when the wood is under tension. I'll keep a few clamps on the wood till I have to decide.

I spent some time fitting the smaller pieces at the gusset and very end of the cap. After a quick sand and dust I glued the small pieces front and back.
The 2 sides are now glued and ready to be cleaned up, shaped and sanded. I also have to decide where and how and where to attach the oar locks before I modify the cap.

I like this sort of job. I spent a pleasant few hours listening to music and trimming the coaming caps. (Did you know that Bob Marley actually recorded "I shot the Sheriff" in French?) The front and back were oversize so I used the Japanese saw to get most of it off.

The coaming cap is now smooth. The back is mostly done except for some rounding and sanding on the underside. The front angle is just a bit odd. It comes from the actual angle of the gusset piece. I photographed it at the angle where the bottom looks the worst. I might have to add a small piece of wood to smooth out the flow of the cap and give me the proverbial fair curve.

The coamings are essentially done now. I will use the router to round the profile once I've decided how to install the rowing hardware. I still have to add a whole lot of very visible (so quite scary) fillets.
emails: Christine
If you decide to build a boat be careful. These tools can be dangerous. If you don't know how to safely handle something find out. There are lots of forums out there.
This web site reflects my personal ideas and doesn't represent anyone else's point of view. I don't claim to be an expert in anything, just someone muddling along.
I pay for maintaining this website by having links to Amazon.com. I choose the ads to be relevant to the content. Mostly stuff that I buy myself or lust after. If you buy after clicking one of the links I get a small fee.
I live in a mostly rural area and suppliers of boatbuilding stuff are pretty thin on the ground. Amazon has proved to be a reliable and well priced resource.
If you decide to build a boat be careful. Some of the tools and materials can hurt you. I offer this page for entertainment and don't want to imply that my method or ideas are necessarily the best way to do things. It just worked for me.
- 1-800-455-3917

- Coaming Hatches

COAMING HEIGHTS Standard height coamings are: 6” 12” 18” 24” Custom heights available – Please allow 6-10 working days.
Showing all 3 results
- Hatches By Shape
- Hex-Bolt Strongback
- T-Handle Strongback
- Quick Acting, 4 Dog
- Low Profile, QuickActing
- Multi-Bolt Manholes
- Universal Steel Hatches
- Hinged Hatches
- ABS Certified Hatches
- Hatches by Materials
- Hatch Replacement Parts
- Deck Fittings
- Cut-Out Dimensions
- Download Library
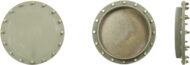
Clean-Out Hatch – Round 14″ &18″ Raised Coaming
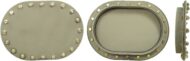
Manhole – 15″ X 23″ Raised Coaming
Hatch Categories
Connect with us.


The $tingy Sailor
Diy trailerable sailboat restoration and improvement without throwing your budget overboard.

Add More Cockpit Seating With DIY Stern Perch Seats
Small sailboats don’t offer a lot of seating options in the cockpit. Four adults are about the maximum that will leave room for the skipper to work the helm. For casual cruising, that means everyone is in the cockpit, not hiking out on the coamings or side decks. Most sailboats will accommodate six in the cockpit while moored with the tiller out of the way but that can be crowded. You can give your guests more room or yourself more seating options with seats mounted on the stern pushpit.
Before I continue, a bit of legal housekeeping. This post contains affiliate links. That means I receive a small commission if you make a purchase using those links. Those commissions help to pay the costs associated with running this site so that it stays free for everyone to enjoy. For a complete explanation of why I’m telling you this and how you can support this blog without paying more, please read my full disclosure .
Stern perch seats make sitting on the pushpit railing more comfortable. Back when I used to do all my docking maneuvers with the outboard tiller, I often sat on the railing for better forward visibility and for room to steer the outboard. Now I leave the outboard motor locked in the centered position and steer with the rudder exclusively. But I still like to sit on the pushpit occasionally for a change of view or to see over the bimini.
You can spend hundreds of dollars for factory-built seats like those from Zarcor shown below or you can make your own with simple tools and materials and a little imagination. You can make them out of any material that you want, for example, Starboard by King Plastics or teak plywood—in my case, recycled old crib boards.

Custom Stern Perch Seats Step-by-Step
To make your own custom stern perch seats:
- Use cardboard to make a template that fits the shape of the corners of your pushpit. Overlap the railing enough for three clamps underneath the seat. The shape and size of the seat should be comfortable but compact. Avoid shapes that get in the way of the main sheet when on a reach, bimini attachments, or the lazarette lids. Make the size easy to stow when you’re not using the seats.
- Transfer the shape to your seat material and cut out the seat with a jigsaw or bandsaw.
- Smooth the edges until the curves are fair.
- Round over the edges with a router and/or sandpaper.
- If you are using wood for the seat material, apply your favorite finish. Mine is teak oil and a clear varnish to let the beauty of the wood shine through.
- Temporarily attach three pole clips to your pushpit similar to the picture below. You want the clips to form a triangle to support the weight of a person sitting on the seat without the seat folding down.
- Position the seat board on the clips and mark the locations of the mounting holes on the bottom of the seat.
- Remove the seat and drill pilot holes for the mounting screws. Remember to not drill all the way through the seat!
- Remove the clips from the railing and screw them to the seat with stainless steel pan head sheet metal screws that are shorter than the seat board is thick.
- Snap the seat onto the pushpit whenever you want to sit high and dry. Unsnap it whenever you want to stow it or so that it doesn’t become a perch for messy birds.
Attachment and Other Options
I used three 1″ Sea-Dog Line Pole Storage Clips for each seat to make them easy to remove.

If you would prefer a more permanent mounting, use something like these Ancor Marine Grade Electrical Stainless Steel Cushion Clamps .

Most small sailboat pushpits are made with a single rail so a stern perch seat works more like a stool than a chair. Larger sailboats have taller pushpits with two rails, which makes a more comfortable seat. The seat attaches to the lower rail (possibly with a center support leg) and the upper rail serves as a backrest, especially if it’s cushioned.
Depending on how you attach your seats to the pushpit (permanent vs. removable), you might be able to make your seats more comfortable by shaping them more like an ellipse. I found that an elliptical shape didn’t work well with the rubber pole clips that I used. Weight on the front of the seat board unsnapped the middle clip at the rear of the seat. That’s why I made them shaped like a fat boomerang. They’re not as comfy as on a bigger boat but they’re not bad. Permanent clamps can hold more weight on the front edge of the seat.If you want to start with my design to make your own, there is
If you want to base your design off mine, there is a free, dimensioned drawing on the Downloads page that’s available to subscribers.

Experiment with different shapes to find what works best for you. Make prototypes out of wood scraps. Also, consider making your seats multi-purpose with built-in cup holders, fishing rod holders, a flag staff, or as a grilling prep table.
Would you like to be notified when I publish more posts like this? Enter your email address below to follow this blog and receive notifications of new posts by email. You will also receive occasional newsletters with exclusive info and deals only for followers and the password to the Downloads page. It’s free and you can unsubscribe at any time but almost nobody does!
Subscribe to Blog via Email
Enter your email address to subscribe to this blog and receive notifications of new posts by email.
Email Address:
Share this:
6 thoughts on “ add more cockpit seating with diy stern perch seats ”.
Stingy Sailor:
At lastâ¦An article that addresses a topic that actually interests me!
Seriously, I was beginning to consider unsubscribing.
Jim Roberts
Whoa, we can’t have that! I’m always open to what folks are most interested in. Use the Contact page to send me your suggestions. You’re opinion counts!
I was having trouble finding the starboard or teak locally, and the quantities online were more than we needed (and expensive). Solution? I went to Walmart and bought a large cutting board! Cut it according to plan, and it worked perfectly. Additional advantage, it’s made to get wet. Total cost of stern perch seat: $35 🙂
Great article. Love your site. 2 Questions regarding a Catalina 22:
Have you ever seen a good design of a DIY Stern rail?
Have you ever seen a good design of a solar panel mounted on the stern rail?
I have not seen an entirely DIY stern rail before but I have seen a few modified ones. If you have something unique in mind and access to the right tools or a good stainless steel fabricator, it shouldn’t be too hard.
I’ve seen two basic designs for stern rail mounted solar panels. The first is simple clamps like shown in the pictures in Installing a Solar Panel by the Numbers . The other design is basically two triangular brackets that raise the panel a little and move it aft outside the stern rail, which is a little more convenient.
If I were going to add a solar panel, I wouldn’t put it on the stern rail, though, because it would be constantly in the way of operating the outboard, the rudder/tiller, the backstay adjuster, fishing poles, swim ladder, and so on. I would probably get a flexible, roll-up panel that I could keep below while under sail and unroll on the cabin roof or foredeck while at anchor or docked. But honestly, I truly prefer recharging with the outboard motor like I describe in Upgrade Your Outboard Motor to Charge Your Battery . I don’t even have to think about my battery, it’s just always fully charged and ready to go with no extra gear in the way.
Hope that helps, $tingy
I have a question about the various types of tail clips that can be used
Leave a comment Cancel reply
This site uses Akismet to reduce spam. Learn how your comment data is processed .

- Already have a WordPress.com account? Log in now.
- Subscribe Subscribed
- Copy shortlink
- Report this content
- View post in Reader
- Manage subscriptions
- Collapse this bar
EC Coamings
- " onclick="window.open(this.href,'win2','status=no,toolbar=no,scrollbars=yes,titlebar=no,menubar=no,resizable=yes,width=640,height=480,directories=no,location=no'); return false;" rel="nofollow"> Print
Lots of Tips for the East Coast Guys and Their Wood Coamings
Jim Lydon, Swahili
I have recently aquired and cut replacement coamings for my Triton Swahili (East Coast) As a test both pieces have been pressed into place but not fastened in.
Briefly for those interested 3/4" Teak stock smooth- planed was used. I had fears of bending such expensive stock into the curveature of the cock-pit sides. Heres how I did the bending process. I cut a piece of 2X4 and laid it across both cockpit seats and up against the starboard coaming leaving enough room to lay a standard car jack on its side up against the 2X4 on the portside. Pad the end of the 2x4 against the coaming you are pressing into place. A few prayers were silently stated as I began cranking the coaming into place. It worked! You may have to repeat the cranking a second time towards the forward section of the cockpit to obtain a good tight fit. I plan on using 1 1/2" Phillips flat head stainless screws countersunk and bunged in.
The coamings are now in the process of applying 5 coats of Sikkens Marine Light and 5 to seven coats of Sikkens Gloss. ( I decided on Sikkens for its longivity)
If anybody needs information on the cutting, measurements, or the templates I designed feel free to ask.
This past weekend I finally installed the coamings, and all of the suggestions from the group were very helpful. I adhered to Jim Baldwins advice and utilized 2 auto jacks to press the coamings into place which made for a much tighter fit.
Just a few additional items that I discovered during the process that may be very helpful to those approaching the project. I drilled several test holes through the cockpit siding and upon retracting the bit, wood was noted on the bit. I reached up as far as I could and noted what felt like a 2x6 Dont quote me on the size, running not quite the whole length of the cockpit but centered along the wall maybe leaving a foot and a half on each end of the cockpit side. This provided extra support for any bolts or screws utilized. One of the group mentioned that he could not understand why the forward section of each coaming was bolted in and not screwed in. It was probably because at this point there was no wood backing, and bolts were uitilized So at this point I wish to put the coaming question to rest.
James Baldwin, #384, Atom
Regarding the cockpit coamings I can tell you a little about how I installed my new teak coamings on Atom while in Hong Kong eight years ago.
First I dry-fit them. While the coamings were held in place with two boards/jacks I drilled through the coamings and fiberglass for 6mm (1/4-inch) flat head SS bolts. I drilled out each hole with a spade bit for the wood plugs, going only as deep as necessary so as not to weaken the wood. I also ran some masking tape along the top edges of the coaming to fiberglass joining points. I then cleaned the mating surface of the bare teak with acetone to remove surface oils and applied 5200 sealant. Then I reinstalled the boards and tightened the bolts with fender washers behind the nuts. Later I coated the teak with urethane clear coatings. About once a year I give all exterior teak a light sanding with #280 and apply another coat.
Winch bases are likewise thru-bolted with backing plates. Mine are easily accessable through the cockpit lockers.
And I use 5200 to further insure a tight bond that will prevent the teak from cracking or trying to pull out the bolt heads.
Bill Bell "Kialoa" #41
Hi there - just a note to suggest that if you secure your handsome new coamings with screws with finishing washers, you'll be able to remove the coamings easily two or three years from now to give them a complete redo much more easily than when they are on the boat. I have removed the coamings from my "Kialoa" every few years for the past 33 and the job is very simple. Also - the original EC winch was held in place with five screws through the coamings into the side of the winch block and there is also a large bronze bolt that runs right down through the winch, base and deck with a 3/4 backing block under the deck. This is all accessible through the cockpit seat access hatches. For what it is worth, the two forward most coaming fastenings are bolts, not screws. Their heads are accessible in the galley and ice box areas. I am not clear on why these were bolted and all else screwed. Good luck.
Mark Parker, #516, All Ways
I, too, just finished new coamings. Mine, however, were 6/4 Mahogany (actual thickness=1 1/4") I cut an angled rebate in the portion that overlaps the fiberglass with the result that the coaming is tilted back at a much more comfortable angle. Needless to say, bending 6/4 mahogany was no easy task, but I followed a similar route except that I chickened out and left the wood to 'set' about three different times in the process of achieving the final curve. It is now 'permanently' attached with lots of 5200 and 6 silicone bronze screws which are recessed just below flush, but left exposed. I was worried about the small amount of wood left if I counter sunk them enough to bung. The tilt is very comfortable, but I must admit it was a pain when it came time to fit the forward blocking that ties the coaming to the cabin side - lots of trial and error and cardboard templates! I also added mahogany toerail/bulwark to the molded fg one. It is 3 1/4 by 1" (actual dimensions) I spliced 2 15' lengths to get each piece and then used thru' screws (#14) every 6", bedded in lots more 5200 (I really should buy stock in 3M ;>)
(See Steve Cossman, #534, Juno, Project Showcase)
My EC 589 had mahogany boards for coamings. I tried refurb, but they had enough rotten areas that it was futile. I replaced mine with 3/4 marine ply, cut and shaped using the old as templates. Then I multi-coated them with epoxy, using glass along the top edges for wear resistance, and then 3 coats of two-part epoxy paint. I thru-bolted them instead of screwing them in place. They've been on the boat for about 1-1/2 years and they're still as solid as the day I first set them. I have a photo if you're interested.
- Cabin, Galley, Head
- Deck and Cockpit
- Electrical Systems
- Electronics
- Odds an Ends
- Engine and Prop
- Rigging and Sails
- Tanks and Bilges
- Trailers and Cradles
- Odds and Ends
- Project Showcase
- Project Resources
- Improvement Bulletins
- Reading Room
- San Francisco Alberg Fleet
- National Triton Registry
Free Shipping On All Orders!
- Epoxy Resins
- Polyester Resin
- Urethane Resins
- Epoxy Project Supplies
- Antifouling Paints
- Topside Paints
- Thinners & Solvents
- Paint Supplies
- Wood Oils & Finishes
- Wood Finishing Supplies
- Cleaning & Polishing
- Accessories

Table Top Epoxy

Clear High Performance Epoxy Kits

5:1 Traditional Epoxy Resin Kits
- Thinners & Solvents

Wet Edge Topside Paint

Premium Marine Topside Primer

Spartan Multi-Season Antifouling Paint
- Wood Finishes
- Wood Oils & Finishes

Gleam Marine Spar Varnish

Lust Rapid Recoat Marine Spar Varnish

Halcyon Water-Based Marine Varnish

TotalBuff Rubbing Compound

TotalShine Finishing Compound

White Knight Fiberglass Stain Remover
- TotalBoat Gear

FlexFit Fitted Mesh Back Baseball Cap

Men’s Long Sleeve T-Shirt Hoodie

Women’s Long Sleeve T-Shirt Hoodie
FREE SHIPPING with a minimum puchase of $1,200.00 You are $10.00 away from your free shipping!
Shipping, taxes, and dicount codes calculated at checkout.
The Art of Boatbuilding – Scarfing Planks for the Coaming

The Art of Boatbuilding’s Bob Emser has built himself a beautiful wooden Joel White designed Haven 12 1/2. This week he’s building and attaching one of the most beautiful parts of his boat and he’s selected gorgeous walnut for the job. Bob is scarfing together three pieces of the walnut to use as the coamings, and he explains his process beautifully in this video.
Using High Performance epoxy thickened with wood dust from his walnut pieces, and a technique we recognize from Lou Sauzedde of steaming the planks in place with a home-built steaming bag, Bob gets the coamings dry fit and ready to finish. We can’t wait to see Bob pop the grain on the walnut with coats of Lust Varnish , coming in his next episode. Until then enjoy another joyful video from a true artisan who truly understands the “art” of boatbuilding. Happy Friday!
Leave a comment
Related articles.

Bottom Painting with Salty Sunrise
We’re excited to welcome a new ambassador to our marine community with this week’s featured video from Salty Sunrise! Kelsey and Tim of Salty Sunrise sold everything they owned seven...

Victoria the Tender Gets Some TLC
In the latest episode of Acorn to Arabella, we return to where it all began for Steve and his wooden boat, Arabella. This time however the focus is on Victoria, the...

Boat Restoration with Andy Miller and TotalBoat
This spring, we had the incredible opportunity to welcome boat repair wizard Andy Miller from the Boatworks Today YouTube channel to the TotalBoat Shop. Andy, a master in the art...

Antifouling Update on an Aluminum Boat with Whi...
It’s been over three years since we’ve featured Nike from White Spot Pirates, so we were very excited when she reached out recently needing help tackling some updates! Nike's aluminum...
- Choosing a selection results in a full page refresh.
Practical Boat Owner
- Digital edition

- Robert Melotti
- May 6, 2010
A vertical ridge or barrier, of wood, steel, fibreglass, etc., whose purpose is to keep water out. A cockpit usually has a coaming down each side, and perhaps all round. A deck hatch has one all round. Some hatches have a double coaming so that any water which gets past the outer one is channelled between the two and escapes through drains.

- [[html title]]
Stay in the loop! Never miss sale announcements, how-to blogs, new product launches, helpful tutorials and more!
- New Sailboats
- Sailboats 21-30ft
- Sailboats 31-35ft
- Sailboats 36-40ft
- Sailboats Over 40ft
- Sailboats Under 21feet
- used_sailboats
- Apps and Computer Programs
- Communications
- Fishfinders
- Handheld Electronics
- Plotters MFDS Rradar
- Wind, Speed & Depth Instruments
- Anchoring Mooring
- Running Rigging
- Sails Canvas
- Standing Rigging
- Diesel Engines
- Off Grid Energy
- Cleaning Waxing
- DIY Projects
- Repair, Tools & Materials
- Spare Parts
- Tools & Gadgets
- Cabin Comfort
- Ventilation
- Footwear Apparel
- Foul Weather Gear
- Mailport & PS Advisor
- Inside Practical Sailor Blog
- Activate My Web Access
- Reset Password
- Customer Service

- Free Newsletter
Dufour 44 Used Boat Review

Blue Jacket 40 Used Boat Review

Catalina 270 vs. The Beneteau First 265 Used Boat Match-Up

Ericson 41 Used Boat Review

How to Create a Bullet-Proof VHF/SSB Backup

Tips From A First “Sail” on the ICW

Tillerpilot Tips and Safety Cautions

Best Crimpers and Strippers for Fixing Marine Electrical Connectors

Solving the Dodger Dilemma

Polyester vs. Nylon Rode

Getting the Most Out of Older Sails

How (Not) to Tie Your Boat to a Dock
Fuel Lift Pump: Easy DIY Diesel Fuel System Diagnostic and Repair

Ensuring Safe Shorepower

Sinking? Check Your Stuffing Box

Why Choose the Wharram Design?

Winterizing: Make It Easy With Checklists

Boat Improvements for the Technically Illiterate

What Do You Do With Old Fiberglass Boats?

Stopping Holding-tank Odors

Giving Bugs the Big Goodbye

Galley Gadgets for the Cruising Sailor

The Rain Catcher’s Guide

Sailing Gear for Kids

What’s the Best Sunscreen?

UV Clothing: Is It Worth the Hype?

Preparing Yourself for Solo Sailing

R. Tucker Thompson Tall Ship Youth Voyage

On Watch: This 60-Year-Old Hinckley Pilot 35 is Also a Working…

On Watch: America’s Cup

On Watch: All Eyes on Europe Sail Racing

Dear Readers
- Sailboat Reviews
This slightly odd 30-footer, with its wishbone rig and catboat looks, is easily sailed and comfortable.
The Nonsuch 30 is an oddity. She is a fin keeled, spade ruddered boat with an unstayed wishbone cat rig. Weird.

She was built in Canada, whose main boatbuilding export has been C&C sailboats. Come to think of it, all her construction details look very much like those of C&C boats. This isn’t unusual, since George Hinterhoeller, the builder, was formerly the president of C&C, and one of the founders of the three company merger that created C&C Yachts.
When Hinterhoeller left C&C to recreate Hinterhoeller Yachts Ltd., he took with him those characteristics that have given C&C a reputation for quality: good attention to finish detail and high-quality balsa-cored hull construction.
The Nonsuch 30 is the concept of retired ocean racer Gordon Fisher, the design of Mark Ellis, and the created child of Hinterhoeller, who is one of the few production boatbuilders with the legitimate title Master Boatbuilder, earned the hard way through apprenticeship in Europe.
The Nonsuch 30 was originally a Great Lakes phenomenon, which is to be expected considering her origins. She proved quite popular elsewhere, however. This is not surprising considering the amount of boat that has somehow been slipped into an LOA of less than 31′.
Production of the Nonsuch line ceased in 1989.
Construction
George Hinterhoeller’s reputation as a builder is not unearned. His balsa-cored hulls are known for being light and strong. It is probably not an exaggeration to say that he knows as much about cored construction as any boatbuilder around.
Both hull and deck of the Nonsuch 30 are balsa cored. The hull and deck are joined by a through-bolted butyl-bedded joint capped with an aluminum toerail. The butyl tape used for this purpose has no real structural properties, but does create a good watertight seal. A sealant such as 3M 5200 provides equivalent sealant properties with greater structural properties, and we prefer its use in hull-to-deck joints. It is hard to quibble with the Nonsuch’s strongly through-bolted joint, however.
The external lead keel is bolted on with stainless steel bolts. These pass through floor timbers of unidirectional roving, transferring keel loading from the garboard section to a greater area of the hull.
The cockpit seats and coamings contain a surprisingly large number of sharply-radiused turns. Gelcoat cracks are likely to develop here earlier than anywhere else in the hull.
The freestanding mast requires modification of normal construction methods. While no chainplates are required, substantial bulkheading is required in the area of the mast to absorb the considerable forces generated by the unstayed mast. The forward six feet of the hull is strongly bulkheaded for this purpose, and no sign of undue strain could be detected.
Because there is no rigging to hold the mast in the boat should she capsize, alternative means must be found. This is accomplished by lagging a cast aluminum, hexagonally-shaped female mast step to the hull. The butt of the mast is fitted with a hexagonal male counterpart which is strongly joined to the mast step by stainless steel hex-head set screws. The mast is further connected to the hull by a deck-level pin which passes through the mast and the cast aluminum deck collar. Deck hardware is properly backed for load distribution.
There are a few surprising shortcomings. The aluminum rudder quadrant stops have sharp edges which could easily cut into the exhaust line inside the cockpit lockers. This could happen—it had happened on the boat we sailed—if the upper rudder retaining nut is loose, allowing the rudder to drop down slightly. Gate valves are used on most through hull fittings below the waterline, rather than seacocks or ball valves, and no valves at all are fitted on drains and exhaust lines at the bottom of the transom, despite the fact that they could be submerged in a heavily loaded boat.
Despite these deficiencies, construction is generally to very high standards, well above average for the industry.
Handling Under Sail
The Nonsuch 30 is one of the most boring boats we have ever sailed. Tacking requires no yelling, releasing of sheets, cranking, tailing, or trimming. The helmsman simply says “I think we’ll tack” and gives the wheel a quarter turn, being careful not to upset his Mt. Gay and tonic. Nonsuch quietly slides through about 85 degrees and settles on the other tack with a minimum of fuss. Beating up a narrow channel simply requires repeating the above process.

The person who learns to sail on a Nonsuch 30 will receive a rude awakening when switching to a more athletic boat—which means almost any other 30 foot sailboat. The Nonsuch 30 is simply one of the easiest boats to sail we’ve seen.
This doesn’t mean that it’s necessarily easy to sail well. Getting the most out of the boat upwind definitely requires some practice. The aluminum mast is quite flexible, allowing the top of the mast to fall off as the wind increases. The sail’s draft will shift, changing its efficiency. In about 10 knots of breeze, the top of the mast falls to leeward about a foot. This can be a little disconcerting to those used to a fairly rigid stayed mast.
Sail shape is controlled by the “choker,” a line which controls the fore and aft trim of the wishbone and functions as a clew outhaul. Tensioning the choker pulls the wishbone aft, flattening the sail. The sail is slab reefed pretty much the same as a conventional mainsail.
The Nonsuch mainsail is 540 square feet, with a hoist of 45 feet and a foot of 24 feet. By way of comparison the mainsail of the Irwin 52 is 525 square feet, and that of the Cal 31 210 square feet. The sail does not handle like a sail of 540 square feet, fortunately. The wishbone is rigged with permanent lazy jacks which hold the sail as it is dropped.
Furling merely involves putting ties around the neatly cradled sail for the sake of aesthetics. Dousing the main or reefing is easily accomplished by one person, as all of the sail controls lead back to the cockpit.
The Nonsuch does not suffer from “catboat disease”—the tendency to develop monstrous weather helm as the breeze pipes up. She is, rather, remarkably well mannered, with a surprisingly light helm in the light to moderate winds in which we sailed her. Downwind she held course with the wheel brake off and hands off the wheel. Her performance was almost as good upwind at moderate angles of heel.
She is a stiff boat. The flexible mast allows a substantial amount of air to be spilled from the main as the wind pipes up, removing much heeling force. We found that the boat went better upwind with a reef in the main even at moderate angles of heel once the upper mast began to fall off. Getting sail off the more flexible upper part of the mast allows better draft control as the wind increases.
Having only one sail can be a real nail-chewer to the uncured racer. Whether it blows five knots or 25, the maximum amount of sail you can have is already up. Some unreconstructed racers have equipped the Nonsuch 30 with a blooper for light air downwind performance.
The Nonsuch 30 is no Cape Cod catboat under the water. She has a moderate aspect ratio fin keel, low wetted surface, and a freestanding semi-balanced spade rudder. These characteristics greatly add to her performance.
With all sail controls led back to the cockpit, she is a natural candidate for singlehanding. We strongly recommend the optional self-tailing winches for all functions if shorthanded sailing is contemplated.
The Nonsuch 30 is not the boat for the hard-core grand prix racer. Her entire sail inventory consists of that one big sail, with perhaps, but not necessarily, a single downwind sail. You will not become the bosom buddy of any racing sailmaker by owning a Nonsuch. Then again, no sailmaker will ever have a second mortgage on your boat, either.
Handling Under Power
The Nonsuch 30 was originally equipped with a 23 horsepower Volvo MD 11C diesel with saildrive. This basically eliminated engine installation and alignment problems for the builder, saving both time and money.
These units have an integral cast zinc to protect the vulnerable aluminum lower unit from galvanic corrosion. A special Volvo-supplied zinc is required—not an item that you can pick up in any boatyard. About hull number 125, this installation was changed to a more conventional engine and shaft arrangement, utilizing a new 27 horsepower Westerbeke diesel.
Either engine will drive the boat to hull speed. We greatly prefer the conventional engine installation, which is understood and can be worked on by most boatyards. It is less vulnerable to corrosion, and runs quietly and smoothly.
Because of her high freeboard the Nonsuch 30 will be susceptible to crosswinds when docking. With most of her windage forward she will have a tendency to blow bow downwind. A good hand on the throttle and gearshift will be a real plus in tight docking situations. Without the complication of wind we found her easy to back down into a slip once a sharp burst of throttle was given to activate the folding prop with which our test boat was equipped.
Deck Layout
Because the Nonsuch 30 has no standing rigging, her side decks are devoid of obstacles. Because she has no headsails there are no sheeting angles to be concerned with.
For cruising the optional bowsprit/anchor roller with hawsepipe to the otherwise unusable forepeak is highly desirable. Otherwise, anchor and rode must be stored in one of the cockpit lockers and dragged forward every time you wish to anchor. We also recommend the installation of a bow pulpit. With no shrouds to hold when forward there is a great feeling of vulnerability on the bow. These things may make the Nonsuch 30 un-catboatlike in appearance, but they will greatly add to the safety and convenience of both sailing and anchoring.
The cockpit of the Nonsuch 30 is large and deep. It is not particularly comfortable, and without four inch or thicker cockpit cushions it is impossible for a person of average height to see forward over the cabin. The helmsman’s position is elevated above that of the other seats, but visibility even from that position is only fair.
With the standard white-on-white gelcoat scheme the cockpit of the Nonsuch 30 is sterile and generates a lot of glare on sunny days. The optional contrasting nonskid and teak cockpit grate alleviates part of this problem.
The large cockpit creates other problems. First, you should never raft up with other boats at anchor. A friendly crowd of eight could easily fit in the cockpit.
There are more serious problems associated with the cockpit design. The Nonsuch 30 is promoted as a “new offshore concept.” We think this is an unfortunate choice of words, because the standard cockpit is not suited to offshore use. There is no bridgedeck. The companionway goes almost to the level of the cockpit sole—about three feet below the level of the lowest point in the cockpit coamings. Coupled with the huge cockpit volume, this creates a situation that cannot in any good conscience be called an offshore configuration. If this boat is to be called an offshore sailboat, we think there should be an optional cockpit arrangement—a large bridgedeck which could incorporate life raft storage, two more large cockpit drains, and perhaps a raised cockpit sole to further reduce the cockpit’s volume.

There are three cockpit lockers; deep port and starboard lockers, and a lazarette propane locker set up to hold two ten-pound gas bottles. The large side locker should incorporate some form of easily-removed retainer system to prevent items there from rolling under the cockpit.
On the boat we sailed the drain line from the propane locker overboard was too long. At the low point in the loop water had collected in the hose, which exits through the transom and is underwater in many sailing conditions. This water prevents any propane leakage from draining overboard as designed. The hose should be shortened to remedy a potentially hazardous situation.
When tacking or jibing it is easy for the helmsman to get caught by the mainsheet as the boom comes over. A better lead would be welcome here, perhaps having the mainsheet system incorporated into the stern rail.
The interior volume of the Nonsuch 30 is an eye opener, even to those used to the modern trend toward maximum interior volume on minimum overall length. To anyone used only to the interior space of an older boat, the interior of the Nonsuch 30 is absolutely stunning.
The waterline and beam of the Nonsuch 30 are about the same as that of a modern 36 foot cruiser-racer, and that beam is carried quite a bit further forward. Coupled with high topsides and a highly-crowned deck house, this yields a boat with tremendous interior volume for her overall length.
The interior layout is unusual but practical. There is no forward cabin in the conventional sense. This isn’t a real drawback. The forward cabin on the typical 30 footer is only useful for sleeping or sail stowage, and frequently has berths which narrow so much forward that an all-night game of footsie for the occupants is a necessity rather than a pleasure.
The forwardmost six feet of the boat is given over to two huge hanging lockers and a great deal of storage space which has been created by the three transverse and two fore and aft bulkheads that stiffen the hull in the way of the mast. This storage space is not readily accessible, and will probably end up as the boat’s attic, collecting little-used piles of gear until the day when it must be all removed to get at the mast step to remove the mast.
The rest of the boat is basically one large cabin. What would be considered the main cabin occupies the forward third of the interior. At the forward end are the aforementioned hanging lockers and a bureau. There are shelves and bins outboard of the two long settees that face each other at a comfortable distance across the cabin, with a dropleaf table on centerline. Varnished pine ceiling behind the settees is a welcome note in an otherwise dark teak interior.
The galley is to port midships. The cook is out of the traffic flow yet located in the center of activity if there are people both below and topsides. The galley has a gimballed propane stove with oven, a well-insulated icebox with (hurrah!) an insulated, gasketed lid, and a deep sink nearly on centerline which will easily drain on either tack. The icebox melt water is pumped into the galley sink. For the sake of aesthetics the icebox drain should tee into the sink drain below the sink, relieving the cook of the dubious pleasure of watching the things which dribble to the bottom of the icebox flow through the sink.
The head is opposite the galley. Because of the pronounced deckhouse camber, headroom there decreases rapidly as you move outboard.
An unusual option was a demand propane-fired hot water heater. This compact unit mounts on a head bulkhead, and has electric ignition. When a hot water faucet is turned on the heater fires, and will heat steaming hot water as fast as the water pressure system will deliver it. This is much less complicated than the normal engine water heat exchanger/110 volt powered water heaters found on most boats. Since the boat is already plumbed for propane, installation of this heater is straightforward.
There are quarterberths port and starboard aft of the galley and head. The standard berth starboard is a double, with a single to port. An option provides doubles on both sides, although filling all the berths on the boat requires an open mind and no highlydeveloped sense of privacy.
Despite the open interior of the boat, privacy can be attained through another unusual interior option. A hidden slide-up partition can be installed between the galley and the forward/main cabin, and a bifold louvered teak door which folds up against the head bulkhead. When closed, the door and partition divide the boat into two large compartments for sleeping, with reasonable separation between them.
The occupants of the thus-created forward cabin must enter the aft cabin either to go on deck or to use the head, an inconvenience.
Like the cockpit, the huge interior invites company. In the event of a sudden rainstorm, the eight people who previously occupied your cockpit could easily move below to continue their revelry. If there were already eight below—a not unlikely circumstance—you may be in trouble. Sixteen people is too many belowdecks even in the Nonsuch 30.
Ventilation of the interior is excellent, with seven opening ports, two hatches, and two dorade boxes. The propane heater vents overboard through its own exhaust stack.
Conclusions
The Nonsuch 30 is an unusual boat by any standards. The unstayed wishbone cat rig is becoming increasingly popular. It does greatly reduce the cost of sails, spars, and rigging.
The general appearance of the boat is similar to a traditional catboat, although she will never be taken to be a product of the Crosby yard. Her generally catboatlike hull dimensions produce the maximum hull volume on a minimum overall length.
Despite her billing we do not consider her an offshore cruiser with her standard cockpit arrangement. She will make an excellent coastal cruiser for a couple or family with up to three small children or two older children.
Because she is easy to sail and rig, has a big cockpit and a roomy, well-ventilated interior, she should make a good Caribbean charter boat for two couples, although head access is a minor problem from the forward cabin. Surprisingly, none have entered the southern charter business.
The Nonsuch 30 is not a traditionalist’s catboat. She lacks the sweeping sheer, low freeboard, gaff rig, and barndoor rudder of the Cape Cod catboat. She also lacks that boat’s infamous sailing characteristics—ferocious weather helm, inability to go to windward, and a man-killing mainsail.
She is a relatively simple, easily sailed boat for the convivial sailor who doesn’t mind being seen in what many might consider an oddball boat with an oddball interior and an oddball rig, The more you look at it, the less oddball it seems.
RELATED ARTICLES MORE FROM AUTHOR
Hi, Hope you are safe and well. We Provide Estimation – Quantities and materials takeoff for all kinds of constructions, Excavation, Foundation, Interior and exterior renovation, roofing projects etc. You can email us the plans in PDF or via Google Drive, Drop box link or any other link where from we can download them. Thanks
LEAVE A REPLY Cancel reply
Log in to leave a comment
Latest Videos

The Performance Sailboat from Island Packet: Blue Jacket 40 Boat Review

Top 3 Winter Boat HACKS!

Cabo Rico 34 Boat Review

Super Shallow Draft Sailboat: The Leeboard Sharpie
Latest sailboat review.

- Privacy Policy
- Do Not Sell My Personal Information
- Online Account Activation
- Privacy Manager
COMMENTS
Nov 19, 2008. 2,129. Catalina C-22 MK-II Parrish, FL. Mar 30, 2015. #2. Milton, Years ago on my 1980 C-22, the teak cockpit coamings were in pretty bad condition. I saturated them with WEST epoxy, sanded them smooth, I might have repeated the saturation again, (been a long time), then sanded them smooth and applied several coats of a good spar ...
Here's my plan; Clean up the blocks in my shop. Drill and scew the blocks and coamings back together with epoxy. Once dry, sand and shape the forward edge of the coaming-filler block while it is away from the cabin (about 1/2", that will make it easier).
Working the winches: All too often, winch location is an afterthought, and fine hardware is stuck on side coamings shaped more as a roof for the aft cabin than as a key component of sail trim. We always like to check sheet leads angles that lead lines to a particular winch and then mimic what cranking with a two-handed winch handle would be like.
When I rebuilt the Far Reach in 2009-2015 I installed new African Mahogany coamings. I bedded them with 3M 4000. I used teak colored polysulfide to bed the wood winch pads. This past season in the Caribbean water began to get under the coamings where the 4000UV failed. 3M 4000UV failure has been widely reported in the marine industry. 3M has ...
We thought we would take a break from inside the boat so we have more time to plan out our internal layouts. This week we focused on removing the original bo...
The new coamings need to be sufficiently rigid. Matt therefore uses a sandwich with a core of coosa board, a reinforced foam he has already used in this restoration . The main winch, partially recessed in the coaming, is bolted directly to the deck through an angled wedge to align with the blockers.
One thing that has always bothered my about my boat (an Oday 23) is the tangle of lines I get in the cockpit while sailing. The jib sheets, roller furling line and centerboard pendant line can make a mess in the cockpit while underway. ... I've always thought that a couple of storage boxes tucked into the coamings would nicely take care of the ...
The coamings are essentially done now. I will use the router to round the profile once I've decided how to install the rowing hardware. ... SCAMP envy/Lust This is a thread in the Wooden Boat Forum. DEWALT DW3742C 14-Piece T-Shank Jig Saw Blade Set with Case. System Three 3145S16 White Glass Microspheres, 1 quart Tub. O'Keeffe's Working Hands ...
The cockpit coamings go on, along with the transom cap, and some doublers. This time we add the last few things to the hull of the boat before turn over time. The cockpit coamings go on, along ...
Baier™ coamings are available in various heights for any of our three lines of raised marine hatches. Coamings are available for both our lift-out and hinged model hatches. All comings are fabricated from mild steel, welded to a steel deck ring, primed and painted. COAMING HEIGHTS. Standard height coamings are: 6" 12" 18" 24".
Small sailboats don't offer a lot of seating options in the cockpit. Four adults are about the maximum that will leave room for the skipper to work the helm. For casual cruising, that means everyone is in the cockpit, not hiking out on the coamings or side decks. Most sailboats will accommodate six in the cockpit while…
Also - the original EC winch was held in place with five screws through the coamings into the side of the winch block and there is also a large bronze bolt that runs right down through the winch, base and deck with a 3/4 backing block under the deck. This is all accessible through the cockpit seat access hatches.
In part 2 of installing the coaming of The Art of Boat Building (S2-E46) Bob Emser boat builder demonstrates the fairing of the coaming and its installation ...
14. Practical Sailor tester Mike Collins guides the Cape Dory 30 "Skimmer" in the ship's channel on Tampa Bay. (Photo courtesy of Mike Collins) When the Cape Dory 30 entered production in 1976, it was the largest boat in the expanding line of the Taunton, Massachusetts boatbuilder. In 1986, when production ceased, over 350 Cape Dory 30s had ...
Coaming is any vertical surface on a ship designed to deflect or prevent entry of water. It usually consists of a raised section of deck plating around an opening, such as a cargo hatch. Coamings also provide a frame onto which to fit a hatch cover. The protective metal sheeting or plating protecting against water entry into ventilation shafts ...
Re: Cockpit coamings for small boats. I like the way the coamings were set up on the older Lightnings. In the front they form a v with the mast stepped just inside the apex and the legs of the v sweep past the side coamings. These side coamings go past the cockpit opening by 6" or so. There are pics on the Lightning Class page, search 'wooden'.
Bob is scarfing together three pieces of the walnut to use as the coamings, and he explains his process beautifully in this video. Using High Performance epoxy thickened with wood dust from his walnut pieces, and a technique we recognize from Lou Sauzedde of steaming the planks in place with a home-built steaming bag, Bob gets the coamings dry ...
Coaming. A vertical ridge or barrier, of wood, steel, fibreglass, etc., whose purpose is to keep water out. A cockpit usually has a coaming down each side, and perhaps all round. A deck hatch has one all round. Some hatches have a double coaming so that any water which gets past the outer one is channelled between the two and escapes through ...
Bottom Line: At $33 per quart, its the most expensive test product by far, and that keeps it out of the winners circle thus far. MDR Amazons Golden Oil. Made by Marine Development and Research, Amazons Golden Teak Oil is a sealer and a wood finish. Like the Bio Impression, it is biodegradable and non-flammable.
Stay in the loop! Never miss sale announcements, how-to blogs, new product launches, helpful tutorials and more! Coaming pads or coaming bolsters are long, cushioned pads that are found around the perimeter of the boat and offer a soft, cushioned surface to lean against or use as a backrest.
The boats coamings gleamed with nine layers of varnish. The boat, I remember well. It was the first time I got a really close look at an Alberg 30. She was, in many ways, the sort of sailboat an elementary school artist might render, if you asked him to draw a sailboat. Deceptively simple. Elegant and well-balanced.
The biggest single complaint about the interior of the Endeavour 32 is the lack of a navigation station or chart table. When this boat was designed, navigators of even 40-footers frequently had to work on the cabin table or icebox lid. Today, almost every boat over 30′ has some sort of nav station—a must in the days of electronic gizmos.
The Nonsuch 30 is an unusual boat by any standards. The unstayed wishbone cat rig is becoming increasingly popular. It does greatly reduce the cost of sails, spars, and rigging. The general appearance of the boat is similar to a traditional catboat, although she will never be taken to be a product of the Crosby yard.